Autumn
by
Masashi Ito (a.k.a. Qunai)
An Unsolicited Walkthrough.
Screenshots (and directions to
tricky maneuver) care of Kristina and Chris (a.k.a.
Repley). Thanks!
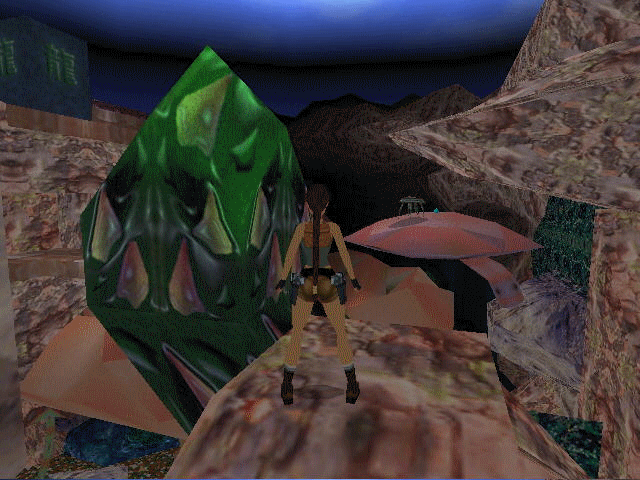
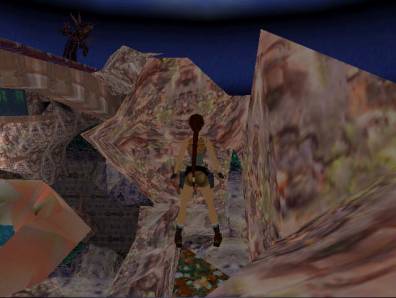
Fall to
the water and swim out.
Ground. Explore a reachable slope (one by the running
water) to get a box of shotgun ammos
on the drop side.
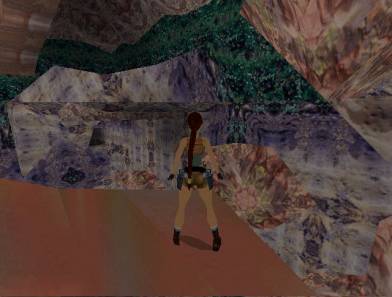
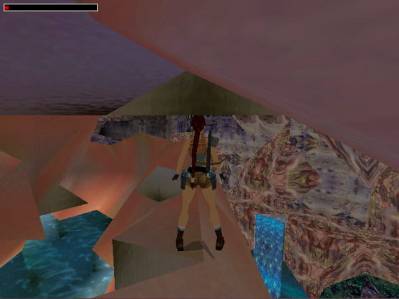
Look for a high green slope by the western wall
to get another set of shotgun ammos in
an alcove. This routine (1) is
tricky.
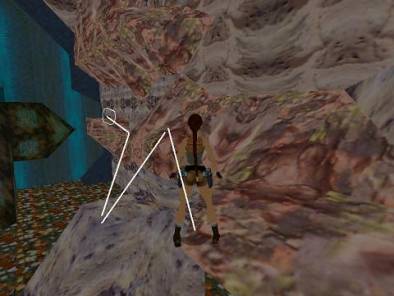
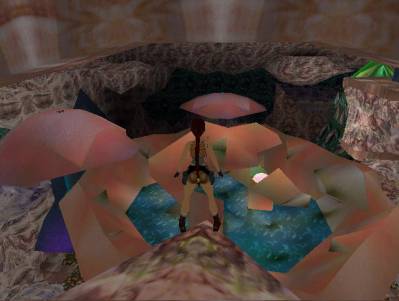
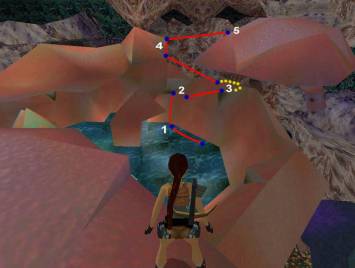
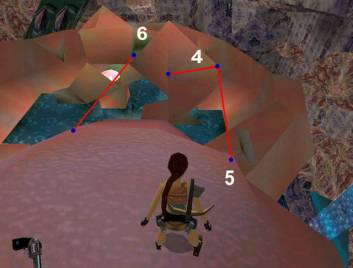
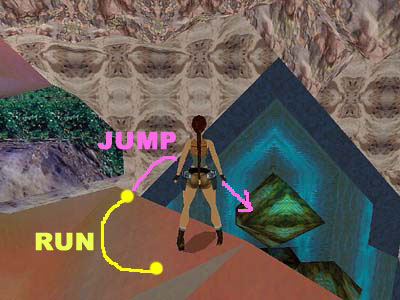
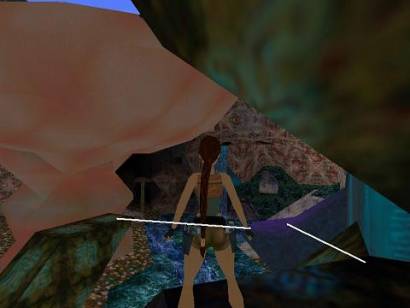
See illustration:
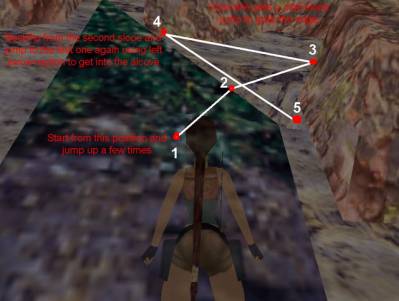
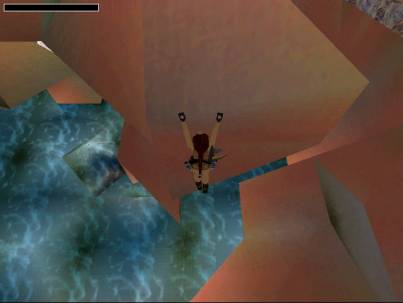
From point 1 (position is important), use a bug
(jump eight times) and Lara lands on point 2. Immediately jump curve left, time
(difficult) a grab, and hang by point 3.
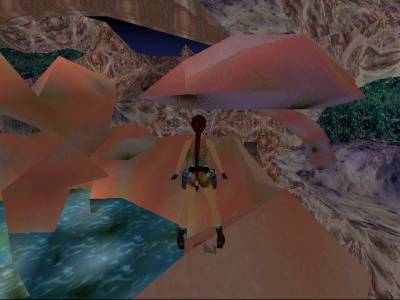
Shimmy left past the middle. From here, back flip to point 4, jump curve
hard left to land inside the alcove at point 5 (again difficult as it may take
a few back and forth flipping and grabbing to get this right plus the overhang
just above tends to change her direction). Take
the shotgun shells. Then a running jump to an
overhang on the right for a big mushroom medi (1).
If you can’t do this, as a last resort,
use the savegames below.
Save Game 1 (the 8th jump)
Save Game 2 (hanging at 3)
Save Game 3 (inside the alcove)
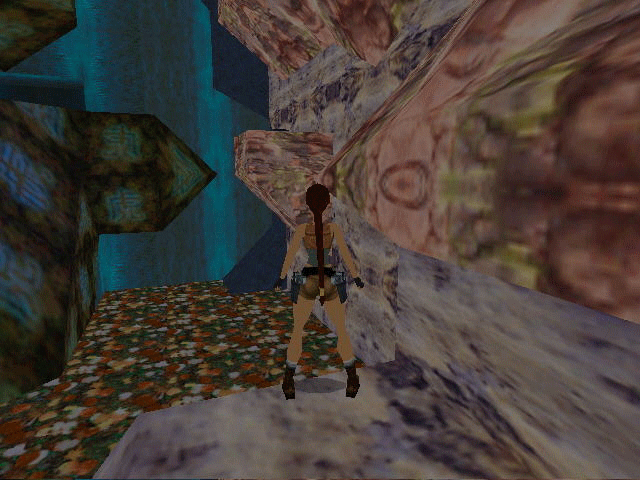
Now back to the ground.
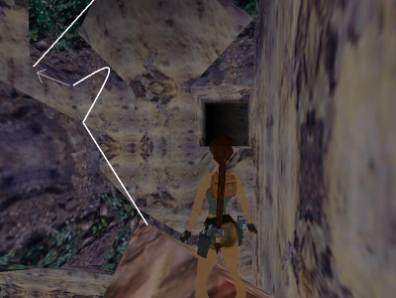
Observe these three (3) openings (not much you can do here for now):
1.
1.
One (1), a northern entrance with green toxic
liquid. You may monkey swing or jump grab to the other side within. This will
be one possible route later for the timed run. On your first pass, a flying bug
comes out from here to attack;
2.
2.
Two (2), a western entrance that leads to both
---
1.
1.
If you drop down and crawl back, the toxic
entrance with deadly mushroom and a closed timed door (1) on the left,
and a slide down waterfall on the right to the outside (an alternate route for
the timed run);
2.
2.
If you follow the passage, a long ascending
hallway with a closed door at the top (actually 2 but one is not visible yet). Once
opened, this will be the route to get back and forth from the ground to the
gigantic mushroom;
3.
3. Three (3), an eastern entrance with a fence at the
bottom and a closed door at the opposite top. Once opened, a back flip here is
the route to the high wall switch by the waterfall outside.
Ground to Gigantic
Mushroom. Back up from the northern
toxic entrance 1 (you’d
probably have to do this while shooting at the flying bug that attacks you from
this opening) and see some slopes along the western wall to your left. Jump up
to the reachable slope, running jump to the higher overhang, and then side flip
to the right with jump from the slope (don’t grab) to
land on the next higher overhang. Simple jump grab (or a running jump) on the
next, go to the alcove to the right and reach the walkway above with a back
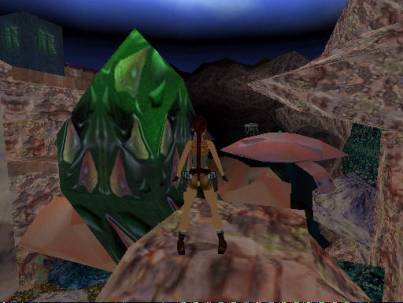
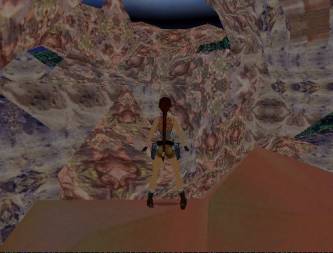
flip from the slope and a quick grab. Now if you go out to the flat square overlooking
the central area, you’d see the top of the Z-shaped
obelisk (multicolored but predominantly green structures) and the outer rim of
the orange gigantic mushroom. You also see a couple of pink tree-looking giant
mushrooms (see picture below). From here, align a DIFFICULT
JUMP (1) to a flat triangular spot on the rim of the gigantic
mushroom.
It may take more than the usual number of
frustrating tries (or forever!), but you’d land on the slope (outer rim) beside the flat surface and be able
to pull up on it if done right (see second picture below). Here’s how I did it:
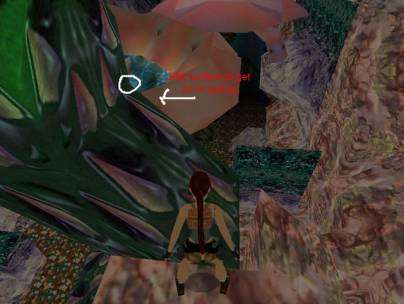
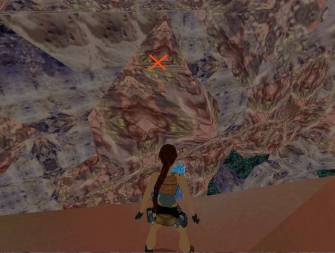
Line up Lara on the leftmost edge of the
square, use look (as in the first picture above) to align her along the corner
of the obelisk (see the white circle). From this angle, back her up for a
running jump. A simple jump won’t
be enough to clear the obelisk (or if you press the ctrl action key too soon,
she’d tend to slide or bounce off it). A more
consistent action is to keep holding the run (forward arrow) even after the
jump. That way, she’d skid off the corner (she may
overshoot the obelisk too and that’s no good either). After
the momentary hop (off the obelisk), she’d momentarily
land down on a slope beside the flat triangular spot. This will only be for a
millisecond (before she falls down). The timing of the ctrl-action key (to pull
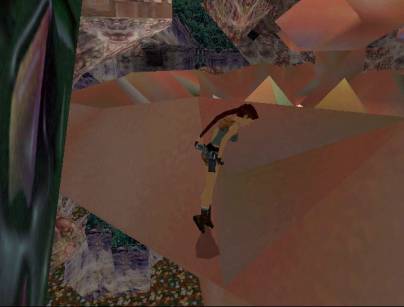
up on the spot) is crucial at this moment. If the timing is precise, you’d be surprised to see her pull up on the spot (see 2nd
picture above). Not easy, mind
you! Watch the animation below:
You may resort to the savegames below if all
else fails:
Save Game 4 (Initial position)
Save Game 5 (after the jump)
On the rim, observe: sparsely scattered around
the gigantic mushroom’s rim
are some more triangular spots to jump off to. Every spot is accessible and
offers an option for acrobatics to reach other places and items.
The Rim of the Gigantic
Mushroom. Jump off to another spot on your left to reach another
set of walkway. Pull up to the walkway above, go around, and get the small asparagus health (1) in front of the door
as it opens. Avoid the skeleton first as you don’t have the crossbow with explosives yet. Another door to the left
opens within. These are the two doors at the top of western opening no. 2. So
go back to the gigantic mushroom’s rim (just crawl back
from the walkway and drop down onto the spots) and to the first spot where you
first landed on the rim.
From this first spot, there are many tasks you
may do at a time.
4.
4.
Health.
Jump off (with action to shorten the distance) slightly to the right of a green
slope below. You’d land
at a small asparagus health (2) with half health damage. Back to the ground and
follow the western opening 2 to go back to the first spot (avoiding the
skeleton).
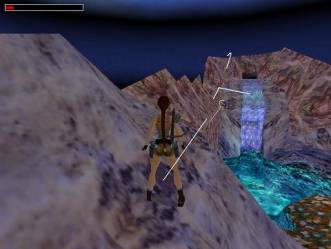
5.
5. Laser Sight. This time, jump on the left side of the green slope
below. Slide a little way, grab and hang at the end of the slide. Shimmy left
to land on the left side of the slope below. Slide a little. Turn around. Walk
around the edge until you get to this area (see picture below):
Now after sliding to the white block, try this maneuver:
Just target the tip of the overhang in your initial position, lengthen the
simple jump (keep the forward key pressed),
a slight mid-air angle correction to the right, and
she'll grab the ledge perfectly. Pull up and get the laser sight.
Back to the gigantic mushroom above, you may now
drop in the water. You may get the King Mushroom
(30p) (Secret 1) after a long swim down to the lower reaches
in the center of the gigantic mushroom (with plenty of health to waste! Is
there an aqua lung somewhere?). Or you may postpone this for later, that is,
till you collected all the asparagus and mushroom health packs available in the
outdoor.
To get out of the water and onto the rim again,
do a running jump (forward and right arrow keys together) on to a northeast
reachable triangle on the inner rim of the gigantic mushroom. See picture
below.
Then from here you may do any of these:
6.
6.
Monkey Swing, Health, and
Revolver Ammo. Take a
few steps forward (two flat spots really to the left), face the northwest
overhangs
Align a running jump on the higher overhang (slope
really), slide a little way, then jump grab the monkey swing above. Swing to
the opening. There’s a small
asparagus medi (3) and a deadly (if
you fall thru the) ground hole at the end of the passage. Go back outside. Drop
onto the overhangs below. Jump off to a couple to get into the opening. There’s a box of revolver ammos
inside the dark alcove. Out to the first overhang, turn around, and face the
violet slope to your left (see pic below).
Align a tricky running jump routine (2) on a part of the slope (at the back). Jump
immediately off it curving hard left (and aided by another overhang by bumping
it a bit), then grab another slope to the left. Hang, shimmy left, pull up,
then back flip twice --- first on the slide, then the overhang, and finally
land on the ledge above perfectly. Pick up the big
mushroom medi (2). Savegames below if you can’t do this:
Save Game 9 (initial position)
Save Game 10 (hanging by the slope)
Save Game 11 (above the ledge)
7. 7. Upper reaches (may not be legitimate). Face a flat triangle from afar at the north
wall.
If you successfully reach it (or as the author said, with a
bug-technique or cheat), you
may climb the ledges in the area to find a small
asparagus medi. The long rectangular opening there will only bring you
back to the area after the first monkey swing (with a deadly hole). So don’t bother to drop down anymore. There’s a straightforward way to get to the upper reaches (Dragon and
Crate above): hang on to an incline and back flip to an overhang behind. Turn
around to face another overhang afar. A running jump (Lara will partially step
on what seems to be an invisible tile here)
to grab
and hang on to that overhang. Pull up and go around the corner. You’ll have a spectacular view of
everything below from here:
Now
turn around to face a double incline behind you. Target a simple double-jump on
the left half side to reach the highest surface. You may now cross the walkway
to get to the dragon or drop to the crate. There’s not much here though. If you get unlucky, the dragon will even
spew balls of fires and some scarab-looking locusts will attack too. The
mushroom med behind the dragon is just a trap. It’s on
a death flame tile so forget it. At any rate, this upper reaches is not
supposed to be reachable because the initial jump to the triangle seems
impossible. But why do I have the screenshots to this area? Go figure J
8.
8. Revolver and Big Mushroom Health. Reach the second giant
mushroom with a revolver
on top.
After
getting out of the water (point 1 to 2), go to a triangular spot (point 3)
underneath the second giant mushroom with a revolver. Follow the pictures above
to get the revolver first --- align a hard left running jump from triangle
plate 3
to grab
the leftmost edge of point 4. That was a DIFFICULT
JUMP (2)
shimmy
right, and then back flip to point 5 on top of the mushroom. On top, get the revolver, do a running jump off to an almost
central structure to get a big mushroom health (3) at point 6. Fall to the water. Make your way back to
the triangle spot underneath the giant mushroom at point 3. There’s a way to slide down to the stem. The
savegames below are for the only difficult jump (point 3 to 4) in this routine.
The rest is easy.
Save Game 12 (initial position)
Save Game 13 (on the fly, catch point 4)
Save Game 14 (on top of the mushroom)
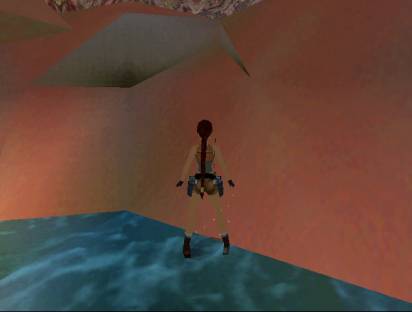
Timed Doors Hang Switch. From point 3, slide down to the violet stem
behind the giant mushroom. Walk around the edge to reach an opening. That
passageway will open a door at the end --- this is the door at the opposite top
of the fence at eastern opening no. 3. Don’t drop to the ground anymore. Just go back outside (where you came
from) to jump at a slope just above and on the same side as the waterfall
switch. Slide and hang. Drop to a crack just below. Shimmy left to the switch
by the waterfall. Drop and grab the switch. This switch will open 4 timed doors
simultaneously. You only have 30 seconds each time you pull it!
Timed Doors (1st Pass). Pass thru the northern toxic entrance
no. 1. Try to jump over the poisonous toxic water and grab and pull up on the
other side, that is, without climbing the ladder any more lest you lose some
valuable seconds. Head right, sprint thru the deadly mushroom (loss of
health!), and hard left to the timed rooms. Heads up note: you can
sprint jump (spring) thru the waterfall up ahead after the fall from the
switch. Behind it is a straight opening to the timed doors. This technique is a
secret. But Lara can only begin to run and sprint at the shallow (knee-high)
portion of the pond. Even so, the alignment of the sprint and timing of the
jump need calculated precision and timing. Not easy too! If you make it thru
the waterfall, you’d chop
off several seconds of the toxic route and you won’t
pass the deadly mushroom which diminishes her health.
The main timed door (1) is the one on
the left of the deadly mushroom awhile back (see above). Instead of passing
thru either the timed doors (2 and 3 on the sides), just beat timed door (1)
initially. Fires are out once the time is up. Running jump grab onto either
platform (losing some health but not burning). Push that central block on the
opposite side to reveal an inner water chamber (for dousing off your burning
Lara just in case). Grab the crawlspace
opening on the left side. Pull up, pick up the crossbow,
and crawl out into the drop fall where you first started this game.
Save Game 1 (at the toxic entrance, pull up and run right
to the door)
UFO and Blue Egg. Now back to the first spot on the rim of the
gigantic mushroom. From here, look at the first giant mushroom where there’s a UFO guarding an egg on top (you
may shoot the UFO from here actually). A precise running jump without grab will
land you perfectly on the mushroom. The egg will disintegrate as you approach
it and some insects (locusts) attack. So better not come near it. Shoot the UFO
(till it turns belly up and floats away) or it’ll hound
you endlessly with its claws.
Drop to the next two spots around the rim.
Crawlspace Opening. You may, from this spot between the two giant
mushrooms, try a DIFFICULT
JUMP (3) off to slide on the green overhang slope above a crawlspace
(see picture below).
The idea is to use as much run-up on that small
surface by making a curve run. So turn around (her back is almost facing the
target) like in the picture below:
Hard right running jump and she’ll slightly hit the tip of the
overhang on landing. She’ll slide a little, then
immediately grab and hang, shimmy left, pull up, and feign grab (use action
when releasing but not too soon for her to grab again) to land perfectly by the
crawlspace opening below. This will enable you to bypass the timed door (3) later.
Crawl thru the opening and see section on exploration of the timed door (3)
passage below. Savegames below if you can’t do this:
Save Game 6 (initial position)
Save Game 7 (hanging on the slope)
Save Game 8 (by the crawlspace)
If you decide not to do the difficult jump to
the crawlspace opening (above section), you may still explore the passage
within thru the timed run. The timed door (3) is on the right ledge of
the timed rooms. But this pass will cost you medpacks. Immediately within is
another timed door (4) to your left. If you’ve explored the passage here already
via the tricky jump down to the crawlspace (see routine above), then beat this
second door (of the double-door), and read section on timed door (4). Otherwise,
explore the dark passage. Turn the switch on to raise the transparent block
along the fire passage below. You need this to get across later. At the other
side is just a slide down exit from a room in the timed door (4) later. Explore
further the passage. Kill a couple of tigers. Get some explosive crossbow ammos in a room behind the waterfall.
Work your way up to a stationary mushroom in a concealed corner above ---
running jump (from the highest ledge near the crawlspace) on to an overhang,
and then another running jump (bumping her head a bit on the ceiling) down to
the top of the blue wall. Blast it with the
explosive crossbow or revolver with laser sight. A skeleton appears instead. Blast
it too and pick up the big mushroom medi (4) it will leave. Climb
the steps on either side and look for a crawlspace. Note that there’s also a way from the gigantic mushroom’s
rim above to land outside this crawlspace. This way, you’ll bypass the difficulty of this timed door (3) and be able to
conserve health by doing away with this pass. From this crawlspace opening, you
may also go for the shotgun. The idea is like in the picture
below:
Follow the series of pictures below:

From the initial position, curve left running
jump to the direction of the violet ledge. Delay the grab. She'd either grab or
land on it. You can now easily reach the mini obelisk with the shotgun from this violet ledge.
Now back to the ground. Look for the skeleton
(which appeared by the walkway above when you first picked up an asparagus
health and opened a door). Blast it with the explosive crossbow and pick up the
big mushroom medi (5) it will also leave. Go up to the timed switch again
via eastern opening 3.
After main timed door (1), without let up, a
running jump/grab onto either left or right ledge will unavoidably burn Lara. Replenish
her health with the medpacks while going thru the routine. Needless to say,
this requires coordinated actions.
Timed Doors (2nd Pass). This time, beat a very tightly timed door
(4) on the right ledge double door.
If you finally make it, crawl a little way and you'll be within this
room with 2 big health mushrooms (6/7)
on both sides of the floor, and the Queen Mushroom
(30p) on the pedestal (Secret 2). Slide out to the fire
passage. Aha! Now you see why you had to switch the transparent block, so you
can cross! If the switch isn't flicked
and the block isn't on the fire passage, you just have to run through the
flames like hell to get to the water by the timed doors (3 and 4) to douse off
a burning Lara! Exit to the outdoor via
the crawlspace. Go back to the timed switch for the last time.
Save Game 4 (after the sprint jump from the shallow pond,
run to beat timed door 4)
Timed Doors (3rd Pass). The one on the left ledge is the second timed door
(2). This will take the most burning damage to Lara (you may douse her off
at the central water chamber you opened with the pushing block but I find that
too damaging and time consuming). The best way is not to go directly for
the left ledge but on the right ledge instead to head to timed door (3) for a
cool off, then a straight running jump (stepping on the middle platform) back
to timed door (2). You may have to
feign grab on your last jump for her to land perfectly within (and not bump her
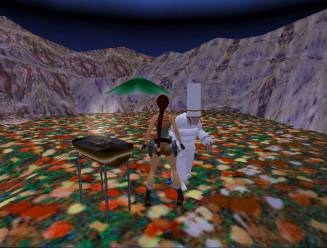
head). This is the exit from the game. A long slide will bring you to a
barbeque party with a Japanese Jeeves :) If you haven’t done it yet, douse your burning
Lara in the water after the long slide (if your meds can hold). There’s a trigger once you hit the water (or along the slide?) --- If you
don’t reach the picnic table soon enough, game ends and
you’re thrown back to the load menu. If you make it
(see 1st picture below), then the flyby just continues and you get a chance to
look for (Secret 3) – just another small asparagus medi (4) by
the rocks behind the waterfall (see 2nd picture below).
Then the game really ends. Congratulations!
Save Game 2 (after the sprint jump from the shallow pond,
run to beat timed door 2)
If you combine the King and Queen mushrooms,
you’d have the Happy Mushroom (90 points)! You may now order
pizza (the works) with all toppings and everything on it. Yea, including
mushrooms J Happy Raiding!
Pick Ups:
9. 9. (3) Secrets (King + Queen Mushrooms = Happy
Mushroom)
10.
10. Revolver, Laser Sight, Shotgun, Crossbow, and ammos
11.
11. (4) Medi Asparagus (small health)
12. 12. (7) Medi Mushrooms (big health)
Enemies:
13. 13. Little
walking/biting mushrooms (ground)
14. 14. Flying
giant mosquitoes (toxic entrance and water area of gigantic mushroom)
15. 15. Skeletons
(walkway above and timed door (3) passage)
16. 16. Tigers (timed
door (3) passage)
17. 17. UFO
(first giant mushroom)
18. 18. Locusts
(first giant mushroom and bridge in the upper reaches)
19. 19. Dragon
(upper reaches)
20.
20. AND THE
DIFFICULT MOVES AND ROUTINE (That’ll kill Lara more than anything else J