Underworld Unfinished Business ~ 4
Taking Care of Business
By Richard Lawther
With
Titak, Trix & Bojrkraider
Authorized walkthrough written by Jenni and Moonpooka for trle.net
Many thanks to Lindén for his invaluable help with the web page.
(24-11-2022) Walk edited by Dutchy because of several minor
discrepancies
and missing links.
First Things First
Demon Smalls has gone to great lengths to provide you with important
information and instructions to help you with your quest. Please read the
documents he has supplied with the level download. You can also use the two
maps (Map
1 & Map2)
provided in the game folder to mark your progress.
Storm
Following the demise of The Lizard King, the three remaining Dark Souls,
Belial, Madam Orr and Legion, are holed up in their stronghold at the base
of Hell. Only Lucifer himself lies below them.
It is believed that this unholy trinity plan to join forces and storm
Lucifer’s realm, topple Lucifer and place Madam Orr on his throne. Of
course, all of this is conjecture. No one actually knows what’s down in
Lucifer’s realm, or even if Lucifer exists anymore. However, Team Anubis
firmly believes it is better to keep the Devil you know; and so these Dark
Souls must be stopped.
Colour Coding
Weapons, Ammo and Health
Puzzle Items
Secrets ~ 11
:Quick Jump To:
:Level
Four ~ The Realm Of The Lost:
:Level
Five ~ The Asylum Revisited:
:Level
Six ~ The Swamp Revisited:
:Level
Seven ~ The Asylum Revisited ~2:
:Level
Eight ~ The Realm Of The Lost ~ Revisited:
:Level
Ten ~ The Lost Realm Revisited ~ 2:
:Level 12 ~ Dark
Souls' Stronghold:
Level One ~ The Descent
Two Secrets
Conversation as Lara and Demon Smalls slide into their first location:
Demon Smalls: "Thank the Lord... Made it!"
Demon Smalls tumbles ahead of Lara, and falls to the ground breathless.
Lara: "What I have to work with."
Lara and Demon Smalls head towards the edge of the canyon, and look
down.
Demon Smalls: "Oh my God!"
Lara: "It's a long way down."
Demon Smalls: "Hmm! I'm wasting my time here."
Demon Smalls dons a parachute and jumps.
Lara: "Hey! Where's my parachute?"
Demon Smalls: "Elvis has left the building!"
Demon Smalls floats to ground, leaving Lara alone at the top of the
canyon.
The Canyon
At Lara's feet you will find The
Shotgun ~ 1 x Shotgun Shells ~ 1 x Magic Elixir ~ Flares Grab
the goodies, and then take four steps to the right from where Lara is
standing. Roll and grab the edge of the canyon, and then drop and grab a
shimmy crack below Lara. Shimmy left to the end of the wall, and continue on
round to the left until Lara can pull up onto a ledge above her. Roll and
drop back, grabbing the edge of the ledge, and then shimmy left and along to
the end of the west wall. There's a slope below Lara; drop onto it, but
immediately jump forwards and hit action to grab an upper
fenced off ledge. Pull up and you
will see a wall lever to you left. Use the wall lever and you will raise a
hatch below this lever ledge. Drop down from the wall lever ledge, and Lara
will arrive on the newly raised hatch. Face north, and hop over to the next
hatch, and stand in front of the blue rectangular object on the rock; this
strange object is a jump switch, and you need to jump and press action for
Lara to use it; but take care as you do so because activating the jump
switch will cause the hatch Lara is standing on to collapse, and she will
slide on a slope to instant death, so as soon as you activate the jump
switch and hit the slope below, back flip with a turn, and hit action to
grab the upper ledge behind, and then pull up to safety. Using the jump
switch has opened the north railings on the lever ledge, and that’s where we
are heading to now. Face Lara with her back to the south slope, and then
back flip onto the slope and spring forwards with action to grab the upper
wall lever ledge. You can now see the north railings are open, giving you
access to a new route. Re-use the wall lever to raise another hatch to the
north, do a run jump/grab to the new hatch. Ahead of Lara now is a rock with
a slope on the other side of it. Take two steps forward on the hatch, and
then jump over the rock and land on the descending slope. Slide just a bit,
jump from the slope and hit action to grab the monkey swing just beyond and
above the slope, and then swing to the end where you see a rope hanging
down. Line up with the rope, drop Lara and hit action to grab the rope. Now
turn round to face the hatch to the north, and swing to it. Pull up onto the
hatch and face west. Side flip to the right so that Lara lands on the ‘face
tiled’ slope, and then slide and grab the edge of the slope. As you landed
on the slope you will have heard another hatch rise; the hatch is around the
corner to the right. Shimmy around the wall to the right, and keep going
until you can pull up onto the newly risen hatch. Face west and you will see
a crawl space in the wall ahead. Take a running jump to it, but don’t crawl
inside until the flame is low. When it’s safe you can head through, but be
ready to grab your guns on the other side because a little Red Demon is on
his way; and don’t be fooled by the childlike chuckles, he’s a mean little
blighter and our motto is ‘cute but shoot’.
The Caves
You are now entering a cave system comprising of four caves and a lower
room, and the third cave will have to be opened as a gate blocks your path,
but we'll come to that later. Enter the first cave, it's very small so you
can just nip through to the south and drop down into the lower second cave.
This second cave is much bigger, and the sound of restless moths can be
heard buzzing through the darkness, giving a somewhat unnerving feeling; but
don’t worry, they won’t make an appearance………… yet!
Taking care to avoid the falling stalactites, walk south as far as you can
and stop by the deep dark pit in the centre of the cave. Face SE towards the
small fiery cave in the east wall, and take a running jump towards the left
side of it; you should land on a rock just outside the small fiery cave.
Face south and take another running jump to the far south rocks ahead, and
from here take another running jump to the final south rocks. Face west, and
pick off the Red Demon lurking on the west rocks, and then walk out onto the
pointed west edge of the rock. Take a straight running jump up over to the
rock just right of where the Red Demon was (the grey one), and you are now
safely over the dark central pit. You can now hear the chuckling sounds of
more naughty Red Demons, and they’re just over the top of the south rocks
down in a pit. Make your way up the south rocks until you can see the Red
Demons in the lower pit, and shoot the little devils from safety before
sliding down to their playground.
Head through the pit westwards and you will come to a rocky barrier; it’s a simple jump over and you will now be in a lower area of the cave with deadly lava pool to the north, and a closed gate beyond it. Make your way to the edge of the lava pool, and then facing east, jump to the small triangular rock on the shore of the lava pool. Still facing east, jump up the sloped rock ahead; keeping right so that Lara doesn’t slide down into the lava pool, and then line up facing the higher rock to the north. Walk to the north point of the triangular part of the rock, and then take a standing jump to the upper north rocks. Now take a final jump down into the low north end of the cave where the closed gates are. The route around the lava pool; screenshot
To the east you will find a hole in the ground. Drop down the hole and Lara
will arrive in a small room below ground with a central pole and revolving
blades circulating the pole. Crawl through the gap, and use the central hole
to shimmy to the south alcove for a Manna From Heaven and
then face the central pole and top up with health. Jump to the pole and
slide quickly to ground; you will lose some health on the way down, but be
quick and the loss will hardly be noticed. In the NW corner you will find a Magic
Elixir. Use
it to top up with health for your journey back up the pole in a short while.
Approach the wall lever in the south alcove and a moth will attack, gun it
down and then use the wall lever to open the gates back up in the cave. Now
it’s time to head back up the pole and it’s slightly easier going up than it
was coming down because you will be avoiding the lower blade. Go to the NW
corner and pull up onto the hatch. Face south and jump over to the higher
hatch, and then line up NE towards the pole. Jump to the pole and quickly
climb out of the hole; the top blade will just catch Lara, but health loss
will be minimal if you are quick. At the top of the pole, back flip to the
upper alcove, and then crawl back to the north alcove. Climb the short
ladder back to the cave, and see to your right the newly opened north gate
and go through to the third cave.
The gate will slam shut as you enter this small cave, and there is a hole
ahead with strange plant life inside; this marks a spike trap, so take care
and make your way left of the trap to pick up some Flares at
the edge of the ledge. Ahead lays a death slope, and over to the NE you can
see a new route. Line up where the rocks make a V shape, and take a running
jump over to land inside the V of the rocks. Now jump into the area to your
left, and then jump NE so that you land on the small slope by the pink
tinted doorway, and can slide safely past another spike trap.
Lava Pool And Raising Blocks
Note: In this room there is a gap in the east wall with a fire emitter
behind it. Some players were able to get Lara through that gap and land her
on a hatch outside, but this is NOT the legal way and making this jump will
only spoil the game play, so please do not take this route.
Lara is now standing at the top of a long slope which leads down cave four,
sporting a deadly lava pool with raising and lowering blocks sitting in it.
Turn Lara’s back to the slope, slide down and catch the end of the slope.
You will see a jump switch below Lara. Drop and grab the jump switch, and
use it to raise a block behind you, and then as you drop, back flip to the
newly risen block. Turn and pull up onto the block, and then jump into the
east wall alcove for the 1st Secret
~ Magic Elixir ~ Revolver Ammo Return
to the block, and line up with the slope to the SE. You can see a monkey
swing above the slope, blocks in the lava pool are raising and lowering, and
a Red Demon is dancing about on a block with a lever. Firstly, there are two
ways to tackle the next task, and you need to grab another secret in
this cave, but it is possible to get the secret and complete the room
whichever route you take.
Route One:
Line up with the slope, and take a running jump to it. Slide and jump to
grab the monkey swing above the slope, and make your way to the end of it;
where you see a block raising and lowering below you. Turn and face the
lever block with the Red Demon in it, and line up with Lara’s back pressed
against the north wall. When the block is about to rise, drop Lara onto it
and take a running jump to grab the lever block, then pull up and kill the
Red Demon. Use the lever, and a rope will appear to the NE, but don’t jump
to it yet if you want to grab the second secret. Standing on the lever
block, face the railings to the east and see to the left of them you can
just squeeze Lara around the railings. Take a running jump with a right
curve, and Lara will land on the small rocky island behind the railings, and
will be standing next to another raising block. Pull up onto the raising
block, and run jump into the south alcove for the 2nd Secret
~ Shotgun Shells ~ Magic Elixir ~ Flares ~ Revolver Ammo Jump
back to the raising block, and then take a running jump over the railings to
get back to the lever block.
Line up with the slope, and take a running jump to it. Slide down and land
on the raising block at the bottom of the slope just when it's rising, and
then jump to the slope left or right of the block. Spring back and forth,
and depending on what slope you jumped to, twist Lara around to face the
north wall. Bounce to the end of the slopes, and time your final jump so
that Lara lands on the raising block at the end of the north slope just as
it is about to rise. Be quick now, and take a running jump to the next
raising block to the east, and then run and jump to the small island to the
SW. Jump around the island to the final raising block, and pull up onto it.
Take a final quick jump into the south alcove to collect the 2nd Secret
~ Shotgun Shells ~ Magic Elixir ~ Flares ~ Revolver Ammo and
then jump
back to the block and take a running jump over the railings to get back to
the lever block.
Kill the Red Demon lurking on the block, and then use the lever to lower a
rope to the NE.
2 Routes join:
Face
the rope to the NE. Take a running jump to grab the rope, and swing into the
north room. Go left, and climb up into the gap above the fire emitter for
some Shotgun
Shells and
then head out of the east doorway.
The Hole With Ladder And Poles
Walk to the east edge of the path and Lara will be looking down onto another
death slide, and down to the right you can just see a hole in the rocks by
the south wall. This next manoeuvre is rather tricky. Down in the hole there
are slopes, poles and a wall ladder, you can just drop down and hope for the
best, and eventually Lara will either grab a pole or land on a safe ledge by
the wall ladder, but to be precise this is how I did it with success each
time. Face Lara towards the hole, and stand at the very pointed edge of the
ledge above the hole screenshot
Jump towards the east wall above the hole, and twist in the air so that Lara
is now facing you while dropping into the hole screenshot
As Lara falls she will land on the first slope and slide backwards; enabling
you to grab the end of the slope. Shimmy right as far as you can screenshot
and then let go and slide onto a short slope to your left screenshot
but be quick, and spring from the second slope with a left curve, so that
Lara lands safely on the ledge above the wall ladder screenshot
Drop back from the ledge and grab the wall ladder, shimmy right and around
the wall, and then climb to the top and back flip to the ledge behind you
for some Flares.
Face the left pole to the north and jump to it, then slide down to the rock
at the bottom of the pole; but don’t try to land here or Lara will slide
off, shimmy around the pole so that Lara is facing east, and then back flip
off to the west ledge. Look down NE, and you will see a bridge leading to a
new area. Jump down to the bridge (or jump onto the sloped ledge next to you
(N), hang and safety) drop, and you’ll activate a cut scene showing a gang
of naughty Red Demons setting a trap for Lara. “She’s here!” announces one
of the Red Demons, and they begin to jump on the bridge causing the bridge
to decay under their feet, “quicker!” Demands another Red Demon, and they
all burst into mischievous giggles. Suddenly, the riotous laughter turns to
screams and, “Whoops!” trembles the final Red Demon, as they plummet to
ground along with the bridge.
Reconstructing The Bridge
Walk to the end of the bridge, and you can now see the damage the little Red
Demons have done, and with the bridge now destroyed, Lara needs to find
another way to the other side of the canyon. Turn around and jump to the
wall ladder on the west wall to Lara’s left. Climb up the wall ladder as far
as you can go, and then shimmy left and proceed up the ladder as far as you
can. Shimmy right onto the north wall, and then pull up. Ahead you will see
a closed flood gate, and an object to the right of it. Behind Lara are a
couple of hatches, and a stalagmite that will be of some use later on, but
first, make your way to the object by the flood gate and stand at its west
side. This is the side you will move the object from, but you need to raise
a hatch first in order to do this, so face NW and see a ledge round the
corner of the wall and jump to it. Use the wall lever here to raise the
hatch by the object, and then jump back to the object. Grab the ring on the
west side of the object, and then pull. A cut scene will now show you the
flood gate opening, and water will gush from the gate over the top of the
ledges. A platform will also rise next to the object giving you access to
the upper ledges, and you can hear a Red Demon mischievously playing up top.
Jump back to the NW ledge and re-use the wall lever. This will lower the
hatch by the object, but it will also raise two hatches on the ledge above
the flood gate. Jump back to the object, and then jump onto the raised
platform. Jump to the upper ledge and shoot the Red Demon, and then go to
the south end of the ledge and find a spade by the raised hatches. Move the
spade forwards once, and leave it sitting on the hatch, and then return to
the NW wall lever below, and use it again to lower the hatch under the
spade. The spade has now fallen to the lower ledge near to the stalagmite.
Return to the flood gate ledge, and push the spade towards the stalagmite. A
cut scene will break in and you will see the spade has diverted the water
flow towards the east, causing a reaction below and a huge stalactite will
fall from the wall of the canyon. Time to go back down!
Drop back from the ledge to the right of the spade, and grab the wall
ladder. Shimmy left and around the corner to the west wall, and make your
way down. Shimmy right, and round to the north wall, and then pull up onto
the broken bridge. Face east, and you will see that the fallen stalactite
has created a pillar where the broken bridge was, giving Lara access to the
other side of the canyon. Take a running jump to the stalactite pillar, and
then make your final running jump to the east cave ahead.
The Final Cave
Gun down the moths that attack, and then carefully walk into the south
alcove for some Flares taking
care to avoid the falling stalactites. Return to the entrance of the cave
and note the wooden floor which you will be opening up later, but for now,
head north up the rocks and go right. A huge spider attacks from its web,
shoot the beast down and then continue on right until you see another
movable object ahead. Walk right of the object, and stand jump with a left
curve around it to get to the other side. Grab the ring on the end of the
object, and pull it back once. A cut scene will now show a door opening in
front of the object, and a huge boulder will fall and crash through the
floor by the entrance to the cave, giving you access to a lava pool cave
below. Be very careful now as it’s easy to slip to your death down the newly
opened floor, and slide down to the entrance of the cave (FI: stand at the S
wall, slide down a bit and jump left to where the Flares were). Walk to the
north edge of the floor and look down. You will see a sloped pillar rising
up out of the lava pool, and this is where you need to go next. Face the
slope, and hop back once. Run forwards towards the slope and drop Lara onto
it so that she slides down the slope backwards and can grab its edge. Pull
up onto the slope, and back flip with a twist so that Lara can grab the west
rocks, and then shimmy right as far as you can and pull up. Make your way
right, and enter the path behind the railings; stopping at the end where you
see a slope leading down. This next task is a tad tricky; there is a slope
ahead with a faced trigger tile at the top of it, and a boulder will be
released as soon as you pass the tile. You simply won’t make it by jumping
straight ahead, so, face SE and line up with the second descending slope,
(which is to the right of the first slope) and then hop back twice. Take a
running jump to land at the top of the second slope and trigger the boulder,
and then immediately jump forwards against the rock face to avoid being
crushed by the falling boulder. It’s safe now, so drop down south to the
lower pillar in the lava pool, and then take a running jump to the wall
ladder on the south wall. Pull up onto the ledge, and explore the alcoves
for some Flares and
a Magic
Elixir Slide
down east, hop to the slope going right to slide Lara into the next level.
Level Two ~ The Swamp
One Secret
Lara enters the swamp, and it's by no means
an easy task ahead. The swamp lake has a deadly current which will sweep
Lara away to a spiky death, so the initial route will be taken around the
outer walls, using the rocks to proceed beyond the first area.
Begin by making your way to the right, and go to the east rocks Grab the top
of the rocks and shimmy left until you can pull up onto a safe flat
triangular rock at the end of the rocks. Face north and take a running jump
down (or slide and jump along the wall) to the safe land by the edge of the
pool, and then stand at the right side of the north rocks and grab the top.
Shimmy left to the end of the rocks and then shimmy around to the east rocks
and pull up onto a safe flat ledge. There's a monkey swing above Lara now
but don’t use it just yet. Drop back from this ledge and shimmy left to the
end of the rocks. Pull up to the top of the rocks, and then drop down north
to the shore of the lake. Make your way to the north rocks behind the cactus
plant, and pull up to the top for the 3rd Secret
~ Shotgun Shells ~ Magic Elixir Drop
back down to ground and make your way back to the south rocks. Pull up onto
the rocks and shimmy back to the ledge with the monkey swing above it.
Grab the monkey swing and make your way to the end. When you can’t proceed
any further (keep to the left side at the end), turn right a bit, drop off
and Lara will land and slide on a sloped rock below. Grab the edge of the
sloped rock
and shimmy left until you can pull up onto a ledge at the west rocks just
around the corner. Take a standing jump up to the SW rocks, and then walk
southwards and stand at the edge of the rock.
Take a long running jump to the south rocks, and then slide and grab the
edge of the rocks. Shimmy right until you can pull up into an alcove at the
end of the rocks, and then turn and face north. There’s a passage over the
water but you can’t grab its edge, so take a running jump without using
action to land Lara inside the passage and head through. Kill the pesky moth
(s) that shows up, and then make your way through to the end of the passage.
Drop down to a lower passage and kill another moth that shows up to greet
you, and then simply head through the swampy passage and out to a small land
mass at the edge of the lake. A large hornet will attack from the left, and
a few more moths will show their faces so be quick and take them down. When
all is clear, walk to the edge of the lake and stand on the left side facing
out over the water. There’s a small land mass ahead and that is where you
need to take a running jump to.
When you're safely over, walk to the north edge of the land mass standing in
the water and look left around the corner. You can see another land mass by
the edge of the lake and can make a simple curved jump to it, but as soon as
you land you will be attacked by another hornet, so gun it down and then get
your bearings.
Head west through the swampy passage until you arrive at a new lake area
with a waterfall to the left and orange plants floating on the lake ahead.
The orange plants will help you over the deadly lake; but their assistance
is short and sharp. As you land on each flower you will activate spike traps
hidden within the flower head and you will only get a few seconds to move on
to the next, so you need to move fast here and don't even think about
stopping for breath. Line up with the nearest flower and take a running jump
to it; landing on the edge nearest to you so that you can take another
running jump to the next flower without stopping. Continue this way over the
flower heads and on the 4th flower, take a standing jump to the safe land
mass ahead. You now face two more flower heads and they work in exactly the
same way as the others, but before you venture out onto them there’s a small
goody to collect first. So face NE, and run jump over to the land mass
ahead. Pull up onto the north rocks, and then drop down into a small water
hole below. Swim down to the SW corner for some Shotgun
Shells and
then pull out on the rock at the NE corner of the water hole. Now pull up
onto the east rocks and shimmy all the way around to the south rocks. Pull
up and drop back down to the land mass outside. Take a running jump back to
the land by the orange flowers, and then walk NW and stand by the edge of
the lake in front of the first orange flower. Hop back once, and take a
standing jump to the first flower (or stand further back and do a running
jump). Without stopping, run and jump to the left side of the next flower
and take a sharp right curved running jump to catch the sloped rocks to the
east. Slide down the rocks and grab the edge, then shimmy left to the end of
the rocks where you can then drop to safe land.
Pull up to the top of the north wall and enter the dark passage to the left.
At the end of the passage, go left and walk to the edge of the ledge. Line
up with the rock cluster over the lake ahead, and take a running jump with
grab to catch the rocks; but don’t pull up, shimmy left, around the corner
until you can’t go any further. Drop off to safe ground at the end, head SW
through the gap between the rocks and Lara will now be facing the awesome
Asylum.
Getting Into The Asylum
The Asylum is surrounded by swamp land and it all looks very nice, but you
are going to have a bit of a fight to get inside; especially as the central
main doors are guarded by deadly plants that you will not be able pass yet.
On the right side of the Asylum there is a little salesman selling fake
ID’s, and on the left side there is a closed gate. The safest way to
negotiate the swamp area is to stay close to the east wall at all times;
avoiding the vicinity of those plants that will fire deadly pellets from
afar and will burn Lara alive if she ventures too near. So, keeping close to
the east wall, make your way around the outer the walls until you come to a
swampy passage leading into the east wall. Make your way down the swampy
passage, and kill the hornet that shows up at the end. Head left, and make
your way to the end of this passage until you arrive at a pool with deadly
spike trapped plants growing in the bed of the pool. You can’t pass the
spike plants and another way must be found to reach the other side; you will
find that solution up in the left corner of the east wall where you can pull
up into a crawl space. Crawl through, and go left until you can stand Lara
facing over a small spike trapped plant pit. Take a running jump over the
spike pit, and catch the rocks on the other side. Pull up, and then jump
into the passage in the west wall. Make your way through the next passage to
the end, and then pull up to the higher ledge. Walk ahead and stop at the
edge of the ledge. There is a rock to the south with a shimmy gap on the
left side. Jump and grab the shimmy gap and make your way left around the
wall until you are over the spike trapped pool. Drop off to safe land, and
then head through the passage to the east. Make your way through the
following passages until you arrive at a small pool room with a hornet
waiting inside. Kill the hornet and then drop into the pool. Search the
south end of the pool for the Seedling and
then make your way back to the spike trapped pool.
In the pool there is a small pillar to the right, so jump to it and then
jump into the hole in the north wall. Go through to the end of the passage,
and then drop down into a lower passage. Make your way to the north end, and
then pull up into crawl space in the west wall. Crawl through to the left,
and then drop down to find yourself back at the start of the spike trapped
pool. Go right, and make your way through the swampy passage to get back to
the Asylum.
Back at the Asylum, go left and make your way around the outer walls of the
swamp to the left side of the building. Use the seedling on the receptacle
by the gate, and then gun down the moths that attack from the newly opened
room. When all is clear, enter the small room and use the jump switch on the
west wall and watch the cut scene of a plant growing elsewhere. You can now
leave this room and make your way around the outer walls of the swamp to the
other side of the Asylum. To the little salesman selling the fake ID’s, but
you need some money to pay him so don’t bother him just yet. Enter the small
south room, and blast away the hornet that attacks. You can now see the
plant that sprouted earlier and it’s climbable, so make your way to the
upper turrets of the Asylum, and back flip off at the top. Run down the
south path, and kill the moths that attack. When you are in the centre of
the path, you will find a small room to the right with some tiny gardeners
weeding and digging; they won’t harm Lara but a swarm of flies will, so run
about for a bit to disperse the insects, and then head to the SW corner of
the room and find the One
Demon Dollar on
the path by the west wall. You can now return to ground via the plant, and
make your way out to the little salesman. Place the One Demon Dollar in the
bag, and the little salesman will hand you a Fake
ID Card which
will allow you access past those deadly plants.
So, now it’s time to make your way inside the Asylum. Go to the central
doors, and make your way past the plants; who will take a good look at you
when passing, spooky eh? Go left or right to enter the Asylum; and be
warned, this is not a pretty place!
Level Three ~ The Asylum
You have now entered the very spooky and very freaky innards of the Asylum,
and if this place doesn’t give you the creeps, nothing will. Take a look
around if you dare! There are small rooms leading off from the main lower
room, and each area has its own torture chamber; which is rather unnerving
to say the least. In the centre of the main room there is a rather nice
carousel; glad to see there’s some fun to be had around here. To the south
of the carousel there is a passage leading to a gate that needs a key (South
Wing Key) and to the north, there is another passage with a dead end that
you will be visiting later on. Your first objective here is to venture on
through to the west end of this lower room, and enter the west passage. Make
your way to the top of the stairs, and then walk out onto the upper balcony.
You can now see more torture chambers to the left and right. Jump to the
chambers to the eft, and then make your way to the furthest point at the
east end of the chamber. The carousel is just ahead of you, and there's a
seemingly dead end, but there's a balcony on the north wall around the wall
to the left, and now all you need to do is get to it somehow. Line up
towards the south wall balcony, and then take a left curved running jump
(without action) around the wall, to land on the balcony (you can do this
from both sides, S side has an identical balcony). Face the carousel, and
jump to the pole above it. Climb to the top of the pole, and then back flip
off to an upper passage in the ceiling. Head down the passage to the end,
and then make a safety drop to ground. You have now arrived in another
torture chamber (Electric Shock), and there's a passage through the north
wall. Carefully make your way over the floor to the north passage; avoiding
the electrical tiles as you go, and enter the north wall passage. Make your
way down to the end of the passage, and you will come to a big closed gate
with a passage behind it, and another closed gate beyond the passage. Use
the button on the south wall to open both sets of gates, and then head
through the gate, straight over the passage and enter the west gate. Make
your way through the following passage to the end, and then turn right. Walk
a short way along, and in the east wall you will meet the Chief Registrar;
who is sitting at his desk none too happy because apparently someone has
stolen his gold medallion; you can see the reward noticed pinned to the wall
at the top of the steps. Well, there’s not much more you can do here, and
you need to find that medallion, so make your way to the bottom of the
steps, and pick up the Scroll laying
on the penultimate step to the left. It's a note from Demon Smalls
explaining that there is a problem, and that you should meet him down at
the Phlegyas 'Lake of Boiling Blood'. Ok, so here we got then! Run down the
rocky passage ahead and enter the next level.
Level Four ~ Realm Of The
Lost
One Secret
As Lara arrives in The Realm of The Lost she will be hurtling down a slope
towards a cave, and spike traps are littering the path below the slope. When
you are nearing the end of the slope, you need to jump Lara right/left to
avoid being impaled on the spiky traps. There’s a passage in the SW corner
of the cave, but you can ignore that and pull up onto the path at the north
wall. There’s a wall ladder on the north wall, but just before you head up
there, go grab some Flares at
the end of the path (NW), then return to the wall ladder and head up.
Spike Slope
Save your game before reaching the top of the ladder because you’re in for a
rough ride once you are over the top of the ladder. As soon as you pull up
over the top of the ladder you will immediately begin to slide down a long
and deadly slope, and spike traps are scattered in various places on the
slope. There are a few ways to tackle the slope, but this is how I did it.
Keep left on the ladder and pull up over the top. Jump a bit left to avoid
the trap in the middle. Slide for five paces, then jump right to a safe area
between the spikes. Slide and jump over the next traps, slide a bit and a
jump right should bring you to a safe area at the bottom of the slope (screenshot).
Phew! Rough ride eh? Ok, you're now safely down the slope (savegame).
There’s a path through the rocks to the NW, so follow the path al the way
around to the end, and then drop down into a new cave with a long slope
leading up to the south.
Slope And Boulder Run
There are three boulders sitting at the top of a long slope, and a closed
gate and jump switch behind them. A Manna From Heaven is precariously
perched in the centre of the slope, and in the north wall there's a gap with
a small slope below it. Inside the wall gap, certain little red beings are
about to cause havoc in the cave below, so approach the Manna From Heaven,
and save your game before even thinking about touching it. Facing north,
pick up the Manna From Heaven and
activate a cut scene showing two naughty Red Demons up inside the gap in the
north wall; and one of the Red Demons will press a button. The gate you
entered here by will slam shut, and at the same time, the three boulders
will be heading towards Lara. As soon as the cut scene breaks, run down to
the small slope below the gap in the north wall, jump onto it with a roll in
mid air, and then immediately jump over the descending boulders; but don’t
stop, keep running up the slope to ensure Lara is safe from the boulders
which are still rolling about at the bottom of the slope. When Lara is
safely up the slope, use the jump switch on the south wall (SW) to open the
gate in the south wall, and then head through to a new cave. This will be
the first of four lava rooms.
1st Lava Pool Cave
In this first lava
room you will of course find a lava pool, and on the other side of the lava
pool there's a jump switch on the wall. On the lava pool are two gold tiles
with a small sloped rock between them; the gold tiles are in fact sinkable
tiles so don't hang around on them for too long or Lara will sink into the
lava, but don’t try anything here yet because there’s something else you
need to do before attempting those tiles. To the west there is a passage
with spike traps leading through it, and an incomplete monkey swing on the
ceiling before the passage. Your objective is to complete the monkey swing
by using the jump switch, and gain access to the areas beyond.
First take a trip up the slope to the SE and grab some Flares from
the end of the path, and then look at the edge of the path overlooking the
lava pool and see a boulder resting there. Go to the boulder, and use action
for Lara to kick the boulder into the lava pool. The boulder will smash into
the small slope causing it to break and a flat area will be created on the
rock for Lara to use as a stepping stone in the lava pool. Now head back
down to the lava pool, and stand at the edge of the pool facing the first
gold sinkable tile. Hop back twice, and then take a three step running jump
to the first tile; don’t stop for a moment, and take a running jump to the
flat area on the broken slope (right hand side). Do a left curved running
jump to the second sinkable tile and then a running jump with a right curve
(to avoid the spike traps on the safe path) and land on the safe path on the
other side of the lava pool. Use the jump switch on the west wall to
complete the monkey swing in the west passage, and then watch the following
cut scene of three Red Demons swinging their way towards the lava pool room.
Time to go back over the lava pool! Line up at the edge of the lava pool
facing the gold sinkable tile; taking care not to walk too close to the
spike trap nearby, and pointing Lara approximately NE, hop back once, and
then take one step forwards. Stand jump to the gold tile, and then take a
sharp left curved running jump to the flat area on the small sloped rock.
Take a running jump to the sinkable tile and from here to the safe path by
the lava pool, and then you can pick off the three Red Demons who are
scuttling about in the cave. Mission accomplished, and you can now use the
monkey swing in the SW passage and drop off at the end. Now make your way
through the following passage, and stop at the end. You have now reached the
2nd lava pool room.
2nd
Lava Pool Cave
You can see the deadly lava pool below you, and there's a climbable wall
ahead. Jump and grab the wall ladder and shimmy all the way around to the
other side of the wall. When you are central on the wall, back flip with a
twist and grab the wall ladder on the pillar behind you. Shimmy right around
the corner of the pillar, and line up as far left as possible (3 steps down
from the top). You need to do another back flip here, and at the same time
twist and hit the right key so that Lara curves off to the right and lands
on a sloped block behind her. Now slide down the block, jump/grab the next
wall ladder that’s on a hanging pillar ahead. Shimmy around the pillar to
the other side, and drop off onto a safe platform at the south wall. Walk to
the west edge of the platform, and see a monkey swing below the climbable
wall right of the spike trap. Take a running jump to grab the monkey swing,
and then make your way to the end, left around and drop off. There’s a floor
lever ahead; use it to raise some gold sinkable tiles in the lava pool, and
then grab the monkey swing and make your way around to the right. Just after
the spike trap, line Lara up approximately SE (to the solid platform), and
drop onto the gold sinkable tile below. Quickly back flip to the tile behind
you at the west wall, and then quickly hop back to the previous gold
sinkable tile and run jump back onto the platform at the south wall. Now
line up with the gold sinkable tile to the NE, and take a running jump to
its left side. From here, quickly take a standing jump into the alcove in
the east wall (savegame),
and a cut scene will show a gang of Red Demons summoning up some trouble for
Lara in the next cave. Walk to the edge of the alcove, and take a look
inside the next room. You will see a nasty drop below into a lava pool, a
monkey swing above you, and a wall ladder on the north wall with a passage
and gold sinkable tile below it. Grab the monkey swing and swing to the
north wall ladder, and then line Lara up with the ladder and drop using
'action' to grab the wall ladder. Climb down to the bottom of the ladder as
far as possible, and drop off onto the gold sinkable tile; but be quick here
or the tile will sink with Lara on it, so run immediately into the north
passage, and then head through the following passage to the entrance of the
3rd lava pool room.
3rd Lava Pool Cave
As soon as you entered the passage you will have heard a strange
sound; It's the sound of the four large bolt firing plants that the Red
Demons summoned up, and you are going to have to be quick in order to make
it past them without taking too much damage. So enter the lava pool room,
and sprint straight ahead to the end of the north path. You will see a
monkey swing as you pass under a bridge but it’s a red herring so ignore it.
At the end of the path, jump up the east slope (right) using the flat areas,
and jump onto the flat grey rock you see jutting out of the slope. By now
the plants have ceased firing so you can take your time while on the slopes,
but if you slide back to the path the plants will open fire again so take
care. From the small grey rock, take a running jump up onto the top of the
bridge (savegame),
and make your way to the west end. You will come to a pillar obstructing
your way, and you now need to do a banana jump around the pillar to get to
the other side of the bridge (stand against the pillar on one of the sides,
hop back twice and side step once, turn to the corner of the pillar and run
jump around with a sharp curve). Once you are around the pillar, collect
some Revolver
Ammo from
the end of the bridge, and then drop down to the west. Enter the west
passage, and go down to the bottom of the steps to the 4th lava pool room.
4th Lava Pool Cave
This is the final lava pool cave you will need to cross, and beyond you will
see a huge cave leading down into the darkness. The lava pool ahead is a bit
tricky to pass, and there’s also a secret hiding nearby, so grab some
courage and then walk to the right side edge of the lava pool. You will be
using the right side slopes to slide and bounce to the other side of the
lava pool; but it’s not an easy task so screen shots have been provided to
guide you over. First line Lara up (standing about one step from the right
hand wall), so that she is facing the V shaped slope in the centre of the
slope screenshot.
Take a running jump to the slope, and land on the descending slope of the V screenshot.
Let Lara slide towards the upper rocks, and then jump just before she hits
the ascending slope ahead screenshot.
Lara needs to land on the top part of the ascending slope so that she can
continue to slide forwards. Mid-slide: jump forwards again (with right
steer), then another jump with roll and curved right to reach safe ground
just beyond the lava pit
(savegame).
The Large Cave And Beyond
You are now safely over the final lava pool, and you can hear the
mischievous giggles of Red Demons down in the lower regions of the cave, but
they are now heading up to meet the new arrival, and if you wait here for a
short while you will be able to pick off the welcoming committee sooner
rather than later; which is wise, due to the fact that no one really likes
being snuck up on in dark eerie places. When the coast is clear, go to the
south slopes by the lava pool and with Lara’s left foot just at the edge of
the lava pool, take a left diagonal jump up and catch the top of the south
slopes. Pull up, and walk east as far as you can, and then walk back one
step so that Lara moves round the flat triangular rock and is now facing SE.
You now need to make a right curved running jump up to the top of the slope;
which will take a few tries but you’ll get there in the end, and when you
are safely up the top of the slope, crawl or walk east until you see a crawl
space in the south wall. Crawl inside the tiny tunnel, and at the end you
will find the 4th Secret
~ Revolver Ammo ~ Magic Elixir With
goodies in hand, crawl back out of the tunnel, and walk west as far as you
can. Hop back once, and then take a running jump west to land back down in
the cave beyond the lava pool. And now it’s time to head down into the cave.
Make your way down the long rocky path until you come to the second batch of
toadstools growing in the cave to your right. Go behind the toadstools, and
see a small dark cave up in the wall. Jump into the small cave, grab a Magic
Elixir and
then return to the main cave.
Continue on down to the bottom of the cave, and then get your bearings.
There is a closed gate ahead that needs a key; this is the entrance to the
Great Mausoleum; but that’s for later. In the east wall there is a passage,
and that's also for later. To the west, there is a long path leading down
and that’s where you need to head now, but before doing so, jump the rocks
left of the east passage for a Magic
Elixir and
then slide to ground and go take some Flares from
the SE corner of the cave. Head west down the long dusty path, and then make
your way down the steps that lay ahead. Near the bottom of the steps you
will see a Manna From Heaven snuggled
between some spike trap plants on the north rocks. Jump onto the plants and
then immediately off again to trigger the spikes, and take the goodies from
the deactivated spike trap. Continue to the bottom of the steps, and walk
out towards the deadly Phlegyas where Anubis and Demon Smalls are waiting
for Lara on the shore of the lake. Make your way over to them and a cut
scene will kick in giving you an account of events so far.
Lara: “Hello, Guys”
Anubis: “Hello, Lara”
Demon Smalls: “Damn, not at all good!”
Lara: "What’s up with him, still no way through?”
Anubis: “Alas not, no amount of magic seems to work. That is why I have
been summoned. But I have no influence down here either”
Demon Smalls: “There’s no way I’m gonna get through here”
Lara: “Who does have influence?”
Anubis: “The Asylum registrar has the power to assign souls to this
terrible place”
Lara: “I still haven’t found his medallion; it’s like looking for a
needle in a haystack in these caves”
Anubis: “The registrar never leaves the Asylum”
Demon Smalls: "So, I guess its next stop Asylum!”
Lara: "Oh gosh, that place is sick, and you better start making yourself
useful”
Demon Smalls: “Wooo! That told me!”
Demon Smalls taps away on his lap top.
Demon Smalls: “This should be useful”
Demon Smalls will now conjure up some items for Lara, and they will
appear on a pedestal nearby.
From the pedestal, collect the Scroll
~ One Demon Dollar and Revolver
~ Laser Sight and
then walk left of the pedestal. You just need to grab some goodies before
leaving, so face south, and jump up the rocks ahead. Walk up to the highest
point of the rock, and then face SE and stand jump to a flat area on the
slope ahead. Still facing SE, take a standing jump forwards to land on the
next flat area of the slope, and then walk to the SW edge of this rock. You
can now see some flares sitting on a rock to your left. Stand jump to the
flares rock, and then face south and crouch to take the Flares (this
way Lara won't slip from the rock after picking up the flares) and then jump
down to the impassable barrier at the south wall. Now walk to the north and
stand by the edge of the lake. Jump right to the small triangular rock next
to the plant, and then run jump north to land on the safe ground over the
bloody waters. Return to Anubis and Demon Smalls and wave goodbye to them
for now. Return to the top of the steps (E), and head through the passage in
the east wall. At the top of the passage you will come to The Demon
Expressway. There’s also a coin slot, a lift type area to the right, a
closed gate to the left, and a sign on the north wall saying To Asylum; Ok,
so I guess we know where that leads to!
Use the One Demon Dollar on the coin slot, and the gate will open to the
left. Enter the gate and inside you will find a strange object with a tunnel
above. However, the strange object is a wind tunnel with a powerful air
current inside it; an air currant so powerful in fact, that it can transport
Lara to the top of the tunnel above. So jump in and enjoy the ride.
Going Back To The Asylum
At the top of the tunnel, go around to the right, and at the end of the path
you will see another tunnel leading down to your right; which you can ignore
for now. Make your way through the passages to the east, and at the top of
the steps go left into short rocky passage. There’s a closed gate to your
left which you will open shortly, but for now, go right and walk out to the
edge of the deep lava pit ahead. Standing on the left side of the ledge,
take a running jump over to the sloped rocky area to the left, (taking care
not to slide off into the lava pool) and then from this rocky cluster, jump
up the flat areas on the slopes to get to the top of the rocks. From the top
of the rocks, look SW and up to see a monkey swing on the ceiling, and a
steep sloped rock on the north wall where the monkey swing begins. You need
to stand Lara facing SW towards the monkey swing, and at the edge of the
lava pit. Stand Lara about a tile and a half left from the steep slope, like
so screenshot
and take a side jump right onto the slope. Spring forwards from the slope,
and catch the monkey swing. Swing south, and drop off at the end of the
monkey swing. Run through the passage to the south, and then go around to
the left. You are now in a new passage, and about half way down you will see
steps leading up to the right, and a sign on the wall saying To Asylum, but
before heading up the steps, go to the end of the passage and use the button
on the wall to open the gate you saw earlier back in the small rocky
passage. The gate will give you access to the previous areas and you will
use this route later, but you need to take a trip back to the Asylum first,
so return to the steps in the passage and head up to re-enter the Asylum.
Level Five ~ The Asylum
~ Revisited
Two Secrets
You are now back in the Asylum and will arrive in the small office of the
Chief Registrar. First take the South
Wing Key from
the bookcase at the east wall, and then use the button on the south wall to
open the gate to your left. Head through the gate and straight ahead to the
carousel. Go straight over past the carousel, and enter the south passage.
At the end of the passage, use the South Wing Key on the lock to open the
gate to your left, and then head through into the next area of the Asylum.
You will arrive at a crossroads with two signs on the wall ahead. Left: To
Diablo Nightclub, Swimming Pool and Mental Torture. Right: To Asylum Roof
Gardens.
Go right towards the Asylum Roof Gardens and take a look in the room. There
are two hovering demons suspended by different shaped (green triangle, red
square, blue diamond and yellow star) balloons. You must find all 8 balloons
(2x red square, 2x green triangle, 2x blue diamond and 2x yellow star) and
destroy them to allow the demons to “become one with themselves” and open
the doorway behind them.
Turn around (face S) and head towards Diablo Nightclub, Swimming Pool and
Mental Torture (i.e. Follow the sign). You’ll arrive at Diablo Nightclub
first, but require one demon dollar entry fee and you don’t have that yet,
so continue until you approach your first junction (one of many) where the
first demon hologram room is. There is nothing in this room, so consult the
map to decide which direction/room to tackle first. Below is guidance on how
to proceed in each room but for directions on how to get there, please check
the map Asylum
Map
1
Moving Tile Room (Red
Square)
The objective is to make it safely across to a solid, unmoving tile on the
other side of the pillar. It’s simply a matter of timing and luck to get
across. You can do two jumps before the pattern changes, so after your
second jump – aim for a currently burning part knowing that it will become a
tile once you land on it. Make your way to the other side to land safely on
the solid tile (distinguished by its dark colour) and shoot the Red
Square balloon
hovering in front of you to show a cut scene of one of the balloons of the
hovering demon’s start to twirl. Make your way back to the other side using
the same technique you used to get there.
2
Sinkable Tile Room (Green
Triangle)
These tiles won’t support Lara’s weight for long before sinking so make your
run and jump to the other side quickly without stopping to position Lara as
there’s no time for correction between jumps – turn Lara in the air instead.
Pick up the Revolver
Ammo on
the other side and turn around to face the door way so you’re looking back
over the lava from where you came. Note the Green
Triangle in
a crawlspace beside the entrance in to this room – shoot it (from the left
side of the ledge you’re standing on as the lamp on the right side of the
room in front of the crawlspace can block your shots) to see another cut
scene of a balloon being “released”.
3
Swimming Pool (Yellow
Star) and
The One Demon Dollar
From the ledge at the entrance of this room, run-jump in to the nearest
(facing W) water funnel and swim along the passage. Be careful as you co2me
out so you don’t fall out of the funnel in to the pool. Face S in the funnel
and Position Lara to swim her out the side of the funnel on to a sloped ramp
(you may need to position Lara as far back in the funnel as you can so she
can get a bit of a boost as she swims forward to ensure she lands on
the ramp when she drops out of the funnel), slide down the ramp and jump
turning left a bit in the air to land in to the next funnel.
Position Lara to face E in this funnel, facing the monkey swing. Swim her
out high of the funnel to land on the ramp and almost immediately jump to
grab the monkey swing. Monkey swing to the end. Turn right (face S)
and go as far forward as you can, let go and grab the edge of the ramp
below, pull up and slide turning right in the air to grab the pole ahead of
you. Turn Lara around so her back is to the next funnel (and she is facing
E) and back-flip her in to it. Swim up the funnel and pull the underwater
lever above you to move a ramp. Drop in to the pool. If you haven’t already,
grab the Magic
Elixir (SE
corner) and the Revolver
Ammo (NW
corner) from the pool.
Now swim over to the ramp that’s closest to the S wall and is facing S. The
ramp has been moved over so you can now access the funnel on the S side.
Climb up at the base of the ramp (with your back to the S wall) as far left
as possible, pull up and immediately back flip with a twist and curve right
in the air to land in to the funnel (nb: before you get any ideas, you can
only climb up on to this ramp, not any of the others). Follow the passage to
the last funnel and face W, swim out to land on the ramp and jump in to a
small room. Pick up the One
Demon Dollar (entry
fee to Diablo Nightclub) and turn around to face S. Look across to the other
side of the pool and spot the Yellow
Star in
the pool on the opposite side (right of the Monkey swing). Shoot it with
your revolver combined with laser sight to get the cut scene.
(nb: if you miss shooting the yellow star in the pool before exiting the
pool, the underwater door to this small room has now opened so simply swim
back here and climb up in to the small room again to shoot the star). Hop
into the water and swim NE, climb out and go out E to get to the next
challenge.
4
Tile/Shimmy/Monkey Swing Room (Red
Square)
Run-jump and grab the shimmy crack ahead of you, and then shimmy right and
around the corner so Lara is facing S, and the sinkable tile is below. Drop
down and immediately side-jump right before the tile sinks, and then
side-jump left back to the first tile. Quickly hop back on the 4 tiles and
jump up to grab the MS above. Follow the MS around to a tunnel and shoot
the Red
Square balloon for
another cut scene. Hang-drop down the hole in front of you to exit this area
(up E). Look at the Map to get to the next location (keep left till you come
to the room where you have lava left and water right).
5
Lava/Water Pits /2nd Demon
hologram room (Blue
Diamond)
The objective here is to transfer the water in to the lava pit to “neutralise”
it and make it safe to access the other side of the lava pit. Note the hose
connections, one in each pit, and the pipes nearby. Move the two pipes with
the hose connections in to position (push/pull) so the hose connection of
the pipe is connected to the hose connection of the water or lava pit (you
will hear a faint click when they’re in place). This leaves one pipe left to
push around (as the one without the hose connection on the water side is
fixed). Simply line it up between the pipes (only one set of pipes lines up)
so there is a connection and the water pit will be empty to fill in the lava
pit and make it safe to cross. So cross over and head in to the 2nd Demon
hologram room and look up to the SW corner to see the Blue
Diamond to
shoot. Go out and back to the pipe puzzle, take a left and keep left.
6
Rotating Yellow And Blue Star Room (Yellow
Star)
Note the clock (without hands) on the left wall of the room with the closed door before the star room. This gives a clue of what to do in the star room. The clock is anti-clockwise so step on all tiles below those stars which are turning anti-clockwise ONLY (1st and 3rd from the right and 3rd from the left) to open the door in the room where the clock is. Follow the passage to a junction, head right (the other two just meet up on themselves and are dead ends), taking care to jump over a lava tile, until you come to a pit with 3 floating tiles and lava below. Ignore the three tiles left (they are a way up in case you already activated the elevator tile, but have to go up again) and locate the jump switch from the passage entrance, on the right side of the N wall. Run-jump to grab it, the tile below will start to float up but Lara will still lose about ½ her health from the fall to the tile below (the jump switch doesn’t do anything but will soften Lara’s fall) The tile will stop just below a passage. Climb up and follow the passage around to the end, taking care to jump over a lava tile.
7
Maze/Green
Triangle
Jump to the pole and slide down but not all the way to the bottom as there
is lava down there. Instead, back flip Lara off to the top of the maze.
Locate the jump switch on the E side of the room and flick it to open the
door to secret 1 in the maze
below. Head
over to the NW corner and climb down the ladder to retrieve a Magic
Elixir Now
head over to the SW corner and drop down to the side which is cut off from
the rest of the maze. Shoot the Yellow
Star in
the passage way to “release” it and push the button opposite the exit to
leave this area. You are back near the room with the shallow water. Make
your way back in to the maze. That’s left into the passage to the maze and
keep going right to the far NE outer walls corner, locate the look-through
space at the end (N wall) and use revolver with laser sight to shoot the
Green Triangle balloon.
Turn W, keep going right to retrieve the 5th Secret
~ Manna >From Heaven ~ 2x Shotgun Shells. Turn
around, go back to the SE corner to exit the maze. Look on the Map where to
go next (left into the passage, passing Demon Hologram room 1 to the wide
corridor and follow).
8
Diablo Nightclub (Blue
Diamond)
Use the Dollar left of the entrance. Go past the cloak room in to the
nightclub via the curtains in the SW corner. Head towards all the dancing
demons and locate the Shape-Shifter
Key behind
DJ Shorts. Head through the curtain either W or E side of the room and
follow the passage to a bar. Head over to the toilets on the W side of the
bar and go to the end of the line of loos to find the jump switch on the W
wall. Flick it to drop a hatch in the bar. Head back to the bar and go
towards the ladder in the NW corner (near the demon statue), climb up and
shoot a Blue
Diamond in
the passage. Once all the balloons are shot, the door behind the 2 floating
meditating demons has opened so make your way there. (Leave the club. Look
on the Map where to go next, the Floating Demons room. That’s out of the
club to the corridor, a bit right and then left).
The
Car And Exiting The Asylum
Head through the door N and note the sign “Due to a shortage of
shape-shifter parts, Demon Oddjob has agreed to ‘fill in’”. Continue along
the passage to see a small car literally being held together by poor Demon Oddjob.
Pick up a
Magic Elixir
from the ledge behind the car. The Chief Registrar’s car is not to be used,
so use your shape-shifter key to start the car being held together by Oddjob.
(Sprint key is to switch into reverse, Alt key is to brake) Follow the path
around past the shortcut to the Asylum Roof Gardens which is currently under
construction and take the treacherous route further ahead. Drive carefully
around corners and accelerate over ramps to clear them. You may hear Oddjob say
“that’s done it” or even “s**t”.
When you approach the dark ramp heading out of this area (NE/N wall), stop
the car and hop out. Look at the pillar on the left side of the dark ramp’s
entrance. Climb up there and get some Flares (you
may need to crouch to pick them up). Hop back down again and look below to
see some people being tortured by demons and some goodies (secret 2) on a
ledge in the middle of the pit. If you’re not bothered about getting them,
then pick up the walk at the *
Head over to the SE corner of the pit and look below to see a demon
torturing a human. The ledge the demon is on is directly below this ledge so
you’ll need to do a corner trick to land on it, timing your drop so you
don’t land when the demon is firing his fire gun. Facing N, towards the dark
ramp screenshot
13 hang-drop over the side, shimmy right until you start to shimmy around
the corner screenshot
and then let go. Lara should hit the edge of the ledge and land on the ledge
below which the demon with the fire gun is standing on screenshot
Immediately jump forward and to the right to land on the ledge before you
catch fire screenshot
You can stand next to the demon and also next to the flamethrower. Jump over
the ledges where the demons are blasting the humans with fire, then on to
the next where a demon is blasting a human with fire (screenshot)
and right to a safe ledge. Follow the ledges around until you get to
the 6th Secret
~ Shotgun Shells ~ Revolver Ammo ~ Manna From Heaven between
the N side pillars.
Jump back to the ledge before the ledge containing the secret (to the safe
spot next to the demon), turn around and look up to spot the ladder, jump
forward to grab it and climb up to the top. Go 3 steps down and hang
leftmost, back flip with roll and hard right curve. Make your way back to
the car.
* Head
up the ramp in to another area of carefully navigating the car around
ledges. When you’ve made it through, you’ll drive past the top of the
shortcut construction and head right up a wide ramp to exit this level.
Level Six ~ The Swamp
~ Revisited
Dismount the buggy, and then enter the SW passage. Make your way to the end
of the passage and climb the ladder at the end. There’s another short
passage at the top of the ladder which will take you out to the top of the
Asylum roof. Walk ahead and take a look at those fabulous plants below the
glass floor, and then make your way south along the roof top. You will pass
some plants on the way and a swarm of flies will attack, but simply keep
running ahead to avoid taking too much damage. Keep heading south, and
eventually you will find the culprit who stole the Chief Registrar’s Gold
Medallion. There he is in the SW corner reading his gardening
magazine. Sheesh! You just can’t get the staff nowadays! Take the Gold
Medallion and
the gardener is alerted. “Hey, I found that, it’s mine” he
grumbles. “Tell that to the Registrar” Lara snaps back. “A-Oh” says
the tiny green fingered; or should we say, light fingered employee, and
resigns himself to the fact that his stash is lost forever.
Lara is free to leave now, so nip over the south wall and go to the end of
the path where you see a plant hanging down to the right. Grab the plant,
and slide down to the mound of earth at the bottom of the plant. Now face
the south wall and jump Lara towards it so that she hits the sloped wall and
can slide safely to ground. Finally, make your way to the main central doors
of the Asylum, run past those spooky plants at the entrance as you did
before, and go left or right to re-enter the Asylum.
Level Seven ~ The Asylum
Revisited ~ 2
Now back in the Asylum, run ahead to the carousel and take a right turn into
the north passage. Ahead you will see the open door to the Chef registrar's
office, but don't go through there. Take a left turn into the west passage,
and at the end go right to where the Chief Registrar is sitting at his desk
and give him his Gold Medallion.
Chief Registrar: “My medallion! You’ve found it! Wait a minute, who are
you? You’re not a member of my staff…guards!”
Lara: “Now wait a minute. I didn’t see any members of your staff looking
too hard for this bauble. I was the one that found it, and I claim my
reward”
Chief Registrar: “Oh, very well. I’ll put you on mild tortures for a
week, how’s that?”
Lara: “Not too enticing. I’m not one of your wretched inmates either”
Chief Registrar: “They are patients, not inmates. So what are you then?
If you’re not a demon”
Lara: “I am a living human soul and I’m on a mission to defeat the dark
souls. I understand you might be able to help my team pass beyond the Lake
of Boiling Blood”
Chief Registrar: “You mean Phlegyas? Interesting…there is a rogue
demon, Verdilet that belongs in that infernal lake. But he has found
sanctuary in the great Mausoleum and so lies beyond my grasp. But you could
reach him. Bring me his Immortal Soul, live human”
Lara: “And then? You’ll help us get past the lake?”
Chief Registrar: “Bring me Verdilet, and you’ll see….”
A cut scene shows the fire in the fireplace of the Chief Registrar’s office
extinguishing, and the door to the office, near the guard, opens. So head in
there (S, left/left) and take the Mausoleum
Key from
the fireplace. Head past the small shelf near the demon statue (NE), and
make your way back to the Realm of Lost Souls.
Level Eight ~ The Realm
Of The Lost ~ Revisited
Lara is now on the passages that will lead her back to the wind tunnel. Go
right, and if you haven’t already done so, use the button on the south wall
to open the gate at the end of the north passage. Enter the gate, and in the
cave entrance take a right turn into the next passage. Make your way to the
bottom of the long winding steps, and then run ahead and drop down into the
wind tunnel to the SW (there’s a sign; ‘To Great Mausoleum’). It’s a long
drop down, but Lara will hit an air cushion near the bottom of the wind
tunnel and will glide safely to ground. Go straight ahead, and down through
the passage through the west wall. Back in the caves, head left over to the
Mausoleum doors at the south wall. Use the Mausoleum Key on the lock to open
the gate to the Mausoleum, and enter the building. Light a flare, and then
go straight ahead and at the end of this passage, go left or right to enter
the Mausoleum.
Level Nine ~ The Mausoleum
One Secret
The
1st Binro Gem
Head in to the huge Mausoleum to find the tomb of Verdilet in the middle of
the room, to the right (W) is the tomb of Damocles, to the left (E) is the
tomb of Binro the Heretic (requiring a gem to open its door) and straight
ahead (S) is The Hall of Memories.
Head towards the tomb of Damocles, locate the jump switch on the right
pillar opposite the tomb’s door and flick it to open the door, proceed
inside to see a cut scene of Lara trying to wrestle the Binro Gem from
Damocles’ grip; but he’s not going to give up without a fight…note the sword
of Damocles dangling above the tomb, time for drastic action. Locate another
jump switch on the right pillar on the N wall and proceed in to the next
room.
Head over to the N wall and look through a closed door to spot a tomb lying
in the room – this is your destination. Pick up the Baton from
the pedestal there, and then head to the other side (W) of the room. Climb
up in to a niche with a floor switch and flick it to move a central brown
pillar. Head over to the brown pillar which has been moved beside the
central structure and locate the jump switch on the E wall, run-jump to grab
the jump switch to open a door on the N side of the room. Head back to the
floor switch in the niche, flick it again to move the pillar near to the
opened door in the N wall. Climb back on to the brown pillar and run jump to
the opening, being careful not to hit the post. Note the jump switch through
the glass wall on the right, head around to the left, locate the ladder and
climb up. Follow the passage around to a walkway overlooking the room. At
the beginning of the walkway, turn right and spot the ramps. Jump to the
left side of the first one and then to the second, then jump with a left
curve to the one on the W wall which is facing you, then either back jump,
or slide to grab its end and pull up and jump with a twist so you’re facing
forward again. Whichever way you choose, ensure you’re facing the slope and
can grab it before jumping into the central structure (and can save here).
Pull up and back flip into the central structure and grab the edge of the
slope as you slide off. Pull up and back flip into the central structure and
grab the edge of the lower slope, shimmy left around the corner to a jump
switch just below which opens the door above a ladder on the N wall.
Head over to the niche to flick the floor switch again to move the brown
pillar back to the central position. Jump up on to it and run jump to grab
the ladder above the sloped ledge and climb up to take the Spirit
Of The Flame and
then combine it with the baton to make a Flambeau From
here, monkey swing to the other side of the room. Let go and grab the edge
of the slope, pull up and slide in to the passage. You’re on the other side
of the glassed wall; flick the jump switch right to open the door to the
other side of the walkway. Back jump over the slope to land back in to the
room below.
Another level Up.
Make your way back up to the walkway (moving the brown pillar back to the
other spot with the floor switch and jump to it, then into the opening N),
head in to the passage at the other end of the walkway and follow the
passage around, climb the ladder and continue along the passage until you
come out overlooking the room. Note the shimmy crack in the wall of the
central structure ahead of you, run-jump to it, and shimmy left to land on a
ledge around the other side. Jump
up to the niche in the N wall and run along it to the end (past the flaming
ledge). Spot the niche in the W wall with the elixir, do an angled run-jump
to land in the niche – pick up the Magic
Elixir and
turn to face over the room again. Spot the jump-switch on the ladder
attached to the ramp below. Stand all the way back in the niche against the
wall, stand-jump forward and grab the edge of the ramp, hang drop to grab
the ladder, then climb down to grab the jump switch to open the door to the
whirling wind in the passage on the W side of the room.
Run in to the whirl wind and Lara is instantly transported in to a small
room above. Run along the passage to emerge over another walkway. Run-jump
and grab the ladder ahead of you on the N wall and climb up in to a small
room. Head out to see another ramp series. Jump to the first slide in front
of you and jump to the next turning left or right in the air to make it to
the next ramp, continue until you land on a long ramp. Slide down and jump
from the end to another ramp, then the next and the last before grabbing a
ladder with spikes popping out of it. Drop/grabs down so Lara drops down the
ladder quickly (sustaining some damage from the spikes) before Lara lands
safely on the floor below.
You’re in the tomb you saw through the closed door before, place the
flambeau on the end of the tomb and watch a cutscene of a flame heading
towards Damocles tomb, it burns the rope holding the Sword of Damocles which
drops on to his tomb killing him causing Damocles to drop the Binro Gem
(well, he asked for it). Locate the jump switch on the right pillar of the E
wall to exit this room. Head back in to Damocles tomb (SE) and pick up the 1st Binro Gem that
he has dropped.
The 2nd Binro Gem
Head over to the tomb of Binro the Heretic (E from the Main Hall) and use
the Binro Gem in the slot to open the door. Locate the jump switch on the
left pillar on the N wall to open the passage in the E wall and head in
there.
Find the ladder on the central pillar. Jump up to grab it and climb to the
top, shimmy as far left as possible, climb on to the sloped ledge, jump with
a twist and turn right in the air to land on the ledge behind you. Turn
right and jump NW to the ledge behind the pillar. Climb up onto the pillar,
turn to face the sloped tile with the soldier on it, aim for its bottom left
corner screenshot and
run jump with a twist so Lara lands on it backwards, landing on the soldier
ramp opened a trap door above but it’s timed so keep moving. Immediately
jump with a right curve in the air to land on to the ramp with the red
border, slide and jump to grab the ladder on the W wall. Quickly climb up
about 2 rungs then back flip with a twist to grab the sloped ledge behind
you. Shimmy as far right as you can and pull up to slide and jump turning
right in the air to grab the ladder ahead. Climb to the top quickly before
the trap door closes.
(Face
N and run jump to the slope ahead, sliding backwards to grab its edge.
Shimmy as far left as you can, pull up, back flip and twist to face forwards
and turn right in the air to land in the niche on the N wall), pick up the Magic
Elixir).
(Note; Well I couldn’t do that jump as the situation seems to be different
than described here. I stood here (screenshot),
did a run jump straight to the sloped ledge with a bit of a left turn in the
end, then immediately jump again with a hard right curve to land in a small
niche. Run jump/grab into the alcove W to get the
Elixir
and jump back into the niche - Dutchy).
Jump to grab the ladder on the pillar in front of you and climb all the way
down to the pillar at the bottom.
Detour for a Secret:
First a preparation, so we don’t have to do the timed trapdoor section
again. Turn
left (E), run jump and grab the space where you see the colored tiles. Use
the jump switch left and a trapdoor in the floor opens up. This provides us
with a shortcut back up here. Run jump and grab back (N)W to that ledge
behind the pillar, face W and run-jump grab to the crawlspace to get the 7th
Secret ~ Manna From Heaven crawl
out, drop to the floor and go for the shortcut door SE (opened with the jump
switch), just left of the Gem receptacle. Follow the passage and at the
corner is a ladder for later.
Call on Demon Smalls for some assistance.
Follow the passage into a small room and place the scroll to call Demon
Smalls. A cut scene shows Demons Small arrive, standing on stilts, he looks
at the tiles and says “hmmm….interesting” then a hidden passage beside Lara
opens up. Head in the passage to find a sign beside a door say
'You are about to enter the Demon Smalls Virtual Workshop'. Head through the
door to find 4 statues of Demon Smalls with miniature versions of the
tiles. The idea is to move the statues around until all the tiles form a
straight line screenshot.
The order of the tiles is: YELLOW - BLUE - GREEN - RED - YELLOW
Head back to the scroll area by opening the door in the distance. Climb up
the ladder and run over the tiles in the correct order to open the tomb in Binro’s crypt
to reveal a 2nd Binro Gem (you’ll
hear Binro say “oh, blessed relief….absolution from heresy…..thank
you lord!” as the rolling crypt puts out the fire beneath him). Go down
the ladder, left (S) and follow out. Go W to collect the gem and go back
into the previous room, use the gem in the S wall to open the door right of
it.
The Immortal Soul Of Verdilet
Follow the path to find a lava area with flame and pillars. Jump to a pillar
(either left or right) aiming to land on the edge of it. Timing your jumps
past the flames, continue jumping from pillar to pillar zig-zagging your way
up. Land in an area half way up the passage on the left, with 5 numbered
floor switches. The numbers indicate which of the 4 short ladders are
moved around – the idea is to get them in a straight line so Lara can shimmy
left all the way to the passage at the end of the lava passage.
Move only the first, second and fourth levers from left to right to
line up the ladders. Jump to the ladders, stay high and shimmy left into the
passage, time your shimmies past the two flames to avoid catching
fire. Climb the ladder in the passage to the top to find a bit of a déjà vu
moment of yet more lava, pillars and flames. This time though, jump to
the first pillar and jump up to reach a monkey swing. Monkey swing all the
way to the end of the corridor, avoiding the flames, to reach a slope. Let
go above the slope and immediately jump to a ledge. A cut scene shows a jump
switch on a pillar down the hole in the short passage on your right.
Run over the side in to the hole (don’t jump) and grab the jump switch on
the way down. The jump switch opens the door to the Hall of Memories in the
main Mausoleum (S), so head in there, through the curtains.
Put your hands on the two orbs to summon Verdilet’s soul. There’s a loud
explosion and a cut scene of ghostly voices announcing the tomb of Verdilet opening. The
cut scene then shows Verdilet advancing on a horse; he’s not going to give
up his soul so easily. When you have control of Lara, quickly turn around,
get guns out and let him have it. You must shoot him front on and as close
range as possible, – try shooting from the side where his sword is while
back jumping or hopping back as he’s coming towards you. Shooting him in the
back is ineffective. Eventually he’ll be knocked off his horse so shoot him
(using the same front-on point-blank range technique) until he dies and
drops the Mausoleum
Key.
Go through the curtain north and use the key in the lock of the Hall of
Memories (left of the gate which closed behind you) and use the ladder to
descend in to Verdilet’s tomb. Take the Immortal
Soul of Verdilet from
the head of Verdilet’s coffin (face E or W) and exit the Mausoleum the way
you came in (N). A cut scene will show Lara giving Verdilet’s Soul to the
Chief Registrar…
Chief Registrar: “Ah, dear Verdilet. My, how you have led us on a merry
chase. Time to burn”… And he tosses the soul into the Phlegyas.
Level Ten ~ The Lost
Realm Revisited ~ 2
As the level loads, Lara will be hurtling down the wind tunnel back in the
Realm of the Lost. This is only a brief revisit; just long enough to meet
Demon Smalls and venture beyond the Phlegyas. Let Lara fall, and then head
straight on through the passage ahead and out into the caves. Make you way
ahead, and back down the long steps to the bottom, and then run over to the Phlegyas.
Go straight down to the lake; where Demon Smalls and Anubis met you earlier,
and walk to the edge of the south rocks (where you see a guy flipping about
in the water, and a tall plant to the left) and stand at the left edge of
the lake. Take a running jump over the lake to the flat triangular rock at
the shore of the lake, and then jump SW to the impassable wall (which is now
open). There's demon Smalls waiting for you at the top of the steps, so head
over to him and you will be taken into the next level.
Three Secrets
A beacon needs to be constructed in order to summon up Geryon, who will then
take Lara and Demon Smalls onto The Dark Souls’ Stronghold. (Refer to Demon
Smalls’ beacon construction document that came with the level’s download,
and if possible, print out the instructions so that you have a quick
reference to them.)
Watch the cut scene showing Lara and Demons Smalls arriving in the oil
refinery outside the factory, and then Demons Smalls will then head off
alone.
Demon Smalls: “Spoken of in whispers at the Deadside margins, in the
hushed and shivering tones of the lurking, lurching revenants. These places,
blood temples to the Loa, where the Dark Souls did find their secret
corner. Hidden by the sanguinary sisters steeped in voodoo lore”
Lara is now standing alone in the oil refinery. The factory building is over
to the right; which you will visit shortly, but there are a few things to do
outside before heading indoors. First, walk ahead and pick up the scroll
that Demon Smalls has left for Lara; reminding her that she has the
instructions on how to build a beacon. You will now be searching the oil
refinery and factory for the objects required to build the beacon.
The Oil Refinery
First, make your way to the truck at NE corner of the oil refinery, and take
the Empty Jerry
Can that’s
attached to the vehicle between the wheels (north side, you’ll have to
wiggle a bit to find the correct position where Lara takes it). Now go to
the south end of the oil refinery, and to where you see a drilling machine
pounding into the ground. Go east of the drilling machine to the small oil
slick nearby, and fill the jerry can up with Oil Now
make your way to the shed, (north of the oil slick) collecting a pack of Flares from
the east rocks as you pass. At the shed, take a peek through the window and
you will see a machine; this is the Intelligent Plastic (Experimental)
Machine, and you will be back here in a short while to use it. Go to the
back of the shed, (east side) and you will find a Lump Of Coal sitting
on the top of a bin. Take the coal, and then make your way to the front of
the shed. The door to the shed is locked, but the key is nearby, and
although you won’t be entering here just yet, you can grab the red key and
stash it away for later. So, head NW to the first silver tank, and then go
west until you come to a lit up meter display panel. To the right of the
meter panel you will see three small levers on a tank, go to the levers and
save your game because this is a timed run. Behind the tank there is a green
toxic waste pool, and in the centre of the pool is the shed key. As soon as
you use the lever the pool will empty and Lara will have access to the shed
key, but only limited access because a timer is set to refill the pool; so
you need to move fast to avoid Lara being frazzled to death. So use the
lever, and then immediately run right of the tank. Sprint straight ahead
into the now empty pool, grab the Shed
key and
then quickly turn left or right and pull up to the top of the square tanks.
You can now jump safely back to dry land.
Secret:
It’s time to get the first secret of the level now, so make your way to the
south side of the toxic pool, and then go west until you have a horizontal
white tank left of you (just before the second toxic pool). Left of the
toxic pool are 3 white pipes on the ground. Light a flare and you can just
see something between the pipes, it’s the 8th Secret
~ Shotgun and
the only way to get it is to crouch Lara in front of it so that she can pick
it out from under the pipes.
Ok, there are two more tasks to perform in the oil refinery, so first go to
the north end of the oil refinery, and to where you see four tall slim
funnels and a passage leading down underground screenshot
Make your way down the passage, and enter the small room below. Go to the
funnel at the south wall, and pour the Oil from the Jerry Can into it. Watch
as the machine goes to work and an object appears to your right. Take the
object; it’s the Polypropylene and
you now have to take that to the shed. Make your way up top, and then head
over to the south and back to the shed. Use the shed key to open the door,
and make your way inside the room. There’s the Intelligent Plastic
(Experimental) Machine and a button behind a closed case on a panel. Go to
the left side of the machine, and at the end of it, use 'action' to place
the Polypropylene into the hole below the sign that says Polypropylene (you
can’t miss it) The machine starts to clatter about; a blue object appears in
a gold ball on the machine, and the glass case will open on the button
panel. Use the button and watch as the machine completes its task, and a
strange blue object is ejected from the machine; but there is a problem, the
object is alive and it heads off out of the shed and disappears into the oil
refinery. You have no option now, you will have to chase it and find it, and
when you do, you will have to shoot it to stop it in its tracks. When the
object is finally at rest, walk over and pick it up. You are now in
possession of the Intelligent
Plastic
Your tasks here are now complete and its time to head into the factory, so
make your way to the NW corner of the oil refinery and approach the factory.
There is a small door in the right hand side of the building, but don’t
enter just yet. Go round to the south side of the building for some Flares at
the end of the steps, and then return to the small factory door. As you
approach the door, you will be transported inside the factory.
Inside The factory
You are now inside the factory and facing a whole menagerie of weird
machines in this first room; but you will only be using one of these
machines which is the Beacon Fabrication Machine that’s sitting in the
centre of the room, not yet though. Take a little wander around now. There’s
a wide passage to the south, and another passage behind the Red Demon
moulding machine at the west wall, and if you head through there you will
come to a room where demon Smalls is sitting by his laptop with the Bantam
Node Machine nearby. You will be back here later, but there’s a lot more to
do first. So head back to the main room and enter the south passage. Go to
the corner, then right and stop. Face the dark north wall and light a flare
to see a ladder on the wall, and then climb the ladder and pull up at the
top for the 9th
Secret ~ Revolver Ammo ~ Magic Elixir Return
to ground, and continue on through the passage until you see three vertical
vessels with floating Red Demons inside. Run left past the vessels, and make
your way to the end of the passage. There’s a machine to your right dishing
out more Red Demons, and in the SW corner there’s a pillar with a tank next
to it. Stand on the tank tile, and then facing west, pull up to the top of
the pillar. Face east, and run jump over to the next east pillar. Now face
NE, and take a running jump to grab the gap in the north wall. Pull up, walk
to the east end of the gap, and then face SE and take a running jump over to
the pillar at the south wall. One more jump to do and you’re done! Line up
with the gap in the east wall, and take a final running jump over to grab
the edge of the gap. Pull up inside the small space, and then crawl to the
north end for the 10th
Secret ~ Manna From Heaven Now
be careful here and don’t rush to ground. You need to crawl or shimmy back
south a short way until you are past the wheel below the secret, or Lara
will drop down behind the wheel and burn, so take care here and make sure
you are past the wheel before dropping back to ground.
You now have all the secrets from this level, so all there is to do now is
find the apparatus you came here for. So, from the passage you dropped down
to from the final secret, go to the north end of the passage and enter the
west passage. There are two shelves to your right in the north wall, go to
the first shelf and take the Signal
Bolt and
a Manna From Heaven Now
walk west a short way and find the second shelf to your right. Take the Crowbar from
its resting place on the shelf, and then take note of the passage leading
down behind you to the south. There’s no need to go there yet, but remember
this place because you will be back here later. For now though, head west to
the end of the passage, and take a right turn. Don’t go too far, you only
need to go a very short way and you will see a passage to the west, just
before the floating Red Demon vessels. Enter that passage and go round to
the right. There’s a passage ahead leading down under the floor, so hike
down there and make your way to the bottom of the passage where you will
come to a T junction. Go left, make your way to this end of the passage, and
then take a right turn and run round into a room with a toxic pool.
Lara looks at something; it’s the two thick bars on the other side of the
pool wall. Line up with the bars, and take a running jump towards them. The
bars will give Lara a boost, and will enable her to grab the other side of
the pool wall. Pull up, head through the south passage and round to the
left. Head on until you see a passage to your right, and make your way down
to the VHPC room.
To the north you can see a strange round machine, to the SW there is a
button behind a glass case, and your next objective is to get that glass
case open and use the button. So, go to the round machine and use 'action'
for Lara to place the lump of coal in the machine. The glass case will open
enabling Lara to use the button, and on doing so the machine will begin to
start making something for Lara. When the machine is finished, go to it; but
take care of the hot smoke pouring out of the small black hole, and use
'action' for Lara to grab inside the machine and pull out the creation. It’s
a Diamond and
I’m sure that will be very useful later on. You can now leave this room and
make your way back up the steps to the top of the passage. At the
T-junction, go right and make your way to the end of this passage. Take a
left turn, and run into the store room ahead. Go to the first shelf ahead
and take the Copper
Sheet Walk
round to the second row of shelves, and search them both for The
Electronic Components and
a Magic
Elixir and
on the final shelf at the east wall, you will find a Manna
From Heaven That’s
all for this place now, so head to the door at the north wall, and use the
button to the left to open it. Enter the door, and go left to get back to
the start of the toxic pool room. Leave via the north passage, and make your
way round to the passage to the south. Go all the way to the end of this
passage, and then take a right turn; taking care to stop just after the turn
because there is a deadly room ahead.
The Rolling Diamond Blade Room
Map and Route Of The Rolling Diamond Blade Room
Rolling diamond blades are scattered throughout the room, and you need to
use five buttons in various areas of the room to not only switch off the
rolling blades, but to also open a door at the west side of the room. See
Map above for the button locations, and the route through the room There are
a few ways to tackle this room and you can find your own way if you wish,
but I took Richards advice and did it his way. Also, many thanks to Richard
for the map.
Note: Don’t over run the buttons, Lara must be ready to use them
immediately, and if she has to line up with them it will stall time and
cause the blades to run into her.
Button 1: Face SW and wait for the rolling blade ahead to roll away from
you, and as it does, follow it and then run round to the left. Stop for a
few seconds at the corner to allow the blade ahead to move on and then
quickly run left to Button 1 on the east wall, you have to hit it straight
on, no time to line up. Quickly use Button 1 to deactivate a blade to your
left, (the button will change colour to indicate you have used it) and then
immediately side flip twice to the left and run a bit forward a bit to avoid
the blade to your right which is now heading back your way and land on a
safe spot. Save your game only if you are sure the blade was stopped in time
to miss Lara.
Button 2: Lara is now standing on a safe path where you have just
deactivated a blade. Face NW, and see button 2 over on the north wall. Line
up with Button 2, and then wait for the blade to your right to pass east,
and at the same time, keep an eye on the blade to your left; which will now
be at the north wall to the right of Button 2. Run for the safe corner
right of button 2 (don’t touch the blade) Wait for the left blade to arrive
at Lara’s left side, and then run run after the blade to get to Button 2.
Be quick now and use Button 2 to turn off the blades that are now heading
your way from the right. Save your game here at the button only if you are
sure the blade was stopped in time to miss Lara. Then run west to the exit
door
Button 3: Look around the corner to the right to see Button 3 on the east
pillar. Wait for the blade in the passage to pass south, and then follow it
up and quickly use Button 3 to turn off the blade in the passage. Save your
game only if you are sure the blade was stopped in time to miss Lara.
Button 4: Walk south over the now safe blade path and you can see that a
majority of the room is now clear. But there are still two buttons to use.
Button 4 is around the wall ahead, placed on the west wall and there
is a moving blade to your left. Wait for the blade to pass southwards, and
then follow it up and then stop at the west wall to use Button 4, and
deactivate the blades. Save your game here only if you are sure the blade
was stopped in time to miss Lara.
Button 5: Face SE and you will see the final Button 5 over on the south
wall. There’s an active blade to your left, and another blade running in
front of Button 5. Wait for the blade in front of Button 5 to pass towards
the east end of the room, and as it passes Button 5, run over and hit the
Button 5 to deactivate the remaining two blades in the room, and also open
the door in the NW corner of the room. Taking care not to touch the
deactivated blades, (because they can still kill or cause damage to Lara if
she touches them) Make your way over to the newly opened door, and go
through to the new room.
Fabrication, Stage 1 Device.
You are now in a room with the Fabrication Machine. To the right; behind the
machine is a floor lever, and to the left you will find a button behind a
closed glass case. Ignore the lever and button for now; (although it doesn’t
matter if you use the lever first, it won’t stop the process from working)
and go to the machine. Stand Lara on the left side of the machine where you
see a blue arrow and the words Stage 1, and use 'action' to place the
Intelligent Plastic into the machine. Now go to the right side of the
machine where it says Fabrication and use 'action' to place the Signal Bolt
into the machine. Now head over to the lever and use it. The machine will
grab the items you have placed into it, and the glass case will open
revealing the button. Go to the button and use it to start the machine’s
construction process. When the machine has done its job, walk over to the
new item and use the crowbar to pry it from the machine. You are now in
possession of the Stage
1 Device Leave
via the east door and a cut scene will beak showing Demons Smalls in the
Bantam Node room, and he’s having some difficulties with the computer. “Hmm! Not
good!” he says, and then you are returned to Lara.
Creating the Beacon.
Make your way back through the blade room, into the east passage. Go left,
left again at the junction. Make your way to the top of the steps and you
will arrive back in the corridor at the floating Red Demon vessels. Go
straight over into the passage east. Take the first passage right and follow
the steps to the bottom, and enter the Chemical Etching Machine room. Next
to the machine is another button on a panel behind a closed glass case; you
can’t use it yet though so go to the wheel on the machine at the south wall,
and use action at the hole on the west side of the machine to place the
Stage 1 Device into the hole. Now make your way round to the east side of
the machine and find the second hole on the wheel. Place the Copper Sheet
here and the glass case will open on the button panel. Use the button to
begin the etching program and then take the Stage
1 and Empty Circuit Board from
the platform by the machine. You can now combine the Stage 1 and Empty
Circuit Board with the Electronic Components to make the Stage
2 Device You
can now leave via the east passage, and as you do, a cut scene will kick in
showing Demon Smalls looking rather pleased with himself. “Great” he says,
as he finally manages to activate the computer in the Bantam Node room, and
a new item is created for Lara. Let’s go pick it up!
Head through the passage ahead, and at the top go left. At the next turn, go
right and then right again at the floating Red Demon vessels. Head on, and
take a left turn to get back to the Main room of the factory, and then make
your way over to the passage in the west wall behind the Red Demon moulding
machine. Go through the passage and into the Bantam Node Room, and there on
the platform ahead is the Bantam
Node that
Demon Smalls has left for you. Take the Bantam Node and combine it with the
Diamond to make the Regulating
Round and
then head back out to the Main room.
Go to the Beacon Fabrication Machine in the centre of the room, and place
the Regulating Round into the left side of the machine (where you see the
blue arrow). Now go to the right side and place the Stage 2 device into the
machine. A glass case will now open next to the machine revealing a button
on a panel. Use the button, and then watch as the machine constructs your
final item. When the process has finished, go to the east end of the
machine’s conveyer belt, and collect the Beacon.
You now have what is required to summon up Geryon, and you can now leave the
factory via the east wall door.
As you reach the east wall door you will be transported to a bridge out in
the oil refinery, and Demon Smalls will be waiting for you at the end of it.
Walk to him, and then place the Beacon on the receptacle nearby. A cut scene
will now show Lara hoisting Demons Smalls up to use a jump switch and Geryon will
arrive.
“Look!!!” cries Demon Smalls, referring to the vision that's floating
up from the Abyss. Geryon lands and opens up his mouth to let the passengers
through. “Oh yeah” says an excited Demon Smalls as he and Lara head
into the strange transportation, and Geryon will now take Lara and Demon
Smalls to the Dark Souls’ Stronghold.
Demon Smalls: “And deeper still, the morbid mystery entwines. What love I
ever had for life should find its place in here, locked within a cankered
cell beset by madmen chained to hell. The horror, the horror, I embrace
it………… Ok, ok, lets just get this thing over with”
Level 12 ~ Dark Souls’ Stronghold
One Secret
The head of Geryon deposits you on a large floating ledge. Face the smaller
ledge in the NE and aim for its left side, run-jump with a last minute turn
right to grab the corner and pull up screenshot
A cut scene shows Demon Smalls attempt to make the jump as well, but
failing…. “Smalls!” yells Lara as Demon Smalls plunges to his death –
luckily he’s still got his parachute.
Run-jump to the next
ledge, sustaining a bit of damage. Next you need to aim at the near top
corner of the sloped block ahead.
Note: If
you do the usual procedure of walking Lara to the nearest corner, then
jumping back, then taking a running jump - she will not be able to clear the
required distance to slide down the sloped block. You need to do a "manual"
jump from the far corner and judge for yourself when Lara is at her closest
before pressing the jump key.
Note: An
easier way is to perform the standard jump procedure; after hopping back,
jump once straight up - this moves her forwards slightly - and then the jump
is doable.
Run-jump from ledge to ledge until you reach the walkway in the E (run-jump
with a grab to make the walkway).
Run along the walkway to find the gate is closed, so you’ll have to enter
the Demons’ Stronghold through the back door. You now need to locate a
ladder on the Stronghold’s wall to climb up and in to the fortress, although
the area to the right side of the gate looks inviting, you can only go part
way around until you come to a large gap which cannot be jumped over to
reach the ladder, so head to the left, taking the long way, instead. Aim for
the right-angled ledges which jut out at the very side of the castle. Make
your way around the base of the castle until you come to a Magic
Elixir hidden
in blue “singing” grass (that’s the high-pitched humming you can hear).
Collect the elixir and continue on. Just past the singing grass, stand-jump
to the jutted out ledge. Just on a few paces is a long sloped ledge. Jump up
to the flat part just beside the top of the ledge; position Lara on it to
run-jump to the angled ledge in the SE. Arrive at a large ledge with a
turret on it (and a winged skeleton bird hovering over the turret – but
don’t worry, the winged skeleton bird is harmless). Continue around the base
of the castle. About 10 paces on, jump to the small flat part just above the
jutted ledge, and then run-jump to the flat ledge at the base of the wall.
Continue on, and jump to a jutted angled-ledge, turn the corner and run-jump
to another. At this ledge, run-jump to a large jutted ledge in the distance.
It’s not sloped enough for Lara to slide. From the large jutted ledge,
run-jump to the ledge, curving slightly to the right, to make it around the
corner of the wall. Follow the large ledge around the base of the castle and
banana jump around the corner of the wall to land on another large ledge
with another turret on top. Hear the singing grass again and find the Magic
Elixir hidden
within it. Continue on and just around the corner is a ladder – you’ve found
the back door in. Before you climb up, you may wish to collect just one
more Magic
Elixir which
is just around the corner – it means doing a tricky banana jump to the
jutted ledge to reach it. Jump back when you have it, then climb the ladder
and crawl all the way along the passage passing a closed door on your right.
Climb down the ladder at the end of the passage to emerge on to a large
courtyard and head through the open gate on your right (S). Follow the
passage to a large hall – note the passage in front of you on your right
with 3 closed gates blocking access to it. Take the passage on the left, go
down the stairs and find yourself in an area outside the entrance to each
Demon’s domain.
It
doesn’t matter which demon you take on first, but because of Revolver ammo
you need for Legion, best do that one last….
Belial:
Belial is a powerful demon believed to be the first of the fallen angels. He
is impervious to Lara’s earthly weapons and so Team Anubis will have to deal
with this one. Some spells and other paraphernalia will have been
transmitted down to the stronghold. Lara simply needs to read the spells.
Belial is not able to destroy these but he may have placed items beyond
Lara’s reach. Team Anubis has tried to anticipate his moves. Difficulty
Rating: 7
Legion:
“For he is many”. He’s easy to kill - but he won’t stay dead. He’ll keep
coming at you with evermore ferocious attacks. Eventually his Dark Soul may
be ‘exposed’. Destroy it to completely destroy Legion. A tough battle of
attrition! Difficulty Rating: 8
Madam Orr:
The unofficial leader. Treacherous and very deadly, Madam Orr was the Dark
Soul who exerted an evil influence over Demon Smalls at Demon Heights (see
UB~1 - Recruiting Demon Smalls). Demon Smalls does not recall much from his
‘time under’ but he suspects he was coerced into designing a spell defense
system that will neutralize Lara’s firepower. Madam Orr can be taken down
with a single shot - but it’s not likely to be that easy due to the
battlefield. Difficulty Rating: 9
Belial
Slide down to be confronted by a grunting and snorting piggy Belial. He has
two nasty hammers which can do some serious damage to Lara when hitting the
floor and he’s impervious to Lara’s guns, so don’t waste your time shooting
him. Move quickly to the N side and flick the jump switch. This opens a
hidden door just to the right of you so quickly run in there to a much
larger room and jump on to the white ledges – Belial can’t hurt you while
you’re on these ledges (nor can he hurt you on the blocks in the NW and SW
corners of the small room). Note the scroll holder in the NW
corner. Lure Belial in to the far side of the large room (near the door)
then sprint back to the first small room. Spot the large jar and move it on
to the tile in the middle of this small room. You may need to run out and
away from Belial’s hammer blows as he comes in after you repeatedly, but
eventually you can push it on to the tile. The hammer above swings on to the
jar and breaks it open, back flip quickly to get out of its way as it can
seriously hurt Lara in the process. Take the
scroll
inside and sprint back to the scroll holder and place the scroll on it. The
scroll summons Team Anubis to the small room so make your way back there.
They take care of Belial for you – you need to stay in the room to
ensure Belial hangs around to act as target practice for the team so try to
move around a lot, avoiding his blows with the hammer until he’s finally
killed. The easiest option is to simply jump on to one of the blocks that
the team is on when Belial enters the room, he will leave again while Lara
is on the block so jump back down to the floor to lure him back in. Take
the Stronghold
key that Belial drops,
and use it to open the door in the NE corner of the larger room. Go through
the door and follow the passage until you come to a large white ledge.
Flick the floor lever on the ledge to open the first door to the passage to
the 4th Lucifer Star. Continue W along the passage, up the stairs
and emerge outside the castle on to a walkway, keep running forward (heading
E) to the turret in the distance. Carefully run around the other side of the
turret to retrieve the Lucifer
Star from
the ground. Head back to the walkway and turn N. When you arrive at
the edge, look down and see a revolver clip on a ledge below. Hang
drop down to there, pick up the Revolver
Ammo and
run inside again (W and left) to face your next demon.
In order to get as much Revolver ammo as we can,
we best take on Madam Orr next, before taking on Legion.
Madame Orr
Head down the stairs to emerge in to a chamber with a fine mist over it.
Read the sign on the N wall: “Weapons suppression spell in operation” – now
try taking your guns out – you can’t! On the E side of the chamber is a shootable ball
with lava underneath it – how to shoot the ball when you can’t draw your
weapons?
Head back to the part of the passage which doesn’t have the spell mist and
look up SE to spot a crawlspace above. Jump up there and crawl through the
rope of the shootable ball’s base to move the ball which opens the entrance
to Madame Orr’s domain. Head back out and go through the lowered wall to
slide down in to her domain.
Madame Orr appears at the same time as you do, so start running as soon as
you land in Orr’s domain as she shoots green fireballs at you and you can
catch fire quickly and die. Madame Orr is protected by her 'Weapons
suppression spell' so you need to find a way to combat that, and fast!
Run to the jump switch on the W wall and flick it to make a sinkable tile
appear on the E side of the lava pool. This lava pool with the tile is the
only area where you can draw your guns and shoot Orr. So run around to
the tile, jump on the tile (from a distance so you can back flip to the
floor again after shooting her), draw the revolver while you jump to the
tile and kill Orr with one bullet, then immediately jump back to the safety
of the perimeter ledge before the tile sinks. As Orr dies, she shoots one
final blast of fireballs so keep moving after you’ve shot her to avoid her
“swan song”. Note: There is an easier way to kill Madame Orr, but
that's for you to find out! (savegame)
Once she is dead the trapdoor above the pole in the NW corner drops, so pick
up the Revolver
Ammo in
the SE corner before you climb the pole to exit this area. Flick the floor
switch in the niche on the right to open the second gate to access the 4th Lucifer
Star.
Follow the path and run up the steps. You emerge outside facing another
turret guarded by a winged skeleton bird to collect another Lucifer
Star.
Go back and once you go under the arch at the end of the bridge, look up
left (E) to spot the 11th
Secret ~ Revolver Ammo jutting
out of the wall. Stand Lara in front of the Revolver ammo and press action
for her to collect it. After you’ve collected the dagger, head back to the
walkway from the turret, turn right (face W) and look down to spot a Magic
Elixir on
a ledge below in the NW corner. Head over to the corner and hang-drop
down on to that ledge, collect the elixir and drop to the ground.
Head into the castle again and follow the path back to the 3 entrances to
the demons domains. Let’s take on the last Demon.
Legion
There’s a video link to
doggett’s video walk at the end of this section
After he’s dead, note the sceptre on the altar beneath the picture of Legion
with the evil, staring eyes. Look at the wall on either side of the
sceptre, they are eyes. But it’s time to move on, you’ll be back here later.
Pick up
Revolver ammo
from the NW corner, then head back out to the main chamber with the ramps
and fires to hear laughter and an echoing voice saying “For we are many” –
suddenly, a mini-Legion demon will appear on each of the ramps to race along
their tracks towards their fires – you must kill them all quickly before any
of them reach the fires, because if just one of them makes it, Lara catches
fire and dies. They don’t all rush out at once and some tracks are longer
than others so you have more time than some to kill – just watch the pattern
and note which arrives first, which has the longest track so you can wait a
few seconds before shooting etc. Its best to use the Revolver or Shotgun to
kill each one quickly. Once they’re all dead, the door to the N wall opens
so head over there. As you enter the new room you hear laughter again and
one demon, who decided to wait until Lara’s back was turned, suddenly rushes
off towards his fire – quickly run back in to the room and kill him.
Now you can head in to the room through the N door. The ramps and blue sparks should be a huge hint as to what’s going to happen as soon as you run-jump to the first ledge over the lava. A mini-Legion demon runs down the ramp and tries to push you in to the fire. From the main ledge at the room’s entrance, take 2 hops back from the ledge, run-jump to the ledge and grab the edge, pull up and immediately roll and hop back to catch the edge before the mini-Legion demon can push you in to the flames. Now either pull up and shoot the mini-Legion before it pushes you in to the fire (you’ll need the revolver to ensure it’s done quickly) or run-jump back to the ledge and take him out at your leisure with pistols. Once he’s dealt with you can now run-jump to the ledge safely. The next ledge shows two blue sparks and spikes. Two demons will erupt and try to push you in to the spikes as soon as you land on the ledge, AND one of the Legion’s on the far side will animate and start shooting blue bolts at you. So do the same thing as you did for ledge 1 to target the mini-Legions, but you’ll have to jump back to the ledge with the spikes in order to shoot the Legion demon. You’re unable to target the Legion demon with revolver and laser sight from the far side – he simply won’t die. A lava tile will rise out of the lava once the Legion demon is dead – to allow you to cross to the other side. When you make it across, the other Legion demon will wake up, so kill him quickly (savegame). Take his For We Mask and pick up the Are Many Mask the first Legion demon left behind
Video
(starting at 12:37).
Head back to the other side to see scarabs come running at you
(mini-mini-Legions!). Quickly run in to the N room where you killed the very
first Legion and place the masks on each of the eye receptacles. Beams will
appear from the eyes to make
The Dark Soul of Legion
appear on the sceptre. Take it quickly (the mini-mini Legions are still
after you!). Head out to the main chamber and run left through the (W) door
and run in to the new room. Slam the soul of Legion down onto the
spike in the middle of the room to kill him (and his legions) for good. Pick
up the
Shotgun ammo
SW.
Head through the gate on the S wall which has now opened and head up the
stairs. Emerge on another walkway, head to the turret at the end and take
the Lucifer
Star
(nope, this time it is on the other corner).
Head back over the bridge, through the arch to the walkway and go down to
the north. Run ahead and then around to the right for some Revolver
Ammo in
the SE corner, and then return to the walkway. Go south this time and make
your way to the edge of the south wall, and then face SE and spot the window
up in the castle wall. Stand between the two stumps and run-jump and grab
the ledge at the window. Run along to the end of the ledge. Go as far as you
can over the ledge, then run-jump left around the corner to another part of
the castle and grab the higher ledge of the battlement (Lara won’t grab the
lower part) which is as far as possible against the wall (almost a banana
jump). Pull up and head inside, left/left and right around the corner in the
back, into the small room first (which you could see in to from the window).
Pick up the Manna From Heaven from
the pedestal. Go back a bit and spot the tile near the doorway. Save, then
run over the Timed tile to open a door down the stairs, so sprint
down there and through the door before it closes. Back in the familiar
crawlspace, head right (E), climb down the ladder to the courtyard and head
through the door towards the Demons’ domains again.
The 4th Lucifer Star
Head back inside toward the demon entrances and go through the 3 gates again
to make your way back up to the top of the outside again. Head around to the
NW to find a block and the rope hanging above it. Look to the S to spot a
short ladder above. Hop on to the rope by standing under it and jumping up
and pressing action to grab it, and swing until Lara can jump off and grab
the ladder to climb to the top. Head around to the S side and climb up on to
the block. Turn around to face the castle and jump in to the passage. At the
end of the niche, turn around and climb up the ladder to the top. Run
forward and collect the last Lucifer
Star.
Head back down (route; ladder SW, drop out to floor, down ladder at rope and
safety drop, into passage at E side of building and down stairs) to the 3
demon room entrances again and place the 4 daggers on each spike in this
area – two spikes on the W side and 2 on the East side. The floor of the
central part of the room opens up showing a whirling galaxy. Jump in to find
yourself in an ornate hall.
Run to the end and spot a glass of Bombay
Sapphire Gin (Lucifer
has good taste in gin) on the table 'for Lara Croft', the sign says – how
nice of Lucifer to provide a drink for you. Take the glass and the door
beside you opens. Enter the door and a cut scene shows Lara walking in to
the room, she stops and says, “Ok, so which of you two is the devil?”
The camera swings around to show Anubis and Demon Smalls sitting on a throne
together, they both point to each other and say “He is”
simultaneously.
Make sure you watch the final cut scene.
The End
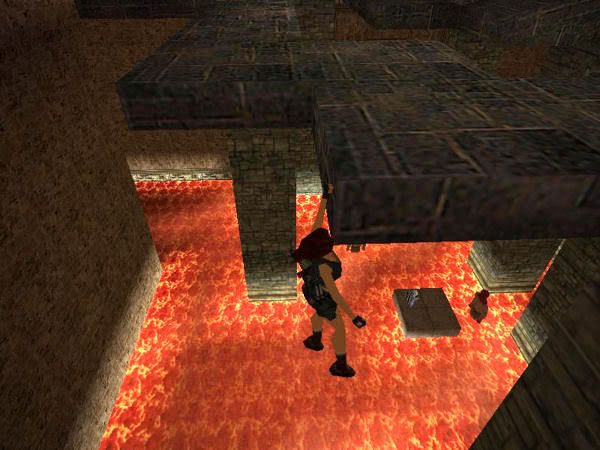
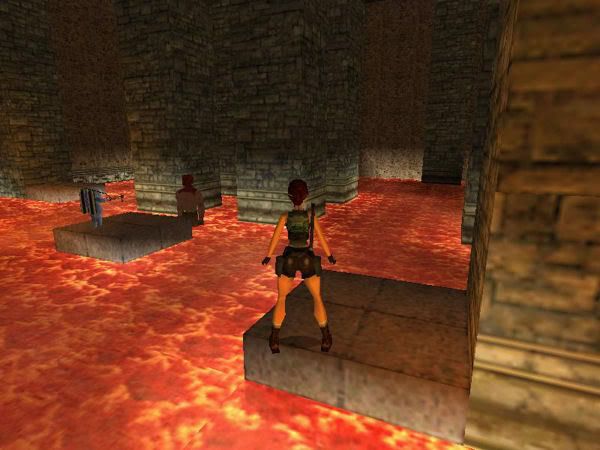
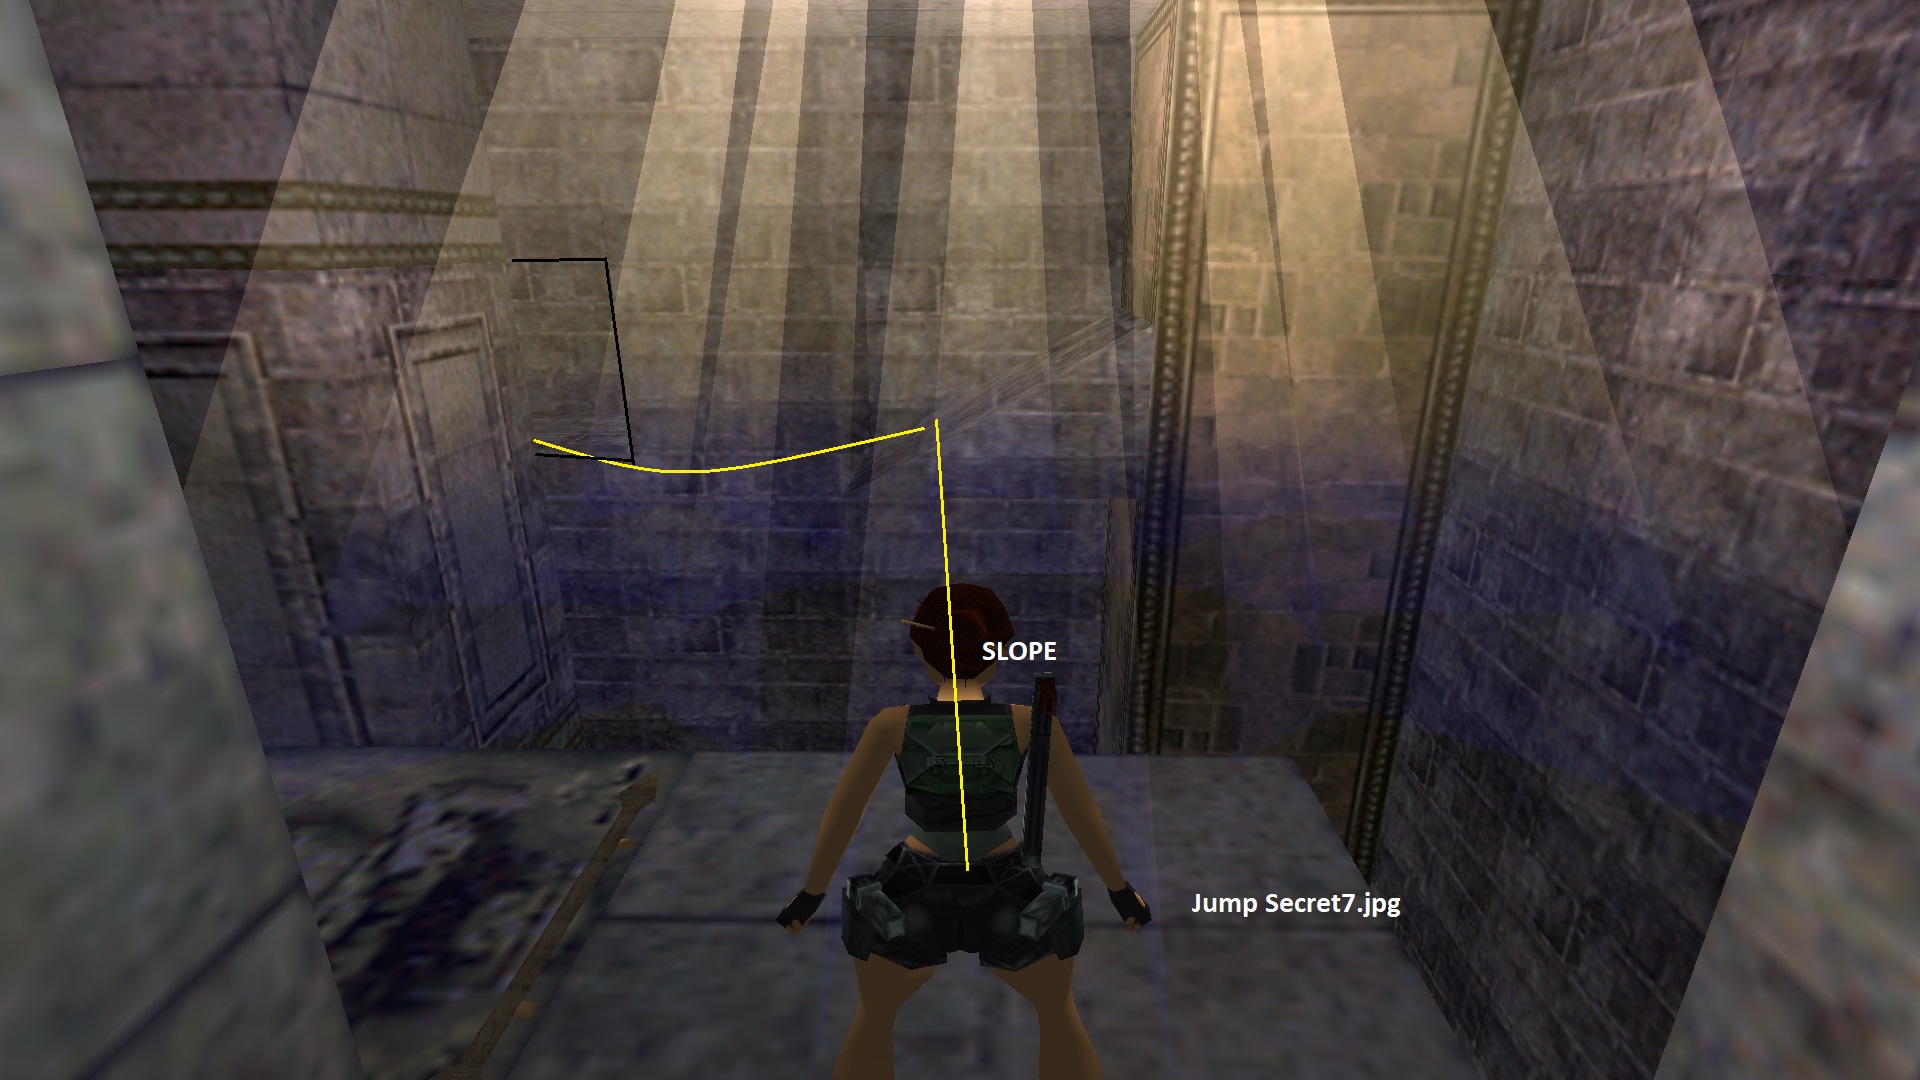