THE QUEST OF
GOLD.
Gold Edition.
Revised
levels including the Bonus levels.
Level series by Thibault Chatelus (TC 14)
Walkthrough by G&D Productions.
IMPORTANT NOTE: BECAUSE OF USING A DIFFERENT GAME
ENGINE THE N AND S DIRECTIONS WERE ALL CHANGED, WE TRIED TO CORRECT THEM AS
MUCH AS POSSIBLE, BUT SOME MIGHT HAVE SLIPPED THROUGH, SO IF FOR INSTANCE A
DOOR ISN'T IN THE N, TRY THE S SIDE
|
Level
Names and Links to the Quest Levels |
||
|
21 The Hall of Legends several stages between the next
levels |
||
In some levels not all enemies are
mentioned, to leave an element of surprise
The Crowbar.
Pick up the flares and leave the cave W and come to a deep canyon
with railway tracks below. There are some buildings on the E side of the
canyon, first safety drop down on those tracks below. Turn around and run to
the end, standjump (no Ctrl) over the gap to the next part and hop back grabbing the rail (ladder). Get down fast as a Bold
Eagle will appear. Once on the bottom pick up a small
medipack NE and go for the all-important Crowbar on a workbench SE.
Go back to the ladder and climb up. Jump N
to the next piece of rail, face W and to the wall where that small tree is,
there’s an opening in the rock wall. Go into a cave and shoot a bear,
follow though S and at the end of this passage you can climb the Ice ladder on
the left hand wall and there, another bear appears. Jump into the mouth
of a cave SW and you are at the Cabana. 2
Baddies stand guard near the Cabana; get some Uzi Ammo from one of
them and the Secondary Key from the other. Have a look around; you can
go in 3 directions from here.
S route: Valve Wheel # 1.
Go S and just left of the opening to the forest is a
Crystal; shoot it to get a small medipack. Now go into the next forest area (N) and shoot the Bold
Eagle, climb over the ridge to the left and find Revolver ammo up in
the NW corner of the forest. Look in
the trench (S) behind the ridge you climbed for Secret#1, 2x
Shotgun Ammo and Gold Bars (behind the next tree),
then go over the ridge in the E to find another small medipack in the NE
corner of the forest. Continue to the S and around
the corner right, follow through, and shoot a guard near a building.
Go around the left side of the building and use the Crowbar on Valve Wheel #
1 there.
The Fuse.
E of this building is a tunnel into the rocks, follow to the end to come
to a canyon, safety drop to the floor and open the door N (one time I had a
bear there and one time not, the soldier from the fly by leaves some Shotgun
Ammo). Crawl under pipes and use the switch E (brings out an icy walkway
back in the canyon). Go out and go right, climb the ice ladder almost to the
top to back flip and roll, grabbing the icy walkway. Go over to the other side
and get the Fuse (facing E) from the left crystal and go back to the
walkway. Spot the opening E and take a run jump with CTRL to get into that
opening. Watch the drunken Yeti walking around down there.
Drop down and get the 2 x Uzi Ammo
(S wall) you don’t have to shoot the Yeti as it is too drunk to do any harm. Head to the tree
Lara is looking at and stand with your back to the
tile on the wall, now crouch and pick up Secret
#2, the Golden Skull from under the tree. Go back out, back to the icy
walkway, into the tunnel S and through the forest to the Cabana Square. Head
straight and into the cave N, down the passage SE and follow back to the
railway tracks in the deep canyon. Go N and then left (E) get some flares
and notice that receptacle on the wall. Turn back and open the door W. Go in
and kill a guard, he’ll leave a small medipack.
Go on and find some flares on a workbench to the left, jump into
the opening in the floor there and crawl through. Open the trapdoor at the end
and climb up to place the Fuse in the NE corner of the generator. A gate
opens in the N side of the Canyon. Get the small medipack from the S
side of the room and head back through the tunnel, climb up at the most left
(NW) corner at that red barred fence and go out to the Canyon.
The Secondary Complex Key, 2 more Valve Wheels.
Head carefully S over the track, it’s damaged. Stand-jump
from one step back from the edge and a run-jump to the next part of the track
and go up to the Mine cart. Shoot the two Guards down on the
tracks while you slide down. In the E are some buildings so make
your way there. Climb up to the pipe and get the Valve Wheel # 2. Turn
around and climb in the opening of the building and get Valve Wheel # 3.
On the workbench is a small medipack. When you leave there will be a
guard, so shoot him and head back N (you can go over the snowy side of the
track and jump back to where the Mine cart is) and up to the Canyon, to the S
over the damaged part and into the same passage in the W wall again (where the
tree is), jump to that ice block in front of the opening. Follow though and
climb the ladder. Climb up into the mouth of a cave (S wall) and you are back
at the Cabana.
W Route: Valve Wheel # 4.
Go W past the Cabana and into the Ice cave there. Shoot the Bear and go
on into the NW corner where a wide opening gives access to a deep cave with a frozen
lake. Drop/hang from the edge and go shimmy right, around the corner, to where
you can drop/grab a lower crack, then drop onto the pillar in the dark corner,
roll and run-jump/grab to the pillar W. Enter the CS and follow to another cave
with a switch in the E (shoot the Crystal). Pulling that switch will drain the
lake in the deep cave, get the Flares (W) on your way out and crawl back
to the deep cave, drop from the side of the pillar and then down into the dry
lake.
Go into the opening S and into the next cave; watch out for the icicles
that drop from the ceiling. Shoot as many ice crystals on the floor as you can
and the door S will open. Jump down and up E and open the door. Shoot the guard
inside; he leaves a small medipack behind. Behind the table SW is 2 x
Shotgun Ammo. On the workbench is the Cabana Key.
This triggers some rolling boulders, so get out, traverse the ice cave
and jump back up NW. Back to and out of the empty pool and climb that ladder
SW. Go out of the next cave to come back to the square. Go straight to the
building and use the Cabana Key on the lock down, left of the door. Enter and
get Valve Wheel # 4.
The Secondary Complex.
Head out and E, passing the Cabana and jump over the
corner of the Canyon to the ledge where you started this level. Look for the
snowy ledge on the E side of the Canyon and run-jump over to it, climb up. Head
into the open door, shoot the guards and pick up the Shotgun Ammo
one leaves behind, there are also Flares on the desk. Go to the small
tree NW, the one behind a table. From there take a
stand jump also SW to another tree there and pick up 2 x Shotgun Ammo
and Secret # 3, Golden Coins. Jump
back and go in the building.
Open the door in the N. On the workbench is more Shotgun Ammo and right next to the door in an
alcove some Flares, then use the Secondary Complex Key. Go in and shoot the next Baddy
and pick up the Uzi ammo he leaves behind as well as the Uzi ammo
on the right in an alcove. Follow through and open the small door E. Go in and
shoot the next Baddy. Open the S door, and another one, find and use the
switch in the back. Go back through both doors and into the new open door E to
place the 4 Valve Wheels.
A door in the room with the switch is open now, so get in there. In the
SE another door is open, and another till you get at an office place. On the
desk is Revolver Ammo. Open the small door W, shoot the Baddy and
pick up a Medipack. On the desk is the Gold Mine Key, shoot
another Baddy and leave W, go left and out W. Get back to the green
area, follow through and where you jumped for a secret by that small tree
behind that table, just run down onto the rail tracks. Go N and left; remember
that receptacle on the left? Use the Gold Mine Key there.
The door S is open, shoot the guards
and get a Medipack from one of them and Shotgun Ammo from the
other. Go in and slide down to the next level.
The guards are friendly, and help you to
kill the mutants (wendingo’s).
To The Main Crossing.
Slide down the ramp and look how the guards kill a
mutant. Pick up the Flares on the left, turn around go around that
wooden support to crawl into that crawlspace there. At the end, crawl out. Use
the Crowbar on the door E; better wait a bit, as there is a mutant lurking. Let
the soldiers do their work, but if they don’t succeed you’ll have to finish off
the mutant. (In that case one of the guards will have dropped a small
medipack).
Follow the rail tracks and just look at the crate with
Explosives; that is for later. For now continue S and push the little cart out
of the way and keep going over the tracks. You’ll arrive at the Main
Crossing of this mine.
The First Detonator Card.
Find a crawlspace in the E wall behind the big pipes.
Crawl out the other end and stay on the crate to shoot the wolf, jump
down and run/jump into the opening across, you need a Key Card here. Another wolf
is showing up. Now you can get the Flares NW.
Follow through N, over
the tracks, and see a room with burning floors to the left. Run-jump to the
orange crate and from there NW. Push the contraption first N and then pull/push
it to the S on that brown tile. A flame around the corner of that orange crate
is out. Jump back to the orange crate and you can walk on the other crates as
well. Shoot the electric box E, use the switch. Jump N onto the only
safe part of the lower floor to get the Revolver Ammo and some Gold
Coins as Secret #1. Jump back
to the boxes.
Stand on the orange crate and see that you have to
push/pull that contraption to another brown tile NE. This opens a door
somewhere on the railway tracks. Jump back W to the tracks and go left (N).
Push the mine cart all the way forward and grab the Access Card from under
it and also find some Shotgun Ammo on the left.
Go back over the tracks, go right and use the Access
Card on the door right. Go through another door and find the Detonator
on the desk. Leave and crawl back through the crawlspace to the Main Crossing. (In
my game all Guards were dead and I had to shoot that mutant myself)
Go N from behind the pipes and jump onto the ice rise with the crates to
the right and get the Shotgun Ammo on the floor. Now go back to the
pipes and down the tracks (N).
The Desert Ranger.
Go back down the ramp to the beginning of the level,
where the crate with explosives is. Open the small door N of the crate, go in
and place the Detonator NW. An explosion follows, go out and enter the new
opening left. Go right and up and pick up Uzi ammo. Continue on the rail
tracks S op a ramp, passing a crane and jump over the lower track, passing some
guards, open the door on the right (N). Nothing to do in here but you have to
go in to trigger a cut scene to see that outside the guards are
killed. So pick up the Desert Ranger one leaves behind. Go back (W) to
the Main Crossing; you’ll be back here later. Go left at the explosion site and
arrive in the Main Crossing.
The Lasersight.
Go to the NE corner of
the Main Crossing and go up the tracks, enter in the opening on the right and
in the new room drop into the hole (safety drop in a corner) and swim in
carefully as just around a corner is a nasty machine. Time the swim pass this
machine (I stayed on the bottom and swam through upwards). Around the corner
are two more, so time that as well. This time I swam close to the ceiling. At
the end, climb out. Get some Uzi Ammo from the workbench E. Then go N
and open the small door, go left (N) over the tracks and all the way at the end
is the Laser Sight. Go back to the room, and up
the ramp S. Shoot the electric box NE and use the switch, watch the fly by. Go
up the ramp E, the door will open and you’re back at the room with the hole in
the floor. Leave SE and go down the tracks to the Main Crossing.
The Second Detonator.
Go SE, take the E side opening and go up the tracks, halfway up Lara
will stare at the wall. There is a small crack there. Take the Laser Sight and
Desert Ranger and shoot the swinging ball.
Continue on the tracks and find an open door. Go further and to the N
into another cave, shoot the 2 wolves and at the end the electric box to use
the switch. The fire on the tracks is extinguished. Push the mine cart all the
way to the end and the fire on the on the grey tile is off so you can pick up
another Detonator. Go back to the Main
Crossing.
The Azot Bottle.
In the Main Crossing go
back down to the tracks (near the pipes) that go down to where you exploded
that crate (N) enter that same tunnel again and follow through, jump over the
pit again. Enter the door to the right again and use the Detonator in the back
of this house (W). Go out and to the right, into the open wall there. Follow
through to a Gold Cave. You probably have to kill the miners there. Go
all the way E and find a crawlspace, crawl through and pick up Secret #2, a Golden Skull and a small medipack.
Go NW to the tracks there and into an alcove, open the
door and pick up the Azot Bottle. Leave and go back to the Main Crossing.
The Excavation Area Key.
Go to the S opening, push the cart so you can get pass it, follow the
track and go right where the green arrow points. Shoot the Fan and enter. You
enter a huge room. Walk over the tight rope to the other side. On the left is
an opening in the wooden wall. Open the door, shoot the electric box on the E
wall and use the switch. Watch the fly by. There is another door to open NW,
and on the desk S is the Excavation Area Key. Leave this building.
The Oxygen Bottle.
Jump back to the ledge and walk S. You have to reach that icy corner NE.
Use the rope lowered by the crane before to swing over to that corner and take
a running jump with grab W. Look NW and jump into the alcove, shoot the ball in
there to stop a burner and get the small medipack. From there a running
jump (no grab) to the hanging platform S. Take another running jump onto the
crate hanging from the crane, then again a running jump with grab to the ledge
in the W.
A worker is there, after taking care of him you can enter this building.
Time your run passing those nasty machines and grab the ladder on the right
wall and climb down (or check the health and just run down).
Run through the passage and shoot another angry worker. Go up the ramp
and halfway up you can climb the ladder to the left. Avoid the drills by
climbing left or right. On the top you can climb off on the right, more drills
follow, just crawl. On the shelves is the Oxygen Bottle, and under the
shootable grey Fan (crate) is some Desert Ranger Ammo.
Shoot the gray Fan up in the dark NW corner and climb in. Walk slowly
left around the corner (gate) and hop into the alcove to find some Shotgun
Ammo, and then return to the Main Crossing by sliding down the rest of the
track.
To the Carbon Bottle.
Once on the Main Crossing, go left and left again (SE and take the S
side again), pass the cart and this time go straight. Pick up some Shotgun
Ammo on the right, keep on following the tracks and at a crossing go left.
Shoot the Fan there and use the Crowbar on the door behind it. Shoot the
electric box and use the switch. You’ll see a door on the tracks opening up. Go
back to the tracks and go over the bridge (N). Don’t shoot the soldiers, there
are here to help, remember? You have been here before (way up in this room),
keep going and shoot that Fan (crate) that is in front of a ladder.
The Carbon Bottle.
Climb the ladder and the second one about 3 blocks up and back flip into
a small opening. Look S and a running jump to that small dark ledge and another
one W. Walk over the tight rope, climb higher and jump/grab the top of the
building. Get the Carbon Bottle from the shelves. Go to the E side and
look down, jump to the ledge there and go into the building, down the ladder
and turn and take the second ladder to the ground floor. Go back to the bridge
and jump to the ladder E. Down in the water pick up 2x Revolver Ammo
and swim over the fence to get Secret
# 3, Golden Bars.
Swim to the W wall behind that wooden box, hoist out
off the water and back flip on the box. Jump from box to box and the to the ladder. Climb as high as you can and back flip
onto the tracks.
The Big Drill Room.
Go S down to the Main Crossing and to the NW.
Follow the tracks, through an open gate and go right into a room with a small
crane. Go left and save here. Be sure to have your health topped up, as you
will loose some of it. After the first two machines you have some respite but
then there are two more to pass. Then cross the tight rope, shoot the worker,
or let the soldiers do it for you, but in any case, pick up the Access Card
he leaves behind. Continue E through the newly opened up wall and go to the
left, back to the room with the small crane. Climb up E into the building and
use the Access card. Time the drills (or crawl underneath), shoot the
electric box and use the switch. Go back out and back to the Main Crossing.
Once on the Main Crossing, keep going straight (S) and to the left near
the crates a door has opened up. Go the W wall and climb up on the ledge to use
the Excavation Area Key there.
Go out and left and keep going left (opening W in the SW corner) grab the small
medipack from the workbench and go through the open gate. Go over the
tracks and open the door on your right. Place the 3 Bottles at the far
end in their receptacles. This opens a door a bit back to back on the tracks
and find that door that is on your right. Shoot the
electric box and use the switch.
A big explosion follows, go back out
and go left to see the ice is gone under the big drill and the drill is
working. Go to the ladder W and descend, find and jump into the opening S.
ONLY FOR MAC: The leveljump is at the
slope just before water section. So basically you get part 1
: Earth - Fire and part 2 : Water - Ice. All secrets are in the first
section...
Go forwards and pick up some Flares under the
jug. Follow through and over a wooden bridge, go left and shoot another jug for
a small medipack. Go E into a passage there and watch out for the Indian
in the next room. Enter the opening S, the gates will
open when you approach.
The Moving Sand Key, the Jar of Elements.
Head into the cave, go into the tunnel W and turn around at the end,
back flip and jump grab to a ledge above to use the switch there. A small quake
occurs, get down again. In the S there is an opening in the wall. Go in and
into the muddy waters, head to the NW corner. Pick up the Moving Sand Key
from the bottom. Now go to the far end S, around the corner right and up the
ledge and put the Moving Sand Key in the lock. A sort of a bridge appears W.
Jump on it and another jump to a small room to get the Jar of Elements.
A cut scene shows a gate opening.
Go back (E) to where you used the key and on the right is the now open
gate. Push the block with the face on it (E) once. Then push the grey block as
far as it will go (N). Push the block to your left (E) into an alcove so you
can turn left and pull the block with the face on it once, go around to the
other side of it and push it all the way on its tile next to the popping up
spikes.
Pull the E block out of the passage, go
around it and pull it in the passage where the face block came from so you can
go around it to the room behind and shoot the two jars for some Shotgun
Ammo, a small medipack and Secret #1,
Golden Coins.
A Torch.
Now back to the spikes and time your run over them and
be aware of the Teeth doors in the passage further on. Drop down into the grass
and shoot two Wendingo’s. Head S and slide down, to a room with a camp
fire where an Indian attacks. In that bush of tall grass near the
entrance is a Torch. Carefully light it at the camp fire and ignite the
skin hanging on a pole.
The Skeleton Key.
Leave the Torch and climb into the opening N and shoot an alligator.
Jump down in the rocky place, grab the Skeleton Key from the ledge on
the lower floor and climb back out, back to the campfire. Behind the wooden
through (NW) is the open door you got by igniting that skin, so jump in, climb
the ladder and climb off to the right. Use the Key on the lock and enter. Kill
the Indian and go E and place the Jar on the left in its receptacle.
Bridge Cave.
Go through this passage and watch out for the clanking
knives, and walk slowly onto the first part of the wooden bridge. The middle
part is breakable. Turn NW and spot a rock near the W wall, be sure Lara has
some health as she’ll loose some of it. Just run off the bridge near the ropes
onto the rock and jump inside the opening W. You’ll hear a door opening when
you go up the ramp, pick up the Shotgun Ammo and another batch on the next
ramp. On the top is Secret #2, Golden Bars. Go through the open door, turn E
and you are back at the bridge.
Fiery Traps.
Now cross the bridge, kill the Indian, and follow
through to a lava chamber. Go into an opening W and side flip over the fence to
use the Crowbar on the lever (face S). Cut scene of a block lowering. Back over
the fence, down to the lava room and the block in front of the wooden bridge S
over the lava is gone. Run and jump over to the other side of the bridge and
another running jump over a pool with lava and an emitter. Next trap, grab the
monkey climb and time your way through the emitters. Drop off behind a
balustrade and jump into the opening in the floor. Follow through to another
chamber with lava. Jump to the block SW and grab the monkey climb. Go all the
way to the other side, let go and grab the ladder and shimmy left. At the end
be sure to have one block above Lara’s head and back flip/roll to a block and
shoot the jar. Under it is
Secret #3, a Golden Skull.
Now for some jumping, side flip to the S and slide/jump from block to
block and grab the ladder. Shimmy left around 2 corners and
descend, almost down to the lava, back flip with roll and grab the next
ladder. Go around the corner and almost touch the lava and back flip, slide/jump
till you can stand safe on a block W. Use the Crowbar on the lever (face SE)
and see a gate opening up. Go E and just a hop and grab the slanted block on
the left and hoist up, slide and jump and at the end grab the safe block.
Jump/grab into the opening E, you leave this room through an opening NE. You
end up at the Bridge Cave, lower section. Jump from block to block to the other
side.
Timed Fire Jump.
In the W wall of the next room is a walkthrough wall,
use the switch there and run back. A block lowered in the room with the campfire, take a running jump with grab to the block with
the campfire. Shimmy around the corner and pull up on that next corner. From
there take a standing jump to grab the ladder and climb up.
Pushblocks, the Jar of the
Elements.
N are blocks to push, take the one on the left (face)
first, push it in once. Now back to the room and pull the right block twice,
run around it and go into the passage, left and pull the face block once. Run
around again and push it as far as it will go. Now place it on the tile with a
face. The door S opens, walk the tight rope over the lava, grab the Jar of
the Elements from the pedestal. You have to cross the lava pool again and
this time, also time the emitters (I took 9 steps
till Lara started to loose balance, make her regain her balance and wait till
the emitter dies down. Then take a standjump to grab the floor ahead).
Once back, the door S is open. The other door at the end opens when you
approach and jump down in a room you’ve been already.
Go E and at the end of this corridor, place the Jar in
its receptacle. Enter and go up some ramps, kill the Indian and make
your way through some Teeth doors.
Slide down and (mac
version only) you go to another part of the level.
Kill the Indian, jump over the fence in the
pool and swim down. Halfway down S is an opening, get in there, follow through
and watch out for the croc, keep swimming and use the underwater lever at the
end of this passage. Swim back and where the croc came down you can get some
needed air. Swim to the pool and up and N is another opening, Lara just opened
that door. Follow the tunnel and get out of the water. Follow through and climb
down into a pit at the end. Go to that bush and face S to use the Crowbar on
the lever there.
Back up the ladder and the door on your left is open,
use the switch, back to the pit you just left and see it is flooded. Climb on
the floating block and pull up even higher. Just keep going through a passage,
meeting another Indian. At the end, jump down into an opening in the
floor and then again go down. Follow the tunnel to a Big Cave.
The Big Cave, Underwater levers.
Shoot the Indian and pick up a small
medipack NE. Look up at the ceiling there and spot the blue ball, shoot it
to open a gate in a steep tunnel in the E wall. Go all the way to the S and get
the Desert Ranger Ammo near the S wall. Head N again and go up the steps
W to where there is a small fence on the left. Over the pit is a crawlspace, go
up the steps a bit more to where you can grab up to
the W wall. Shimmy left around the corners over a deadly pit
and hoist yourself into the crawlspace, shoot the vase and get the Cistern
Key. Get back out and be sure to shimmy back to the right to drop onto the
safe ledge, go down the steps and return into the passage NW, where you entered
this place. Watch out as there is a Wendingo on the loose.
Flood the Cave.
Climb up in the end, use the Key E and go into the
room to flood the Big Cave with a floor lever. Go back, swim to the Big Cave
and swim up looking up for an air pocket between the vegetation in the ceiling.
It is about where the fenced off pit is, this will be a refuge and also a
closed gate is to be found there. Save and go down to the E wall, swim into
that steep sloped tunnel in the E wall. Throw the 1st Underwater lever
there and a gate opens NE in the Cave. Swim back down and go down into that deep pit
between the wooden fences, a 2nd Underwater lever will open a gate SW in
the Cave (under the bridge), revealing a switch in the end of the passage, so
that one is for later. Swim out of the pit, go up to get some air before you go
straight into the opening SW in S wall, follow to a ladder in a shaft and use
the 3rd Underwater lever (S wall) there to open another gate in the Big
Cave, get some air above and swim out again, to the N and go right (W) at the
deep pit, in the W wall is the UW room you just opened.
The Little Wheel.
In the top of that room is the 4th Underwater lever, it will open the gate in that air
pocket of the Big Cave, so swim out and go up
into the air pocket. Climb out and follow this passage into a cave with a Skull
on a pedestal. Use the Crowbar lever left to kill the flames at another Crowbar
lever and jump on the other block to get the Little Wheel from the Skull
stand. Head back to the Big cave, swim S and right to
climb out on the E side of the broken bridge. Go into the structure towards the
closed gate (behind it is the next Jar of Elements) and to the left is that
Crowbar lever; use it to raise a block in the big cave, close to the deep pit.
Well that’s all for this run, go back to the N, swim
into the NW passage (the start) and back up to the room E where you flooded the
Big Cave before. Use the floor lever again to drain the Big Cave and return
there.
A Torch.
Go up the stairs, under the bridge go left, use the
switch in the end of the passage and see a wall torch being lit. Go out, S down
the stairs, shoot a Wendingo and climb that raised block NW (face it W)
Jump into the opening W (you’ve visited before) and pull the push block out of
the wall, put it aside and grab a Torch from the pile.
Go out to the ground floor and to the SE, jump in the
windowsill E. Hop with the Torch up and up once more and follow to where you
can light the Torch. Turn and throw it down, use the Crowbar on the lever and
see another door opening. Get the Torch and leave. Kill the Indian and
pick up the Torch. Go to the staircase in the W; go up to the S wall and hop W
onto the ledge with the bridge. Leave the Torch there so that you can pick it
up later. Go down to the ground floor and enter the S passage, climb up the
ladder in the end, back flip and enter the door there. Shoot the Indian
and get the second Little Wheel from the pedestal. In the back of this
room is another door.
Go back out and to the Big Cave, NW into the passage
to go to the floor lever and flood the Big Cave again. Return there and swim S.
Climb up the W side bridge and get the Torch, now slowly walk down the bridge
into the water. Swim up the E side bridge and go to that closed door, carefully
light that skin to the right.
Room for the
Wheels.
Go in and jump to that bridge to get to the E wall.
Use the 2 Little Wheels you’ve collected, the fire S will go out so you can use
the lever. The wheels start turning and the pool is full of water. Jump
into the water, grab the Jar of the Elements from the pedestal and swim
up to the broken bridge and pull up. Leave this room, back to the water and
swim NW into the passage to go to the floor
lever and un-flood the Big Cave again. Return there and head S, into the
passage SW, climb the ladder and back flip, go into
the room where the Little Wheel was. The door in the back (SW) of this room has
finally opened.
Get into the water and follow through, it is a long
swim and a block will lower when you approach. Swim up at the end of this
passage and climb out on that the ledge in the water. Take a running jump (side
flip) over the balustrade and place the Jar of Elements in the S hallway on the
right. Some more swimming to do, at the end are wooden fences, get the small
medipack in front of the fence, swim up climb out E.
Timed Run.
Go into opening E, kill the Wendingo on the ice
in the next room, run over the ice it and collect some Uzi Ammo in the
SE corner of the next room. Run around to the other side (NW corner) and save
behind that trigger tile (facing S). Look E and spot that Timed door. Run over
the trigger tile, turn right after the pillar, jump over the balustrade in to
the corner to the right and keep running and jumping to the NE and into the
open door of the E wall.
Lower Passages.
Go down some slopes and arrive at a hallway with snow
on the floor. Kill the Wendingo in the room, follow through, pick up
some Revolver ammo and keep going, passing a block with spikes on your
left. In the next room is an Indian and under that jug is a Medipack.
NE around the corner is a lever. Use it and go to the block you just passed,
the spikes are gone. Jump on it and up to the ledge above.
Block Puzzle Room.
There are 4 pushable blocks in this room. Your goal is
to push them on one of the icy tiles in the N, E, S and W. The clue is to look
down through the ice and you can see a tile on the bottom, the same block
should be standing on top of it. The door NW opens so jump in and into the
water. Get another Jar of Elements from the pedestal, swim back up face
N, pull up and back flip back to the Push Block Room. Get back out of the room,
down on the block with no spikes, NE, through the icy caves, into the passage,
up the slopes to the Timed door. Go down into the room with the frozen pit and
into hallway S to place the Jar on your right.
Watch the cut scene then jump to that statue in the
pit behind the balustrade and safety drop to the bottom. Into the opening N and
slide into the next level.
Level 4 - Portal of the Great Spirit.
In and around the Shaft.
From the Indian sanctuary you’ll slide into a new
area, in this hall is a closed door up L and a Face
tile up in the R hand wall, climb up through that Face Tile and get Secret
#1, Arrows, Shotgun Ammo and a Pile of Golden Coins. Head
back out and proceed to the N and just before you get onto the bridge a flyby
will show the Shaft and surroundings. Cross the bridge, into the next
room and find the blue button in the far R corner, it will open that door you
saw opposite the Secret room. Standing W of the pillar in the room with the
button is a blue box, shoot it to get the Flares and head back S over
the Bridge, go down into the hall, shoot an Indian and get his small
medipack. Enter the room ahead and up into the W opening. Follow to a room
with a Golden Pond.
Do a L curved stand-jump around the hides to shoot the
blue box SW and get the Shotgun Ammo, jump back and stand besides the Spike
ledge, do a run-jump/grab past the Spike ledge (I never touched the Spike
ledge) to the Golden Blade ledge and shimmy around to the N side, pull
up on a corner (the Blades will never get activated this way, you can also
crawl under them) and turn facing the next Spike ledge a stand-jump when the
Spikes are just coming up and immediately another stand-jump to the safe ledge.
Head down the E side and go around the deadly yellow
pit to come to a bridge over the Shaft, one level down. Cross over to the N
side, shoot an Indian and drop into the hole in the floor at the gates,
go past the burner-traps and come into the Shaft one more level down. Grab the
monkeyswing under the bridge and go to the other side, drop and grab the
crawlspace there, crawl through and come to a push block. Pull it W once, turn
left and crawl out, push it W once more so it sits on the dark blue Tile, now
the spikes are gone and the block can be moved to the E side to the tile with the
face. The door opens NE. Go through and save before you come to a Spike-trap.
Stand a step back and run over the trap as the Spikes go up, two more nasty
Spike-traps and you can climb down to the Zip-line, grab it and go all the way
down to the opposite wall, grab the crack and shimmy R to the crevice with the Flares.
Shoot the grating and climb in backwards a bit and
back flip. Under the bench is a Medipack. Look up S and shoot the ball,
this opens a door further on (out of Ammo? go do
the ladders first). Go climb the ladder and shimmy around, climb as low
as you dare to go and back flip/roll/grab the next ladder. Shimmy around and
you can climb to the floor. On the block SW is Revolver Ammo. Go N,
jump/grab the ladder, climb almost to the bottom and back flip/roll with grab
to a ledge and shimmy right. Two huge hammers come crushing down.
Look for a ledge with a switch in the corner NW and
jump there as the burner is off, quickly hop back and grab the edge, wait till
the Burner is off again, pull up and backflip to the Hammer ledge. Run through
the open Hammers or shimmy past to the Totem. Behind the pillar E is an opened
door, you can get there by jumping to that Spike-ledge and immediately another
jump to the door (or just run over the corners of the Spike-ledge to the door
or side flip and hop)
The Torch.
Now you are at the Shaft again, to the L are burning
Skins you need later, cross the bridge, pick up a small medipack and go
down in the next room. Take care of the enemies and go to the E wall and around
the corner right and just look at a Torch between some grasses. Leave it
for now and back to the ladder and climb up, climb off to the right. Use the
button and watch the cut scene, back to the ladder and down. Now go for the Torch.
Take it to the exit of the room W, stand against the wall under the opening and
jump. At the highest point hit "1", as if you pull out the guns and
Lara will drop the torch in the opening (you can also jump into the opening
from a block S). Climb up, retrieve the Torch, go over
the bridge and side jump onto the spikes when they are up and jump immediately
forward to the ledge with the hammers. Go through the hammers
and jump on the block with the burner (and switch) when the burner is off.
Standing in a corner is quite safe. Best way for me to ignite the Torch is
standing with your back to the wall in the NW corner and when the flame is out,
turn a bit towards the tile and use Ctrl, Lara will
then ignite the Torch. Go stand back to the wall and wait till the flames are
out again and then jump to the middle ledge.
Go W, into the room with the spiked ladder and this is
a bit tricky, stand on the raised floor near the two statues left and right to
ignite the wall torches. Lara has to be standing exactly in the corner to just
do that (use Ctrl). The spikes disappear so throw away the Torch SE
near/against the wooden fence so you can pick it up later from the other side,
and climb the ladder. When you about one block away from the ceiling, back flip
and roll and grab a wooden ledge. Hoist up and jump/grab up to get onto the
monkeyswing ceiling. Swing to the pillar with the Zip-line L and drop/grab the
edge of it, use the Zip-line to go over the fence to
the other side of the room.
Pick up a small medipack left by the Indian
and some Flares, and get the Torch, drop it into the hole in the floor,
get down yourself and come to a pushblock, push it once and turn L to push the
next block in twice and then move it onto the Tile NE. Turn R and go through
the passage behind the hides and come to the 1st block, push it once and go
around again to push it into the S alcove onto the blue Tile and a door opens
N, don’t go there yet but pick up the Torch, in
these rooms are 2 statues, light them and the W door opens, go in and get Secret#2, a small
medipack, Uzi Ammo and some Golden Bars.
Go out and enter the open door N, carefully go around
the corner as Burner-traps block the passage, time the run through and come to
a death pool (you’ll have to leave the Torch here), grab the grated floor above
and monkey swing over the pool, to the right in the end is a closed door. Hop
onto the grated floor and get past the furniture and a Burner to the button to
open that door, get back safe and find a pole in a corner of the Shaft. Go down
the pole, turn to face the corner and back flip onto the yellow central floor
and hop/grab into the opening E, follow to a room with a blue structure in the
middle. Watch the fly by. Run-jump/grab to it and shoot the box to the L for
some Revolver Ammo, remember this place as
you will come back to this Portal Pillar much later.
Shoot the swinging ball to open the N door (from standing on the block with pistols you will save
Ammo), grab the Flares and even more Flares a bit further.
In the SW corner of this small room (behind the vase) is an opening in the
ceiling with a jump switch. Go back to the blue structure and then runjump/grab
back into the orange passage W, jump to that small island in the Shaft and jump
into an opening N where a door now opened. Follow up to some big closed doors
and head into the SE passage and follow down to a glass window looking into a
pool. Further down the passage is a Rolling Boulder, face the R hand
lower side of the passage, save, then sprint down and quickly run sharp around
the R hand corner, stop at once before you run off that ledge.
Little Wheels and Flood
Switches.
Now take a run-jump from the ledge into the blue structure you’ve
visited on top already, to the left is a push block. Pull it once then move it
onto the ice covered spot W, a block rises behind the
Totem, climb it and run-jump/grab to the Jump lever on W wall. The big doors
open up, so head back to the opening up S by doing a run-jump/grab over the
fence to the ladder and hop to the left onto the Boulder slope, go up to where
you saw the big doors before and enter, shoot the Natives to get a small
medipack and hop up into an opening E overlooking the pool you saw through
the window before. Dive in the pool and swim down to the NE corner, where an UW
lever will flood the place even further (a passage opens up in the bottom,
leading back to the Boulder slope).
Just swim up and back into the now flooded room at the Big Doors, go up
in a shaft and swim into the S tunnel after you got some air at the surface.
Follow to where you climb out at the Swinging Axes room, stand with your back
to the blade, back flip to the sloped block and jump/grab the monkeyswing
ceiling, turn around and go along the left side past the 1st Blade, then cross
over to the right hand side and go past the next till you hang against the
ladder, drop/grab and go left around the 2 corners and drop at a room. Shoot
the bench for a Medipack. In the next room remember where you shot the
native as he drops a Little Wheel and it is pretty hard to see (better
wait till he comes out after you). If the 2 Snake Mutants don’t come out, just
leave them and get back on the ladder, go around and hang right when at the
Axe, one square from the bottom and back flip/roll/grab when the Axe swings
aside. Time the next Axe and pull up to slide back to the entrance.
Go left and find more Cogwheels on the wall and place the little
wheel in between them. The fire under a lever S is out, so use the lever
there. This will raise the water level in the pit even further, go back out and
left at the Axes, swim back to the pit and go up, to swim into the W tunnel and
follow to a room where you can climb out.
Find a grating in the W and shoot it to get in, follow through, shoot
another gating and drop into the pit room. There’s a pit with a Jump lever and
a lever on a lower block, go to the opening in the fence NW and climb down the
ladder into the pit. From about halfway down, back flip to a yellow block and
jump to the switch to raise a block in the upper room. Jump back to the ladder
and go climb the block at the closed gate after you shot the Snake. Grab the
Monkey Swing ceiling and head over to the Jump switch on W wall. Better save
before you drop/grab the switch and hold grab to catch the edge of the sloped
block, shimmy right a bit and drop, slide and jump/grab back to that block N,
now be careful as a Burner started between block and ladder, time it.
Jump to the ladder and quickly climb up, the gate is now open. Get the Little
wheel from the Snake statue and make your way back through the crawlspace.
Place the Cog on the wall, use the now safe lever, this will raise the level in
the pit once more. Dive into the pool and swim back E to the pit, and go up a
bit to swim into the E tunnel.
Pushblock Puzzle.
Get out and find Flares SE. Climb up a ledge and use the jump
lever at the S wall. A door opens NW. Take a running jump in there and crab the
Monkey Swing to climb pass the swinging axes. Find the Little Wheel on that
snake like object and take the same route back to the poolroom. Once out of the
water go to the S wall and right into the opening E. Use the lever in the
corner there. This lowers and raises blocks in the poolroom, go back and get
the Face block (E of the pool). Pull/push it onto the lowered block W and go
into the E room again to use the lever.
Go back and move the block E onto the grey Tile on the wall and use the
lever in the E room again to raise it to the next level. Now you can grab up to
the grey block on which the push block sits and shimmy left around to the high
wall, go pull/push the block to the Face Tile on the E wall and the Spikes
where you have to use the Little wheel are gone, so place it and then
you can use the lever next to it to raise the level in the pit, go swim back
there and save at the surface, facing the tunnel SE.
Nasty Swim and a Secret.
Swim into the tunnel. Navigate over a couple of fences
and come to a wider room with a wooden gate, in the back to the R is an UW
lever you have to use to open a door (later). There’s a Secret behind the
wooden gate, but you will have to get back for air first cause you will not
make it in one go… Getting back to the pit in one breath is hard enough already
(maybe use a MP while swimming). Then save and swim
in again, to the same room, but up at the ceiling at the wooden fence is a
somewhat higher part of the ceiling, here you can go over the fence, (hard but
possible if you’re lined up straight) Get Secret#3, a Golden Skull and quickly get back over the
fence, swim back to the pit (this swim is
possible in one go after some practice… Dutchy).
Burners, Hammers and Spikes
too.
Climb out onto the ledge at the ladder and turn E to hop into the
opening in the yellow wall, there are big closed doors here, shoot the Indian.
Go to the N, follow the passage down to a deadly pit with a grated monkeyswing,
jump/grab straight up and go left to the Burners. Time them to get past, better
go almost to the end of the monkeyswing and turn right, drop/grab the crevice
and shimmy right to the flat part to pull up in there, follow to a drop off and
save before you do that. Slide down and grab the end of the slope, climb left
over the ladder.
Drop onto the blue ledge and look in the NE corner for a box with a Medipack
inside, then have a go at the next obstacles. Best way was from the ledge where
you got the MP, just run-jump NW from the NW tip to
the 2nd part of the Spike-trap when you expect them to go up so when you land
they are just down, run into the passage and just slide down (did it without
losing health).
Backtrack.
In the passage below is a lever to open the door left and the big doors
you saw up at the pit. Slide into the left tunnel and you’re back in a passage
you’ve visited before, I left the Torch here before and it was still there. Go
left and over the monkeyswing again to come to the Shaft, down the pole to the
yellow island, into the opening N (the Indian will leave a small medipack),
go right and down the passage of the Boulder-trap. Into the water below and
swim to the room with the UW lever, go way up, through the opening W and up in
that high pit, climb out on the ledge at the ladder and again jump E into the
opening.
In the back of the room are the open doors. Use the switch behind them to open
3 doors, up where we go next. Go out, jump to the ledge with the ladder in the
pit and climb up to the top of the pit.
There are 3 doors, giving access to 3 different
levels, you can choose which one to do first, I
started with the first opened door.
Go into the E passage and follow to…
There will surely be a different order
to collect all the objects in this level, but this is the way that worked for
me…
To the City.
Go to a wider cave and straight to a blue box, shoot it for the Desert
Ranger Ammo and turn around, shoot the ball on the ceiling and head into a
passage in the W wall you opened up. Follow to a cave with 2 huts, one with a
golden (closed) door, and an Indian attacks. Go to the right (S) side of
the hut and climb up to the roof. Go over to the N end and hop into the opening
in the wall, follow to a cave with water. Run-jump to the blue block,
run-jump/grab to the Ice ladder E when the Blade swings left, climb left
around the corner, go down a bit and back flip/roll/grab the opening, go in to
push the button and jump back into the water. Swim to the NE corner and get the
Medipack, go back to the opening SW and climb out of the water. Back to the huts and head SW where a gate opened.
The Upper City.
A flyby starts when you enter Mineral City, get the small medipack
to the left and head to the NW square, look up SE and shoot the ball there to
open the hut under that ball. Under the blue bench S is some Desert Ranger
Ammo. Now go to the hut under the ball, climb down the ladder, go jump to
the yellow block in the pool cave and grab the monkeyswing on the ceiling go
past the Blade and drop onto the block below. Jump to the button in the
corner, which will open the door on the other side of the pool. So go back as
you came and enter the W passage. Follow the passage and watch out for the
knives, you’ll come to the roof of the hut you just entered. Go to the front,
close to the fence and run-jump to the SW hut, then to the NW hut and collect 2x
Uzi Ammo on that roof. Jump back to the middle hut and climb down the
ladder on the S side to get into the other part of the City. Nothing
to do here now, so go to a deep pit SW and drop onto the ledge under the edge.
Stand-jump S and then run-jump/grab W, the opening in W wall is for later after
you collected all Sacred Stones. A curved run-jump/grab to the icy pillar N and
climb down the ladder on the N side of it, head into the passage N and follow
to the ice covered crawlspace you saw in the flyby, shoot it and go through
shoot the next panel and drop into a new area.
The Lower City, 1st Sacred Stone.
Go N and L at the hut, around the back of the E hut
and when you come to the next crossing, go L and look up N near the wooden
fence, shoot the ball in the ceiling and a gate opens up, go to the E and find
a place with a Totem and a burning statue, shoot a box there to get some Flares
and go to the opened gate E.
Jumping the Pits.
Run-jump to one of the sloped sides and keep jumping to and fro to the
other side, once there let Lara slide backwards to the lowest point of the
slope, then jump and steer hard into the opening and hit grab in the last
moment. Follow down to a couple of Snake statues besides a death pit. Jump to
the S side of the pit, jump up straight W and keep jumping uphill till you
reach the top (better light a flare halfway up the slope), once on top you have
to grab the Monkey Swing ceiling in the forward jump. Go to the opening W and
you can jump to the roof of the hut, go jump to the S roof and then cross over
to the W, that hut has a hole in the roof, drop into the hut. Use the switch
there and go out, go right and the Indian will leave a small medipack.
Go to the wooden fence (N) and through the opening as a block went up next to
the hut. Climb the roof of that hut and go behind the chimney to climb the
ladder to an upper room.
Go left, head up the steps N and hop over the fence, push the button to
open several hut doors (see the fly by).
First open Golden door is in the same hut you are on. So down the ladder
and a safety drop on the ground, the opening is W when facing the hut. Push the
button to open that door in the upper room you just were. Now go out again,
around the hut and climb the block N of the hut, go up the ladder again, turn
right this time and into that open door SE.
Pushblock Puzzle, 1st Sacred Stone.
The block under the NW pillar is a pushable block. Move it to the N wall
and onto a Tile behind the N pillar. Head to the S side of the room and you can
climb the SE pillar from the higher part of the floor, go to the N and jump W
to grab the ladder. Go up and roll, runjump to the ledge E, then to the ledge
S, pull the switch and go down the S side, jump over the fence to the lower
switch S and use it too. The push block is now on the 1st level. Jump back and
go pull/push (shimmy along the wooden floor to the other side of it) it to the
SW corner onto the lowered block. Go to the E switch (via the ladder) and use
it again to raise the block to the 2nd level. Jump to the lower
switch S and put it back in the “up” position (otherwise you will have a raised
block in an alcove up W). Now up the ladder and go back to the block and move
it to the tile N. If there’s a block in the alcove W preventing this, be sure
to have both switches in the “up” position.
Go over to the E switch and from there a jump up to the top bridge, do a
run-jump/grab to the high switch in the SW corner and use it to raise the block
to the 3rd level. Run-jump back to the bridge and move the block
under the Hammers S, the block will be smashed revealing the 1st Sacred
Stone. Make your way down the room and head back, down the ladder to the
huts. Drop down at the raised block; go out through the fence and left around
the huts to the one SW with some Desert Ranger Ammo in front.
Timed Runs for the 2nd Sacred Stone.
Enter, drop into the opening in the floor and follow through. See a dark
blue tile W. Save as this is timed.
This will open a timed door in the N of the room, face E and run-jump to
the opening in the fence turning right a run-jump to the yellow block in the
deadly pool, landing a bit on the left side of it, curve right and a running
jump (no grab) will get you through the Timed door in time.
In the next room there are timed raising blocks and Trigger tiles on the
balconies.
The idea is to start in the N side of the room, face the blue trigger
tile on W wall and sprint over the corner of it to raise a block next to the N
balcony, now sprint onwards to the SE corner, jump on the blue block,
triggering another raising block roll and runjump to the White block, landing a
bit right so you can do another runjump/grab up to the raising block, from that
one a long runjump/grab in the last moment to the block at the N balcony,
quickly get onto the balcony to raise another block near the E balcony (make a
save here), get there fast and jump onto the E balcony, the trigger tile there
will open a Timed door in the NE corner of the room (you also can make a save
here). So run off the balcony, roll and sprint N, turning left you can runjump up into the opening.
Go down and stand on the next trigger tile there, you’ll hear a door
open up. Stand left facing the right hand back of the passage, wait for the
moment you expect the Spikes to just go up and sprint to the end of the
passage through the open door, get the 2nd Sacred Stone there
and exit through the S passage, the door will open and in the passage, climb up
in the corner there (SW) and you are back at the hut after climbing out of the
hole. Leave the hut, go left and all the way N, turn left and left again around
the hut and go into the first hut to the right (the SE hut of the village).
The Animal Cages, a Torch.
You’ll see a cut scene of a fleece. There is a jump switch behind the
right hand statue. Go up the stairs in the back, halfway through where it gets
dark is another jump switch up in the ceiling. This one will open a gate in a
cage we go to now, follow the rest of the passage to the 1st Cage. Wait up a
bit and a so-called Ahmet (hate that name) will come in. Take care of
him and go out to the E into the 2nd Cage, in the E wall is a crawl
space. Go in and follow to a switch opening up the 3rd Cage (S), go back
and drop into Cage #2, Shoot the Ahmet coming in and go into Cage #4 to
shoot the glass from the glass cage. Just leave the Torch for now, as
you need to shoot another Ahmet. So head back to cage # 1 and kill the
beast. In cage 3 look up to the ceiling, there is an opening and a ball you
have to shoot.
This opens up the cage N, shoot the Ahmet then head back for one
of the Torches. Ignite the Torch on the fleece in the last cage and head back
to the huts.
Fire&Water, the 3rd Sacred Stone.
Go out of the hut and right, right and left behind another hut, around
the corner and you see two statues and an arch (where you entered the village
before). Leave the Torch somewhere there so you can pick it up later. Go S and
into the hut on the left and climb down a ladder. Shimmy to the left and climb
down almost to that deadly water and back flip. NE is a lever and under a blue
bench W a Medipack. Flip the switch E, go to the wooden bridge and jump
to the other side while timing the flame. Use the button there and the deadly
water turns into normal water. Back to the bridge and now jump SE to a small
piece of wooden bridge. Keep a medipack handy, as you have to jump to that
switch E while the floor is still burning. Quickly flip the lever and side flip
into the water and use a medipack if needed.
Swim down the opening in the floor, follow through and hoist out of the
water. Climb the wooden box and grab the slanted block. Next couple of moves
aren’t that hard. Shimmy to the right and hoist up and slide, jump/grab the opposite
ledge. Hoist up again and back flip roll with a left curve, slide back and grab
the edge. Shimmy to the right again and climb up. Up the ladder and almost on
the top a back flip and roll and grab the ledge. Shimmy right and when you
can’t go further back flip and roll/grab again and again shimmy, now to the
left and at the end, hoist up and a back flip.
Climb the next ladder and when Lara’s hand reaches the metal, a back
flip/roll/grab and pull up. Use the button. Jump in the water below, as the
lower room is flooded. Swim over the fence and grab the 3rd
Sacred Stone from the pedestal N. Get some air and swim back to the bottom,
through the long tunnel and get out at the broken bridge N. Use the ladder
around the corner to get back up to the hut. Step out and go back S to where
you left the Torch.
With the Torch, the 4th Sacred Stone.
Go N to that crawlspace you came from before (in the opening S and turn
right (E). Stand with your Torch next to the hole in the floor 2 steps away
from and in front of the crawlspace (E), throw the
Torch so it will land inside the crawlspace. (or stand
against the opening and jump, pull your pistols with the “1” key), crawl in and
keep throwing and picking up the Torch till you are out on the other side. Pick
up the Torch and follow through to the Ice pit. Ignite the fleece (S) in this
icy room. Pick up the 4th Sacred Stone, which will appear
close by.
Go to the pillar S and climb the Icy ladder to the top. Do
run-jump/grabs over the pillars (some jumps are nasty as the little fences
prevent a straight run) and finally pull up E at the S square.
Upper City, Snow Balls and the
5th Sacred Stone.
The hut nearby has opened here, go in and shoot a box to the left to get
Desert Ranger Ammo inside, then go up the ladder till just under
the roof, back flip/roll and go to the front of the hut (N), drop backwards
from the roof, grabbing the Jump switch, the Burner on the ladder will now stop
and you can go in again all the way to the top and right to get into the
passage. Follow into a room with Snow balls hanging in the NW corner, in the E
side are 3 ledges with Spikes, a Burner and 3 Buttons, all
3 buttons have to be used to get the 3 Snowballs into pits and a door will open
NW. Go to the blue pillar S and climb it, look N and spot a Jump switch on a
pillar with a Burner on the side, run-jump/grab that Jump switch and the burner
will be off.
Looking at the button-ledge you’ll notice the middle button to be safe
now, so go use that first and see the first Snow Ball going into the pit. Go to
the W side of the room stand facing the slope, stand to the right of the slope,
jump back and take a running jump with a curve to the right to land on the
platform. Use the switch to kill Spikes on the button-ledge so the right hand
button on the button-ledge can be used for the next Ball. Climb the S pillar
again and use the monkeyswing ceiling to get to the switch on the pillar E and
a raising block goes up in the SW corner, also the Burner on the button-ledge
changes position. Go onto the NW platform again to use that switch a second
time and the last (left) button can be used the raising block SW makes the
boulder going into the central slope (it takes a while) and after it falls into
the pit, the door in the W wall opened up and you can claim the 5th Sacred
Stone. Make your way back through that E passage to the hut, get out to the
N square and climb the ladder to the roof of the hut N, drop onto the NW
square.
Skeletons and the 6th Sacred
Stone.
Climb on the ladder N and up onto the roof and drop down at the other
side. Turn around and go to the W hut and enter, follow to the back and climb
up right, get 2x Shotgun Ammo and go to the next room, Skeletons
roaming around, depending on what you’ve got left in your backpack, you can
either shoot off their heads or just run quickly and jump the ledges over the
Ice pit and enter a new Skeletons room on the other side. Leave the one on the
floor alone as you need to shoot it later (for a pick up).
Jump up into the opening S and push
the block once, go in around the block. Push it back and get the Harpoon Gun
(Crossbow) and Explosive Ammo, pull the block back and arm Lara with
that gun, shoot the Skeleton in the previous room and get the Skeleton Key
he will leave behind. Open the door W to get the 6th Sacred Stone, the
exit opens up again and you can jump back over the ledges to the N side
Skeleton room, shoot the Skeleton there and get another Skeleton Key,
use it in the lock NE and a door opens up in the S wall, go back to the higher
passage SW and grab the Skull ceiling, swing over to the open door to get Secret#1, a Golden
Skull. Make your way back to the Square in the City, go SE and enter
the hut there.
Rotating Blade and Spikes, 7th Sacred
Stone.
Drop into the hole onto a sloped floor and slide to the lower passage,
jump a spiked pit and follow to a Burner/Spike-trap around the next
corner. Run-jump through when you think it’s safe and save
in front of the next slope. A Boulder will come after you, slide long and jump
over the deadly water. I don’t know if I was just lucky or its meant to go like
this, but jumping to and fro to the left you’ll pass 3 Spike-traps and I
didn’t get hurt in the end a last jump to a walkway (just save in the air after
each lucky pass, as you CAN get hurt) Follow in to the Blade room.
Stand at the opening in the low
fence and stand-jump to the break ledge, side jump
right and land in a safe corner of the central platform. Notice a few squares
are without Spikes, stand-jump NW to the next safe corner, look over the edge and spot the ledge with the next
Secret. Stand-jump over the fence to the lower hardly visible
ledge and pick up Secret#2, a Golden
Skull.
Side jump up to the next safe corner and then side jump back to the N
side of the platform take another jump to NE to another safe corner, from where
you can jump/grab the ladder going up, climb till just under the burner, time
it and back flip when possible. There’s another Burner at the Stone pedestal.
Run to the Stone when the Burner
goes down (facing W) and hold the back flip while Lara picks up the 7th
Sacred Stone. The exit door opens up, leave through the open door and
follow to the back where a ladder is located between the pillars, but first
shoot the Indian. Go up to a passage with more Spikes, from standing in
the plant you can wait till you expect the Spikes to go up and stand-jump to
the ledge, immediately another stand-jump and run against the wall, hop back
once so you can now time the Spikes and Burner to stand-jump up once more (it’s
a nasty one, I know, the timing has to be perfect) Sliding down you’ll end up
in one of the first huts you saw in this level, shoot another Indian and
go to the N hut on the right and enter.
Mirrors and Squishy Pillars, 8th
and Last Sacred Stone.
Follow the passage down to a room with a Mirror, in
the Mirror you can see a dark deadly floor with a few safe (grey) Tiles, the
first one in front of the first Pillar where it stops left, a stand-jump will
get you there. Stand on the NE corner, but not too close to the edge of the
Tile and stand-jump NE when the pillar moves left (towards you). From that Tile
to the NE one close to the Mirror and then to the statue at the wall, jump to
the NW corner and climb up to get the invisible (only visible in the Mirror) 8th
Sacred Stone.
Get back the way you
came or do a runjump NW to the first safe tile next to the pillar. Go back up
to the hut, go out and left to the SW corner so you can go back to the Upper
City, go into the first hut left and down into the hole. Follow the passage W
and go through the passage with Burners and a Blade to get back to the
rooftops. Jump to the S hut, get down onto the S square and go to the pit SW.
Jump over the pillars to the opening W and go place all Sacred Stones in the
receptacles. When you come close to that ramp, the Snow Ball is released
and will drop into that frozen hole in the pit. Now climb up W into
the hole the Snow Ball came from and find Secret#3,
Golden Bars and 2x Shotgun Ammo in the room above. Climb back
down and go E to the exit to the pit.
The Mineral Keystone.
Runjump right to the Icy pillar in the pit and use the ladder to get
down to the pit floor, drop into the hole and find the Jump switch on W wall,
just behind the Totems. It will open the gate E and you can run-jump/grab
to a block in the deadly pool. Turn left and run-jump/grab to the central
block. Take care, Spikes protect the Mineral Keystone and there’s a Burner Tile
in one corner.
Go to the E side of the floor and to the opening at the Blade and use
the ladder on the central block to go down and back flip/roll/grab (or just do
a diagonal run-jump and grab) the ladder behind the Blade, go left around the
corner and down a bit, back flip/roll onto a sloped block and slide to a
button. Now comes the tricky part. Jump/grab the ledge with the burner Tiles
and shimmy past the Burners (hang close and time them) all the way around to
the golden block you raised before. Shimmy over a sunken golden block to a
sloped block. Pull up on that block and just slide off to grab the edge again,
the golden block will rise, so pull up/back flip and you’ll land on it. Face SE
standing close to the SW corner, then side jump right over the lower part of
the fence and the corner of the burner Tile to land back on the spot you just
jumped from. Go to the pedestal and grab the Mineral Keystone.
Run-jump/grab the E ladder at the Blade again and now go left and all
the way up to the S square in Upper City, climb over the hut N and down from
the other side, go through the passage E to the first huts and out the passage
E to go back to that cave with the Ball you shot, go left and head back to the
intermediate level.
Portal of the Great Spirit.
In the pit room hop into the S passage to go to the
ladders on the right climb to the L and drop on the yellow block, here you have
to run-jump diagonally over the block (the ladder makes a straight run too
short) curving to the next block and grab hop into the passage S and follow to…
Follow that tunnel, crawling into a dark cavern after shooting the ice
cover, crawl out backwards and shimmy left and up. Then right over the
crawlspace you crawled out before, back flip/roll/grab the pillar the
run-jump/grab to the broken walkway S. Turn around and be
sure to stand at the highest part and run-jump to another walkway N.
Go left (E) and open the small door, find the Shotgun on a
workbench in the back and spot the 3 Fuse boxes for which we have to find the
Fuses now.
Go out and to the room on the other side of the walkway, open the door
there and grab the monkeyswing ceiling to cross over to the railway track. Go W
and run-jump over the electrified pool to follow the tracks to the Main
Cavern.
The Main Cavern.
Run around a bit, there are friendly Guards here, don’t shoot them as
they will take care of a Mutant coming in. Get the Ammo if one of your
friends perished and head up the W track. (Remember
this route as you have to go back here later) Just before you go into
the tunnel, turn left and do a curved run over the track to jump/grab to the
stack of crates in the electrified pool, go up the roof of the Garage
and stand-jump SE onto the stack of crates in the middle of the Main Cavern.
From there a run-jump/grab to the left side of the opening over the drill in
the S structure, follow to where a Mineworker attacks and shoot him for a small
medipack. Get past the drills (crawl underneath).
Electrified Water Room.
Go down on a ledge in the water room and line up for a run-jump and grab
in the last moment to the central platform W. Run-jump/grab to the rusty ledge
W (over a closed UW door) and shimmy right to the end, there take a back flip
to a block behind. Turn around to stand jump/grab to the sloped pillar SE. Go
over the top and slide/jump/grab to the ledge with the switch. Use it to stop
the machine in the NW corner. Run-jump/grab N and go over the top of the pillar
to slide/jump over the fence back onto the central platform, go jump to the W
again and use the same route to get back to the SW block, from there a
run-jump/grab to the ladder SW and go left over the walkway, use the switch on
the pipes a bit further to the right and see a wooden gate open up.
Burners and Drills.
Go back to the ladder and run-jump to the block below, go use the route
over the switch ledge E to get back to the central platform and run-jump to the
NE ledge, go back through the Drill passage (time burner and drill to jump
past) to the Main Cavern and head into the NE tunnel (in passing pick up some Uzi
ammo). Follow to a crossing with left a death pit and right a steep slope;
the open fence is straight ahead. Follow in to another death pool,
run-jump/grab to the block in the water and run-jump to the ledge with the
machine E (time the jump). Start running when the machine goes down and land
when its just going up run curved right and jump to the block on N wall, turn W
and grab the monkeyswing ceiling, time the emitter and go over the drill to get
to the corner block with the switch.
Using the switch will open up a steel door in a Mine tunnel. Go back
over the monkeyswing and from the E block a stand-jump/grab to the machine
ledge, shimmy all the way left around corners and along a crack to come to the
E wall, a Burner around the corner has to be timed to drop onto a sloped ledge,
slide/jump/grab a sloped pillar and hang most left. Save and pull up over the
top, you’ll slide in two moves and you’ll have to wait with jumping till Lara
is at the end of the slope before you do a jump/grab to the last pillar, pull
over and land on the S walkway. Side-jump over the Barrier
and head back to the Main Cavern.
Area 52.
Head into the S tunnel, just follow to a crossing and
head straight W, push the Mine Cart into the room and onto a broken part of the
track, the Flames under the switch in the far corner will stop and the switch
can be used to open a fence with a non smoking sign. Head out of this room (see
the Mineworker filling the Cart, shoot him anyway as he will come after you)
and go to the R (S) at the first possibility. Follow down to Area 52, go to the
far end of the bridge and stand at the opening R, run-jump/grab the chain over
the deadly water and turn around, go climb up to about one square under the
ceiling (mind the lower part) and back flip to a ledge on the yellow wall, grab
the edge and shimmy R till you are over the #52 and pull up to back
flip/roll/grab the ladder on the pillar, go R around 2 corners and up to back
flip/roll/grab the block over the bridge, go R again and drop to the yellow
ledge below, slide into the shaft.
Waterworks.
Swim down, get a small medipack and then open
the grated UW door. Now first go up for air and swim through the door. Swim sharp left into the Fan Room and immediately left, into a
narrow gap in the left wall, and get the Garage Key. Swim back
out. For a
Secret go left, stay close to the L wall and swim past the Fan (loosing some
health) into the next opening L, get Secret #1,
Golden Coins there and roll. Swim out and sharp R, back to that yellow
shaft. You probably need
that MP you just got, pull up on the sloped side of the shaft and start jumping
to get onto one of the flat corners, without hitting that dangerous Tile. Jump
over the fence back to the bridge and head out to the E, make your way back to
the Main Cavern.
The Snow Mobile.
Head to the door in the Garage (building on the left) and open it,
inside is a nice Snow Mobile. Mount it and go up the W track. If you happen to
run over one of your Buddies, get the Ammo he leaves behind. On top of
the steep sloped track you can leave the Bike behind, go walk up the next track
and get into a small room. In the corner is a small medipack. Stand to
wall N (the camera changes) and climb up. Come to a passage with a Mine cart,
push the cart and shoot the mineworkers, go to the end of the track at the fake
door and get the Desert Ranger Ammo in the right hand alcove, go back one
alcove to get into the room W (looks familiar).
The Forbidden Area Key. (Red Fuse)
Run-jump to the orange crate in the room with the deadly floor, turn
around and look E for a fuse box with a red light on top. Shoot it (pistols
will do) to shut off the barbed wire the other end of the ledge and go to a
kind of Scale on the ledge S, pull it all the way to the N end of the ledge and
then move it W onto the Tile that was behind the barbed wire.
Then get it out again and move it under
the Fire sign on the S end of the ledge and the flames on the second ledge will
stop so you can go get Secret #2, 2x
Shotgun Ammo and Golden Coins. Now head to the NW corner and run-jump/grab the ladder, go down to the
ledge and jump further down, climb down and slide down a chain to the lower part
of the pit, look around for the Forbidden Area Key (Red Fuse) and make
your way up the chain and ledges again. Go up the ladder and a simple jump with
grab back to the green ledge. The next ladder climb
almost to the top and back flip (no grab) from 4 steps from the top. Run-jump
back to the Entrance of the room E and go left to follow back to where you left
the Bike, take it back down to the Main Cavern and ride it into the SE tunnel.
Shutting down the Power.
Follow the track up to some Mine carts at a closed fence, leave the Bike
and go up the left sloped track to a lever seen from Area 52, it will open the
fence. So go back down, shoot or drive over the monster and enter a small door
S. Go to the back of the central block inside and use the switch to turn some
pools safe, as the Flyby will show. There is another
door W you can open as the electricity is turned off. Use the lever (this will
be a shortcut later)
Make your way back to the Main Cavern.
2nd Forbidden Area Key.
Head to that formerly electrified pool W, park the
Bike close by and climb down and get the 2nd Forbidden Area Key. (Yellow
Fuse)
1st Fuse.
Climb out again and a Giant Mutant will come for you,
quickly get on the Bike and run him over. Ride the Bike into the S tunnel and
go straight (W) at the crossing again, through the room with the Mine Cart and
up the sloped track in the back of the room, come to a cavern with a small Fuse
on the workbench, park the Bike on the Miner, pick up the 1st Fuse
and go back, turn R at the crossing to Area 52.
Ventilation Room, 2nd
Fuse.
Just before you ride onto the bridge, turn the Bike around in the wider
corner and back up onto the bridge, leave the bike there and go on foot to the
now safe pool across the bridge. Hop onto the higher floor left and open the
small door. Jump around the corner past the first machine and stand about two
steps back from the next one, stand close to the right hand wall and run-jump
when the Burner is off and the machine goes up, go into a room with Big Fans.
There’s a medipack on the workbench and you’ll surely need that here.
You have to get to the back of the room, I just ran past the fan along the wall
(hurts less if you do it fast), till I bumped into the wooden pillar. Then
sidestepped to the opening and sidestepped to the wall again to get past the
2nd Fan. In the NW corner is some Uzi Ammo and in the NE corner a block
behind the yellow tanks. Climb up and stand against the E wall facing W, jump
up as you expect the Burner to go down and quickly get the 2nd Fuse,
holding back flip while Lara picks it up so you will be gone when the burner
starts again. Go back past the Fans and backtrack to the Bike and ride it back
to the Main Cavern.
The 3rd Fuse.
Go to the right into the NE tunnel and near the open wooden fence to the
right and follow to a pool. Stop there and walk over the pool, open a small
door to the right in the next passage and go in.
To the left is a grey air
conditioner, shoot it and find the red light on the fuse box up in the ceiling.
Shoot it and a door opens in the other side of the room, go find some Desert
Ranger Ammo near the tables, then go into the newly opened room in
the back and use the lever to bring out a bridge over the pool at the Bike. Go
back there and check an alcove in the NW corner, somebody has been digging up Secret
#3,
a Golden Skull. Take the Bike over the bridge up the steep track and
leave it just on top. Go down into the area with the shack. Shoot a red light on
the fuse box hanging on the side of the shack, the fence opens up. Go push the
Mine cart all the way to the end and the Barbed Wire at the shack’s
entrance will be gone. Go into the shack and get the 3rd Fuse.
Once outside, get the Shotgun ammo E and head back to the bike; pull it
back down the slope. Turn it around and go back over the bridge to the Main
Cavern.
4th Fuse.
Go down the entrance tunnel E (the wide one you came from in the start)
and find that pool dried up, so you can take the Bike up to the walkway. Go
straight across and follow the next tracks to a crossing, go down the left side
and follow to a wider end, leave the bike there and hop over the ledge N, get
some Shotgun Ammo in the end, find the opening in the fence and then go down
from the tracks into a room with a crate. Open the small door and come to the
Crate Puzzle.
Crate Puzzles.
Push the crate W once and go right/right around the corners, pull the
crate there once and go back. Then take a left, right, left and left till you
face another crate W and pull it once. Turn back and go right/right and left
through the opening you just pulled the crate from and pull that same crate as
far as you can into the passage to the puzzle room W. Turn right and go to the
next crate NE corner (that’s first the crate you have pushed) and push it
twice, go left and push the next crate there twice, go left again and follow
the passage left to the crate near the puzzle room, push it once into the room.
Circle back (go right everywhere) around the passages to pull/push the crate S
until it’s in front of the closed door, now pull it once to that door and then
push it N onto the tile next to the “Fire” Tile and the flames under the Scale
S are off.
Go push that Scale onto the N Tile and the door will open up, go through
to the next room, shoot the Mineworkers that attack and get a small medipack.
The last Fuse you need is out of reach under the Deadly Machine, so
climb the chain to back flip to the block and grab up E, follow the passage
jumping past the burners and finally come to a Burner in front of a switch
stand close, run to the switch and pull. Hold back flip while Lara uses the
switch to back flip twice and go back through the nasty passage to the machine
room with a now open door in the W.
In the next room are flame emitters in front of three switches. Time the
emitters so you can flip all three switches. The room rocks, this stops the
machine. Go get the 4th Fuse from under the machine and head
back to the Bike, follow the route back to the Main Cavern.
The 3rd Forbidden Area Key. (Blue Fuse)
Leave the Bike near the garage and go over the crates
to the roof of the Garage as you have to get into the S building again, follow
the nasty Drill passage to the Electrified Water Room.
Electrified Water Room. (2)
Go over the central platform to hang on the W side ledge again and go
shimmy right to back flip to the block. Run-jump/grab the ladder NW and go S
over the walkway. Climb up in the end and follow the passage to get to a room
with Fuse boxes (you saw the room from below already) There are 4 Fuses missing
(2 on each side) and on a workbench in the back is some Desert Ranger Ammo.
Save especially when placing the fuse where the cables are in front of the
receptacle. The Electrified Water becomes safe. Open the door W and use the
switch, a shortcut is now available.
Now go back to the Electrified water
as that is safe now and hop in (E behind that sliding slope is some Shotgun
ammo), just to the left as you go down from the ladder is an UW door
(grated one), open it, go in and use the UW lever to stop a Drill at the next
UW lever under the central platform. That UW lever opens the door W and you can
swim to the 3rd Forbidden Area Key (Blue Fuse).
The Animal Keystone.
Swim out and go NE to climb back up to that nasty Drill passage and go
through it for the last time and drop into the Main Cavern. Take the Bike and
go through the wide entrance tunnel E to the rail track with the yellow water
next to it. Park the Bike, grab the monkeyswing and head into the opening N and
go through the small room left to the walkway outside, get across into the E
room and place the Forbidden Area Keys there. The door S opens up, go in
and hop over one of the fences at the back of the building. Use the switch at
one of the pillars facing W. Giant Mutant Bold Eagles attack, take care of them
and get the Animal Keystone once they are dead. Hop over the fence and
go N, back to the walkway in the first cave and jump to the ledge S. Then to
the white one S and finally to the climb wall at the CS, get through and follow
back to the intermediate level. If you want there is a small medipack in
the water.
Portal of the Great Spirit.
Get back over the yellow pool by using that ladder and
go L out to the pit, go W when you come back to the pit and up into the
passage, get some Revolver Ammo to the L there and then use the
monkeyswing over the deadly water to get to the Hidden Forest.
Deep into the Forest.
Follow the passage to a pit, jump to the pillar and
from the pillar a run-jump/grab to a ladder E, go up and follow through a lower
valley and past a fence overlooking a swamp to another pit. Jump to the sloped
E side and shimmy L along the edge to the opposite side, follow the next tunnel
to where it drops into a grassy valley with a pool.
The 1st Golden Idol.
Dive into the water and find an opening SE in the E wall behind that
bush, swim in, and immediately up and right into a orange room with an UW lever
up in the NE corner, to open a gate further in the other tunnel. Swim back for
air, then go in and down left, follow the tunnel to a two way crossing and go
right, into the room behind the wooden fence. Follow in going left around
corners and come to the second UW lever, you can go back for air as there’s no
rush, the E side of the two way crossing leads to the Golden
Idol on a pedestal. Swim back, surface in the pool and go climb out in the
N, because we need one more Golden Idol before going up the ladder N.
The 2nd Golden Idol.
Through an opening S you’ll come to another forest
area, head to the S wall, turn around and pull up on the back of the slanted
tree trunk there. Hang right and pull up to the top. Immediately jump from the
top and curve right to grab the next tree, jump left to the branch and climb up
the tree (ladder). Go up and poke Lara’s head just through the green leaves and
back flip/roll/grab the Jump switch on the tree behind you (opens a gate up at
the tree tops). Get back up the ladder all the way to the top and turn
N to run-jump/grab to a transparent ledge with Secret #1,
Golden Coins. Jump with a grab
into the SW corner and get the Harpoon Ammo from the trunk there.
Standjump/grab back to the secret ledge and jump to the N, go into the opened
gate.
Spike-bags, Nasty Knives.
Two Run-jump/grabs along the right side of the openings when the Spike-bags
swing left will get you to a sloped tunnel down and there’s a nasty Knife-trap
in there. Stand right and start slide when the Knife blocks the passage, it
will likely be open when you pass. Just around the corner on the next slope is
another Knife-trap, jump to get over that one and when you end up on the
last lower slope to the left, jump to get onto the ledge in a small cave. Go
out N to come to a river. The 2nd Golden Idol is located on a
pedestal W, then wade E and dive down the waterfall. Climb out of the pool N
and head up the ladder N; follow in to place the Golden Idols to open the gate
and enter.
Forest Temple.
There are huge trees standing on a square in the Forest Temple. Also 2x Flares at the W wall and Desert Ranger Ammo N
and S wall, as well as a small medipack in the middle. Go to the
trunk N (on the right) and from standing against it, back flip to the roots of
the tree behind, jump/grab up to the trunk turn around and run jump/grab to the
branch of the huge tree, Fight off a Vulture from there and then stand
in the SE corner (safe here). Run-jump to a sloped branch E of the S tree and
slide/jump curved left and grab the edge of the ledge on E wall. Hop over the
left fence and go into the room there, inside are closed gates, approach the
one SE, the gate opens, go in and follow through a lower room to a grassy area
overlooking the Temple Square. Get the small medipack right and
run-jump/grab to the ladder (careful, the hole under the ladder brings you back
to the cave where the second Idol was). Climb up and off left, follow W to a
slide/jump/grab over a waterfall into the stream, follow the river and straight
ahead on the left, find the push block (SW corner).
Push it all the way in and then move it into the room so you can pull it
E once, it has to go onto the light grey Tile just next to the entrance so the
Flames under the switch will extinguish. Use the switch to open a gate back in
the cave with the ladder. There are some Flares to pick up SE.
Head back to the E, drop down at the waterfall. Climb the ladder S again
and back flip to the upper room, head E now and up to the open gate to come to
the next level of the Temple. Go to the N end of the balcony. Run-jump over the
fence to the branch NW and go run-jump/grab to the W, then to the roof on the W
wall (notice the Idols door below) and from that the corner, take a back flip
to the next branch. Grab the monkeyswing above and head to the N tree,
drop/grab the crack below and go shimmy right, follow the path up ladders and
above the leaves shimmy to the right. A Vulture attacks and a small medipack
is on the branch. Go up the next tree till Lara’s feet are two steps above the
leave cover and back flip/roll/grab the broken bridge behind. Walk up to the
trunk and peek on the left down, there is a very small green slope, you have to
jump to, sliding backwards so you can grab the edge. Then shimmy right around
the corner and pull up. Use the lever there; this opens a big door in the
N.
Now you have to get to those Golden blocks S, stand at the left corner
and take two steps to the right face NE a tiny bit and a run-jump with a left
curve will get you on a sloped ledge behind that tree. Slide, jump/grab to the
Golden ledge. (It’s a hard jump, you can also choose to jump to the sloped
block on the right side of the tree down N and slide back to the branch from
which you can reach the N ladder again, back flip to the bridge and from the N
end an run-jump to the same sloped chunk on the SE tree and slide jump/grab to
the Golden ledge).
DON'T pull up but shimmy R around the block to the S
end, pull up there and run off to the brick ledge N of the tree. Hop to the ledge E and run-jump with a grab into the
alcove E, get Secret #2, Golden Bars, never mind the closed gate,
that one is for later. Runjump/grab back to the ledge on the tree and hop to
the N ledge. Jump to the open gates S and enter a new area, there’s a pit with
a ladder and a passage NW leading to a big swamp area.
Into The Pit for the 3rd Golden Idol.
Get some Desert Ranger Ammo W of the pit and run E into the pit,
slide and jump/grab the ladder E to go down, slide grab the edge to safety drop
down at a closed gate, hop back once and look up SE, jump/grab to the opening
and follow to a sloped end, back flip to the slope, jump/grab and thus activate
the Jump switch which will open a gate further down the pit. Go back to the
opening, run out grabbing and land in a lower opposite alcove, turn around and
stand jump/grab to a lower opposite opening again and go in right, to the right
is a door blocking a ladder (to open the exit later).
Go left and over a block into a room with a Knife-trap (the exit gate
you saw opens up), follow around the left to the far N and in the NW corner is
a Jump switch you can reach from the low block there (it will raise a raising
block E of you). Pick up a small medipack W of the block after landing.
Then get onto a block on N wall, run-jump up to the raising block E and from
there a run-jump/grab over the wooden fence to the pillar N. Run-jump grab to
the Knife pillar and shimmy left around the corner, pull up on the next corner
(safe) and stand jump to the S pillar. Grab the monkeyswing and head W, drop
onto a dark pillar there and face the swinging Spike-bag. I did a curved
left run-jump so you go around the bag a bit and time the jump to get to the
next pillar with little harm. Now a run-jump with a last moments grab to the
yellow SE pillar with the 3rd Golden Idol (screenshot of the
exit passage).
From the pillar you have to stand against the E wall, face E and side
jump down right over the fence to the N side of the room. Head back to the S
and leave, now go straight W and come to a ladder over a pit, jump/grab the
ladder. Go up and one block from the top, back flip/roll/grab the Jump switch
there (gate opens) and immediately jump/roll/grab as you hit the slope under
the switch to get back on the ladder, go down and climb off right into the passage.
Head left and come back to the pit, standjump/grab over to the other side and
then jump/grab up N curved right. Pull up in the alcove where the gate opened
(only to make the jump back up possible) and from there standjump/grab the
sloped SW ledge, pull up, backflip and jump/grab up in front. Shimmy right to the ledge and from that alcove
you can standjump/grab back SE to the ladder, go pull up to the top and
backflip/roll/grab, shimmy right just around the corner and pull up, backflip
and jump hard left to land on the flat corner ledge, you’re safely back out.
The Swamp for the 4th Golden Idol.
Head W and come to the swamp, stand left,
run-jump and grab the broken bridge on the tree, look NW and jump to the next
bridge with the Burner. Run up to that ladder, climb it and go right around the
corner as much as right as possible to back flip to the roots of a tree. Jump
on the bridge, then the ladder, go left around to the other side of the tree
and back flip to the bridge, run-jump into the opening W. Follow to the block
with the pedestal in the back. Then to the left in the S wall is a push block,
visible with the Binoculars. Pull it out 4 times and then pull it to the E
twice and it should end up under the falling water on a square that will
activate blue rays. On the pedestal another Golden Idol will be visible,
go get it and the gate NE will open up.
Get in and follow the passage, pick up a small medipack and turn
around at the end so you can back flip/jump/grab to get onto a ladder (stand
Lara with her left shoulder to the wall), go up and off right and hop over the
pit. Shoot the gratings and jump over the next pit after you saved standing
most left, slide and in the last moment a jump to the left to get to the bridge
in the Swamp. Run-jump/grab to the ladder E and go left around, drop to the
bridge and head to the other end, a stand jump around the corner to the right
to the small platform and run-jump/grab back to the opening SE, follow back to
the Temple square.
You have to get down to that Idols door (I’m not really sure if I got
the right route, but it worked for me). Hop to the brick ledge on the tree and
jump onto that yellow ledge left now a stand jump down to the branch SW and
from there run off onto that lower roof on W wall, grab the edge and shimmy
right till you are over the mushroom on ground floor, just pull up and back
flip, you will land on a branch (loosing some health) from which you can jump
up to the Idols door.
The Idols Door.
Place the idols to open it and climb up in the CS. Pick up Flares and
a Medipack, shoot the grate and crawl in (hold “duck” or jump in and
hold “duck”)). Follow through to a drop off at a nasty trap. A Blade
circles the passage below and if you hang it will cut you up real bad. So time
the Blade and when it’s in the opposite side of the passage, turn around, climb
out and drop, side jump right and go on to the next challenge. A room with a
death floor and you have to get to the button clearly visible to the left,
run-jump to the bridge stand on the tip close to the Swing-blade and time the
moment the Burner goes down and the blade is moving right. Run-jump to the
Burner Bridge, and immediately a running jump up to the button ledge, push the
button to get a flyby of the Forest Temple and see the brick ledge near the
yellow blocks raised. Turn around and stand at the edge, run-jump to the Burner
Bridge and a right curved running jump to the other bridge (or a standjump
depending on where you land). Then jump into the passage, time the Blade and
quickly grab up to the CS and go out through to the Idols door.
Back Up to the Vegetation Keystone.
Stand jump to the branch, then to the S one and from there a run-jump to
that E sloped branch to get back to the E ledge with a jump/grab curved right a
bit. Hop over the fence left and go into the room, a gate opened to the N. Go
through to a pit with trees, run-jump to the branch and then to the one E, go
up the ladder on the tree, start to back flip and jump from the top and go left
till you are on a flat corner. Go up an opening N and pull the switch to the
right to flood the pit you came from. Go back, dive in and swim down to the
central tree with an UW lever that will raise a door on the monkeyswing in the
room back up there.
Swim up E, climb out, and go up the ladder again and to the room with
the monkeyswing and Blades. Grab the monkeyswing and go past the Blades to the
other side and drop onto the corner ledge, follow the passage in and run-jump
over the pit past the swinging Spike-bag. You can get the Shotgun
ammo behind the bag if you crawl, but you will loose health getting back.
Come to a ladder with a closed gate, go up till you hang on the gate and back
flip/roll/grab the Jump switch, now you can go up into the open gate and find
yourself on the ledge where the Secret was before, that Tile is now deadly, so
good thing you got it already!
Run-jump/grab to the ledge on the tree and pull up,
run-jump S to the entrance ledge. Jump to the yellow block N and stand jump/grab up the raised block,
grab up to the branches above S and head to the pedestal with the Vegetal
Keystone. Go back to the S
side and from the R hand side of the green ledge (low ceiling L) you can
run-jump/grab to an opening in the S wall. Pull up in and immediately
jump/roll, grab the edge on sliding of and shimmy L to get Secret #3, a Golden
Skull, now shimmy to the other side
and on the fore last square you can pull up and back flip/roll/grab a ladder.
Go left around the corners and drop on a break ledge, quickly side jump left
and go over the bridge to the brick ledge, pick up the small medipack
from the plant.
Knife-trap Alley.
Follow to a slide down past a Burner into the Knife-trap alley.
Save, slide and jump to get over the first two Knives, hop over the Burner-pit
and then crawl under the next Knife. Now comes a hard one, a jump over a pit
past a Knife, face W, sidestep as close as possible to the pit and side jump
right over the pit, you have to be lucky but it’s possible without harm. Then
sidestep carefully around the corner, hugging the wall and come to a slide,
jump/grab the Jump switch over the slide to kill the burner and slide down the
slopes to where you have to jump to the pillar in the first cave. Jump to the
opening in the red wall and follow back to the intermediate level.
Portal of the Great Spirit.
Use the monkeyswing to get back through the yellow room and go down to
the Pit. Dive in and swim all the way down, to the E and down in the next room,
through the hole in the bottom and follow to where you can climb up at the end
of the Boulder slope again. Go up the slope, follow the passage up and go to
the left at the big yellow doors. You’ll end up in the bottom of the Shaft,
jump to the yellow ledge and hop into the E opening and follow to the top of
that blue structure, place the 3 Keystones on the 3 pointy receptacles
and the central pillar opens up, revealing the Portal of the Great Spirit,
save and keep that save separate as you will need it in the next levels. Pull
up into the Portal and be taken to the next level.
Step out of the Portal beams, go find the Desert Eagle Ammo SW
and then grab a crack in the NW pillar to shimmy around to get behind the
fence. Hop to the blue ledge and look for a Harpy coming your way, start
shooting as soon as possible and runjump/roll NW to the corner of the slanted
block NW and (be sure to slide backwards) grab the edge of it upon sliding off.
Shimmy right around a corner
and backflip onto the block behind you.
Now take a run-jump/grab into the building N and go left around the
statue to find a Jumpswitch on the pillar (cut scene of Yeti’s near the
Portal). Runjump/grab back to the block and face SE standing on the SE corner,
standjump onto the blue slanted block and slide off the left side, then jump
with a left curve and grab under the ladder on the big block, pull up over the
top and slide/jump/grab back to the blue block, runjump/grab to the Portal
house.
To the Top.
Go climb back via the crack around that left pillar
and have it out with the Yeti’s. Look W and see a block with a Burner on
top. There used to be a Burner pointing in your direction too and that one is
now gone. Runjump/grab to that block and shimmy around left to the other
corner, pull up, turn around and stand motionless, then stand jump/grab to the
slanted block NW. Hang right, save and time the Spikes on the next
ledge. Best is to pull up as the Spikes are about to pop up and immediately
jump from the top of the block, curve right and do a running jump over the
Spike block, jumping to the ladder at the last moment (if you land too low on
the ladder you have to try again).
Go climb up and left around the corner, up again and
right till you hang over a Burner ledge, go down to the lowest point and back
flip/roll/grab a block behind. Runjump onto the next blue slanted block a bit
to the left and slide jump to the next. Now runjump/grab to get onto the roof
get over there and hop onto the highest part, look back
W and spot the Secret Golden Bars hanging in the air, jump onto the invisible
platform it is on and get your Secret# 1 Golden Coins. Jump back to the
roof and use the button. A ladder appears in the SE corner of this
building. But for now go to the E side of the roof and stand jump to the
walkway E, go left and see the first building on the right? There’s a crack in
the side and it leads to a crawlspace.
The Receptacle Room.
Runjump over the railing and grab the crack, go R till
you are hanging over a Jump switch (for later) and pull up into the crawlspace,
go climb out onto the ladder in the Receptacle room and from hanging on the top
of the ladder a back flip/roll/grab to the Receptacle floor. Hop onto the blue
block E to get the small medipack and go down from the block (the
opening E is for later).
Go to the W side of the Receptacle floor and jump/grab
the ladder, go down to the end, climb left as far as possible and take one step
back to the right, listen to the sound of the Spikes and backflip (no
roll) when you expect the Spikes to be up when you land, immediately side jump
right onto a sloped block to slide onto a ledge. Look NE and see the Golden Coins on
the deadly floor, that square is the only safe spot, so jump straight to it and
get your Secret #2 and from that square you can jump back to
the ledge.
Time the Spikes again and hop through the corner to do
a running jump/grab back to the ladder. Now once up go for the ladder on the N
wall, down all the way and back flip to a slanted block and from there jump NW
to the lever. Flip it and see a passage being opened up, make your way back up
the ladder (a single jump will do) and back flip/roll and grab the Receptacle
floor.
Climb the blue block and into the opening in the E
wall and get out onto the block right of the opening so you can climb up the
ladder to the roof there, two Yeti’s attack, shoot them and hop over the
railing. There’s a Zip-line here, but you can’t use it yet, that one will be
for much later. Head to the far NW corner of the roof.
Drop down to the walkway you came from and jump to the roof of the Portal (the
one with the button on the roof). From the roof you can runjump to the walkway
NW and go to the W end and just before that big statue is a small medipack
to be found. Go back and head to the S end, just under the arch is another small
medipack. Go to the S and shoot a Demigod
on a roof there and run-jump/grab over the railing to the blue block E; then
run-jump to the roof and Lara will look up at a Jump switch under a crawlspace
up in the S rock face. Look down from the W side and see a ledge with a Medipack,
safety drop down there losing a bit of health.
Grab it and spot the Ivy covered
opening SW in the W wall, runjump in there with a left curve and follow in to
shoot a Yeti, you’ll come to a fence with Fire behind it, grab up
to the ceiling monkey swing and go just over the second fence, drop down and
line up for a run left through the Spike-trap. Save and run as the
Spikes just popped up, jump/roll to a slanted ledge over the gap and jump/grab
a climb wall. Go up to back flip/roll/grab the ledge behind and go up, shoot a Yeti
and shoot a box to get some Desert Ranger Ammo from it. Go out E and
follow crawling backwards out of the crawlspace to the Jump switch, drop/grab
and a door opens in the building below. Now you have to get down and the
quickest way I found (probably there’s a better way) was to jump back to the
blue block S and stand on the SE corner, face SE and run off to land on the
grey block below, runjump/grab N to the building.
The 1st Lizard Sphere.
Go in and find the open gate N, look into the opening and spot a
crawlspace in the blue wall over the gap. Go down on the ledge and stand in the
middle of the E side, face NE and run off with a right curve to grab the edge
of the crawlspace, follow into a pit and hang on the edge of it, shimmy left
along the crack to a crawlspace with a plant, go through and hang on the other
side, shimmy left and climb up the wall.
Room with the Statue (Bottom section).
Go up to one step from the top and back flip to the ledge behind, go N
and hop to the block E, turn around and run off the
lower side with a grab to land on a thin ledge (down and W). Grab up to the
monkey swing and head to the S wall, drop/grab the crack and go shimmy right to
where you can pull up. Walk up to where you look out over the main area and do
a run-jump/grab with a left curve to the closest side of that blue block to the
right. Runjump/grab to a block in the NE corner and standjump/grab
up to the higher block S, now you can stand jump/grab to the N and
run-jump/grab to the wooden ledge W.
Then a run-jump to a balcony block with the pedestal
N. Get the 1st Lizard Sphere. The whole place rocks as the Spikes in the crawlspace N
retract, drop from this block to the blue block below and runjump/grab back
into the right hand opening with the Zip-line, safety drop with grab and shimmy
left along the edge and go through the crawlspace to a very nice room.
Spike-traps, a Blade and a Burner.
Stand jump a bit left to the Spike block as you expect
the Spikes to be up on landing and immediately another stand jump onto
the corner of the Burner block, drop/grab from the edge and shimmy around to
the far corner, pull up facing W and turn slightly right, so you face the Spike
block. When you now side jump right to the Spike block in the corner you’ll
land on it. Time the Spikes and side jump when you expect them to go up, then immediately
stand jump/grab forward to the ledge and pull up, turn SE and runjump over the
Burner block (of course when the Burner is off) and land on the balcony with
the Skeleton. Grab up to the N wall and shimmy right to a slanted block with a
Spike-trap and a Blade behind it, hang left on that block and time the Blade
(when it is right) to pull up over the top and slide/jump to the ledge over the
Spike-trap.
Room with the Statue (Top section).
Jump/grab to the ledge left and runjump/grab to the
wooden balcony on W, pick up the small medipack, then runjump onto the
next and keep doing that, all the way around to the ledge with the push button.
Pushing the button will open that door over the bridge E of the Portal, jump
back to the Statue and then to the opening S (shimmy till you are next to the
statue, pull up and take a standing jump with grab). Go out onto the walkway
and at the Hides-rack a runjump (mind the overhead block) to the roof of the
building W, make your way back to the Portal (jump back to the blue block S and
jump to the walkway W, there might be a small medipack on the walkway. Go
S and jump to the roof of the Portal E, climb down that ladder NE and drop into
the building).
Go out E and runjump/grab to the block, go runjump
over the broken part of the bridge and enter the E area. Runjump with a left
curve around the hanging block to land on the blue ledge left in front and from
there a runjump onto the dark brick structure S, grab the edge and shimmy to
the left side, from the middle of the last square a back flip/roll/grab to a
climb wall on a pillar. Go up and right around the corner to back flip to a
rock ledge where a block has to be raised later. Go up to a ledge N and get the
small medipack there, then stand jump to the block SW and run off SW to
land on the dark brick structure, sliding off backwards you can grab the edge
and shimmy to the ladder, climb down into the structure, push the Face Button
and see a door opening up on a balcony in the E rock face.
Climb back up the ladder
and pull up on the roof, slide off grabbing the edge and immediately start
shimmying right before Lara gets her feet back up. Go right to the square where
you can see the button below, then pull up, backflip/roll/grab to the Fiery
block, hang on the edge and shimmy right around the corner and pull up in the
next corner, quickly turn around and standjump to the block NW. A
Hammer-trap activated on a balcony S
and that’s where you have to go, through the Hammers,
Spikes and a Burner to get to that small balcony left of the ledge. (If you
look NE you can see the third Secret)
Booby Trapped Ledge.
Run-jump to the ledge when the Burner is
off and the Hammers just clanked together (also time the Spikes, you have to be
lucky) and jump with a left curve to get onto that small balcony left of the ledge, push the Face Button there (extinguishes the Fiery
block). Now for getting back you have to be real careful, stand back and take a
stand jump onto the ledge when the Burner is down and try to time the Hammers,
so you’ll land when they are just opening up again, as for the Spikes, you have
to be really lucky again and it will take a few tries for sure (I was lucky,
through on first try!). From the S end of the ledge a run-jump right back to that
blue block (You can also get into the corner of the ledge next to the burner,
when it is of a runjump S, then a running jump to the blue ledge). From the
blue ledge a stand jump to the now extinguished Fiery
Block. Look SE and spot the
crack in the rock face, jump/grab to it and go shimmy R to a ledge with 2x
Revolver Ammo. Now don’t be scared but just drop from the N side and walk
under the ladder to get Secret#3, another Gold Skull.
The 2nd Lizard Sphere.
Go grab up to that ladder and go up and left around
into an alcove, look out NW and spot a blue ledge, standjump out with a left
curve to land on the ledge and runjump to the balcony over the Booby Trapped
Ledge, get the small medipack on the end and take one step back from the
railing, then a hop back, now runjump over the railing and grab the blue block
S. Then stand jump/grab to the slanted block E and pull up over, slide and
jump/grab the ledge with the small statue. Climb up left and go get the 2nd
Lizard Sphere, just beyond the pedestal is 2x Uzi Ammo. Go back down
to the statue ledge and look for that extinguished Fiery block SW, check the
health and runjump out of the alcove with a right curve to land on that block.
Back to the Portal.
The 3rd Lizard Sphere.
Run-jump/grab to that crack in the E wall again, go
shimmy right onto the ladder and go up to that alcove, stand jump out SW to the
blue ledge on S wall and jump to the balcony over the Booby Trapped Ledge, now
look for a block W of it and hop over the railing onto that block. Then a
run-jump down to the dark block a straight forward and a bit to the right and a
runjump to the slanted block in front of the structure, slide and jump/grab to
catch the edge of the opening, climb up S behind the statue and see the
Receptacle room in front of you. Stand jump/grab up to the ledge up and left
and run-jump/grab across to the one S, look down and go to the Golden platform
and get the 3rd Lizard Sphere there. Look for that Jump switch on the
wall of the Receptacle room (under the crawlspace) and runjump/grab to activate
it (the Burner on the block S of the bridge extinguishes). Grab the edge of the
slanted ledge below and hang left, back flip/roll then jump from the slanted
block and jump again with a right curve to land on a broken bridge. Push the
button there to stop a burner and Spikes on the route you have to take now.
Ladder Route for the 4th Lizard Sphere.
Go W up the bridge, stand close to the block with the
Hide-rack and runjump/grab to the block N, then to the block NW and head N with
run-jump/grabs. On the last dark blue block you can turn around and take a
run-jump to that ladder. Shimmy around the corner right and stay away from the
edge, as that will make the spikes deadly. Back flip/roll/grab to another
ladder block with Spikes and go right around 2 corners, then another back
flip/roll/grab from the same height and grab the ladder under a Fiery slope,
now go left around 2 corners and down to the lowest point possible (Lara’s feet
still on the ladder) and back flip/roll/grab to a blue climb wall. Go left
around to the second corner (because there’s a low ceiling left of you), stay
there and go down as low as possible, back flip/roll/grab to a block.
Now runjump/grab W and grab up to the higher block S,
turn around to runjump N and then runjump into an opening NE of the ledge and
in the N rock face. Shoot the Yeti and get the 4th Lizard Sphere.
There’s some Shotgun Ammo hidden in one of the plants. Go out to the
opening and stand jump out left, back to the block and jump to the one S, drop
down and jump back E, go around the blue climb wall and to the second wooden
ladder. Around the first left corner you can drop/grab the slanted ledge below
and back flip/roll/grab to the blue ledge near the Portal, jump over and go
around the crack on the left pillar and you’re back in the Portal.
The E Area for the 5th Lizard Sphere.
Run-jump/grab the block with the hide-rack
E and run-jump over the broken part of the bridge to enter the E area.
Runjump with a left curve around the hanging block to land on the blue ledge
left, and from there a runjump onto the dark brick structure, grab the edge and
shimmy to the left side, from the middle of the last square a back
flip/roll/grab to a climb wall on a pillar, go up and right around the corner
to back flip to that rock ledge. This time go S and run-jump/grab to the block;
turn left and runjump to block with some grass growing there. Turn around and
head N with two run-jumps to the block with the Hide-rack. Now go W to the
balcony with the Statue (stand jump, run-jump). Try to shoot that Demigod
in the structure SW from here and run-jump/grab to the block N then go over
into that structure and get the small medipack on the floor (could be
the Demigod dropped right on top of it), throw the switch to see Spikes
retract on a ledge.
I wont mention all the jumps,
but you have to go back the way you came to the “block with the grass” and then
to the block E, from there you can runjump down to the block where the Spikes
went down, in the SE corner, close to the Swinging Blade. Grab upon
landing to soften the impact and stand jump with a left curve to the ledge with
the Burner-button on N wall. Time the Burner and jump to the Face Button when
you expect the Burner to go down and hold the “back” key while Lara pushes the
button so she will hop back before the Burner starts again. Now
run-jump/grab to a dark blue block W and then a runjump/grab to that ladder on
the Spike-pillar N. Go up to one step from the top and back flip onto a
balcony ledge, from there a runjump (no grab) to the block E and two stand
jumps to get into the opening in the E rock face.
Blade Room.
Run-jump (when the Blade is moving right) from the
left side of the opening and with a right curve to a yellow block in the death
pool, from there a runjump to the E balcony to get the 5th Lizard Sphere.
Run-jump back to the yellow block and face N, stand left on the block and
runjump/grab with a right curve around the Blade to an alcove N to use the
switch there (block rises on the rock ledge). Now runjump back to the yellow
block and back to the entrance (Note:
It is possible to run-jump directly from the switch alcove back to the
entrance, but that is also a hard jump).
Over the Top to the last Lizard Spheres.
Once outside you can stand jump to the first block W,
then jump to the second and from that one a stand jump down to the dark blue
block NW, near the ladder and go back up the ladder, now all the way to the top
of the pillar as the Spikes have retracted. Jump to the block with the grass
and then over to the E block. Then to the rock ledge and from the raised block
you can climb up W. Follow the high blocks to the W and try to shoot the Demigod
from one of the ledges close to the Central Tower. From the last block with the
railing near the walkway go left and then over to the roof where the Demigod
was, get the 2x Shotgun Ammo and follow the route N and then W to the
till you face the Spike-block SW. Here you have to time the Spikes to a
runjump to them and immediately a running jump to the next block SW. Time the
next stand jump onto the second Spike-block and a running jump to the
blue pillar near the building, go SW over the roof, shoot the Demigod
from here or stand jump to the block SW and run-jump over to him, duck and
shoot him from close up with pistols. When you push the face Button, a door
will open up in the building you just crossed over (go there later, because if
you go down there now you have to all the way around again to get up here and
the job isn’t quite finished here). Try and shoot a Harpy flying around
S from here.
Go to the SE corner of the balcony and spot the
pillar, run-jump with a left curve to grab the crack in the base of it (N face
of the pillar) and shimmy right around the corner and drop to a ledge with a plant
below, hop back and drop down one more level, get the Desert Ranger Ammo
there and jump/grab to the dark pillar W, then stand jump/grab to a ledge W
(railing) and runjump back to the ledge with the plant E, turn around and grab
back up W to the crack in the pillar. Shimmy right to pull up on a ledge with a
plant, hidden in the plant is a small medipack. Then shoot the Harpy
hanging way up N (if you didn’t already) and spot the structure N with the Burner
in a crack on the left hand corner, run-jump onto the roof, slide and grab the
edge, go left around the corner when the Burner is down and watch out. There’s
another Burner a bit further on that side (different texture on the floor of
the crack).
All the way in the end is a small balcony below,
drop/grab and go push the Face Button to stop Burners inside the structure,
another Harpy is flying around, you can hear her, shoot it if you get a
chance, otherwise just shimmy along the crack with the Burners back to the
front of the building. The last burner at the corner is a nasty one as I got
torched even approaching the corner, so I used one interval to get to the
corner, one interval to go around the corner and hang still there to wait for
the 3rd interval and shimmy past it. Go to where you
can pull up into the building and drop inside, go move the 2 push blocks onto
the Face Tiles. The first has to be moved all the way to the W side before you
can move it N. Once the blocks are on their proper tiles the spikes will
deactivate and you can push the Face Button in the NE corner to open a door on
the N walkway.
Go back into the crawlspace after moving the block
aside, Save and drop down onto a slanted wall, shimmy right and back
flip/roll/grab to the block where you got the Ammo before, shoot the Harpy
(could be she pushes you off, then just reload and try again) and go back up to
the blue ledge with the plant so you can runjump to a ledge E and close to the
walkway E. Run-jump onto the walkway and head S through the first open arch, to
the right and below the second you can spot a short wooden walkway, stand here
and stand jump with a left curve and grab over the railing to land on it. Go
jump to the E, the next jump involves Spikes, time the runjump and curve right
in the air, so when you land after the Spikes went up, you can immediately side
jump left and land on the blue ledge. Look down S and spot the ledge with the
railing, runjump down to it and head W with run-jump/grabs to a higher pillar with a Hide-rack. Get the small
medipack and runjump to the pillar N, grab up to the ladder on the
structure and hang left on the ladder, pull up to the roof, slide off and
shimmy left before Lara gets her feet up. Go to the last part before the edge goes
up and back flip to the second arch (of which the door opened just before).
Try to get rid of the Harpy coming from the NW
and run-jump to the first (N) arch. Go over to the E end and runjump/grab to
the blue block to grab the monkey swing above, go over to the block with the
plant S and run-jump to the block with the Totem. Now stand jump down to the
balcony with the Face Button E and push the button to see the Fire on the S
walkway go out. Stand against the railing, facing S and just jump backwards straight
over the railing to land back on that same ledge below where a Medipack now
appeared and you can use it right away I think. Go back to the ladder on the
blue building W and now back flip from the top onto the N walkway and shoot a Yeti.
Then go to the N end of the walkway and stare in the unknown. You can see a
stake with a Skull and far away in the distance is another one. This gives you
a direction, because there’s an invisible (or white) walkway you have to
follow.
Walking the White Walkway, the 6th Lizard Sphere (map)
From the walkway take a running jump to the first
stalk or else you get send to your LOAD screen. I’ve made a little map in case
you get lost, but the trick is to walk slowly go from stake to stake, at the
end take some jumps and you will come to a terrace with the 6th
Lizard Sphere, make your way back to the wooden walkway and follow N till
you can runjump onto the roof of the Portal building.
The 7th Lizard Sphere.
Run-jump from the NW corner of the roof to the NW building where the
door opened a while back (W and left) and go inside to get the 7th
Lizard Sphere. Now you have all of them you can return to the Receptacle
room.
Get back on the roof of the portal and jump onto the walkway E,
run-jump/grab over the railing to grab the crack in the building SE and get
into the crawlspace, hang on the ladder inside and back flip to the Receptacle
floor. Place the 7 Spheres and climb onto the block E where you can walk out
into the opening. A flyby kicks in, showing you the top of the building with
lamps lighting up at the Zip-line you’ve seen all level long. Run around the
right hand corner and climb up to the roof and hop over the railing, get onto
the block so you can use the Zip-line and enjoy the long ride. Grab the climb
wall in the end and go up to a receptacle with the Essence of Nature. A
block lowers on a pillar W, run-jump over the railing to grab the edge and pull
up.
The level ends...
"Korea, one week later…"
Red is the way the compass shows.
Lara is dropped off on the roof of an underground
base, careful because there’s a deep Main Laser shaft in the middle of the
roof, get that stack of Flares (3x) NW and go to that shaft. Stand
facing N at the shaft and run in with a grab to land in an alcove N, turn
around and stand-jump/grab against the S wall, to grab a slanted ledge,
drop/grab one more level down and shimmy left till you can pull up in a tunnel
with a Laser-trap. Crawl into the tunnel (stay low) when the Laser moves
away and crawl to an electrified pit, stand up quick when the laser goes behind
you and jump over the pit, quickly run left into the N passage. Follow through
to a shaft, stand to the left and take 3 steps back from it and run in, so you
just go over the edge and landing on a slanted ledge a jump/grab to the other
side of the pit. Shoot the gratings and go backwards into the crawlspace, drop
and look for the Revolver Ammo. Equip the Revolver with the Sight and
shoot a gratings up left in the Main Laser shaft and
stand jump/grab up there with a left curve, follow the dark duct down a slide
and then go through some Slamming Automatic doors and to the left at the
next intersection (R is closed door). Pass through the slamming doors and come
to a button, a Timed button to open that
door in the S passage. Save and push, back flip/roll and run around the corner,
through the doors and straight into the open door.
The Ventilation Shaft.
At the Ventilation shaft a run-jump/grab to the pillar
in the opposite corner and a run-jump/grab to a ladder W, go up to the top and
turn around to stand jump/grab to the swing pole, swing over a Burner tile into
a passage E and notice the overhead ladder you almost bump into, the hatch over
the ladder is still closed so head into the passage S, shoot the grating W just
around the corner. Crawl in to get the Fire Key, go back out and to the
N (the passage R at the cylinders is for later) and left in the end, up a small
ladder and to the R in the next passage is the door you can open with that Fire
Key.
The Fire Room.
Inside are Burners and the floor is deadly,
stand jump to the left corner of the Burner block, turn facing E and sidestep
to the pipe when the Burner is off, quickly get on it (hit “Ctrl”) and walk
over to the other side, time the Burner there to run to the button and push it,
hold “back flip” while Lara pushes and you’ll be gone before the Burner starts
back up, another burner went off. Go back over the pipe, waiting for the Burner
to go off in the end and quickly get onto the block and sidestep to the right
hand corner. Jump/grab back into the opening S and go left (to the R is a Timed
door we’re going to open up now), down the small ladder and left at the
cylinders into that W passage, here is the place where the Burner went off.
Timed Run.
Take out a Flare and Save in front of the Timed
button, push and back flip roll and run out of the passage, right and jump up
onto the ledge at the small ladder, run/sprint diagonally into the passage at
the Fire room and sprint to the end, left and through the Timed door in the
end. Push the button (not Timed) and see that trapdoor opening up at the
ladder. Go back and follow the passage to the ladder (at the start) and get up
the ladder (can be a bit tricky, stand back close to the Burner and stand
jump/grab forward). Climb off to the left, jump to the S and go left to push a
button between *Power signs*, the power of the Laser down in the shaft will be
off. Go back down the ladder, drop and stand straight under the ladder, now you
have to back up a little bit, but not a whole step, so turn left or R a bit,
then sidestep and turn again so you stand straight and back flip just over the
Burner tile and you should just land on that block in the corner of the
Ventilation shaft with minor health loss. Drop through the now safe Lasers and
shoot a grating in the S, go to a button and see a door open up high in the
Ventilation shaft, get back out (time your way passing that burner) and make
your way back up like you did before, climb up the ladder. Jump to the S
passage and go right this time, through the open door and look N to spot a
grating in the opposite wall, shoot it (pistols) and run-jump/grab over to
crawl in.
The Ducts.
Follow through past a grated wall and come to the room
adjacent to the ladder room, get the small medipack and push the button
E to open the trapdoor at the ladder in the room behind the glass N. Return
into the duct and at the grated wall with the sign: “Central Ventilation –
Access Shaft” you can climb up W, pull up into the crevice and crawl to the N,
drop into the space behind the grated wall and go for the button E to raise a
platform in the Ventilation shaft. Hop back and look up for a hole in the
ceiling, grab up to a duct from facing E and crawl past a couple of
Steam-blowers, taking advantage of the small intervals and pick up the Medipack
while you’re there, go around left to come to an opening in the floor. Drop
down and head out S, to drop onto that raised platform, run-jump/grab over to
the S and follow the passage to jump over the hole at the ladder.
The Restricted Area.
Go down into the now open trapdoor and follow the
passage crawling to where a flyby kicks in, the General will enter the
Restricted Area where 2 SAS stand guard. Go on through the duct and come to an
opening in the floor, you have to shimmy around to the opposite side, be sure
to take the shortest route (so climb down along the S side and go around
quickly) and have your health up. Pull up into the other duct as soon as
possible and you should just make it. Follow the duct to a small medipack
and a button, which will lower a part of the Barbed wire in the passage below.
Go back to the hole and quickly jump out (Alt+forward), roll and take care of
the 2 SAS, one of them will leave a Medipack (that may end up
between the Barbed wire). Look for the Timed button in the NE corner and it
will open the door S only shortly, so back flip/roll and sprint through the
door, maybe even hitting “Alt” to roll through at the last moment.
Follow the crooked passage up to a crossing with a
Control room straight ahead, the door is closed and needs an Access Card. Head
left and down the stairs to a Storeroom.
Crate puzzle for the Access Card.
Go straight when you come into the room with crates
and pull the crate SE out twice, then pull it W once, turn left and walk into
the SE corner where you’ll find another push crate right, push it E and then
all the way to the N into the entrance passage. Now go back through the bypass
and pull a crate standing W into that bypass and then move it all the way into
the NE corner, so the bypass will stay open. Now there’s another crate SW, pull
it out and to the E once so you can get behind it. Get the Access Card
and go push the last crate back so the bypass will be open again and you can
pull the crate standing in the NE passage back out. Go up the stairs to the
Control room, open it with the Access Card and go look for another Fire Key
on the shelf in the back left side of the room.
The Fire Department.
Go out of the Control room and left up the stairs to a
platform with a ladder on a hanging pillar, on top of the ladder is a closed
hatch, go up the stairs S and follow to a Rocket storage, shoot the 2 SAS
on your way to the Fire control E, one leaves some Uzi Ammo. Go to the N side of the fenced off area, face N and side jump over
the fence to use the Key in the lock. A Fire tile under a button S
becomes safe, side jump back over the fence, go to that yellow Fire sign on the
floor S and side jump over the fence there to get to that button in the SE
corner. Push it and see the Fire tile W extinguish, side jump over the fence
and walk straight W to the button that will open up the hatch over the ladder
(you have to use the same button again later). Head NW down the stairs to the
platform, from the steps a run-jump/grab and go up the ladder passing the two openings
left and right, you can’t get in there now, because you have to close the hatch
first. Get into the crawlspace on top to get to a ladder down to a door that
will open for you and you are back in the Fire department.
Go to the extinguished Fire tile to use the same
button to close that trapdoor at the ladder and go through the door you just
came from, follow the duct with Burners on this time, to the ladder at the 2
openings and go down onto the hatch to grab up to the opening E and get the small
medipack there. Turn around and go N, into the room and to a button SW,
under a sign that says: "D" sector generator, push that to activate a
door near the Store room below. You’ll witness the General entering the Secure
Silo 01 Area and the guarded door closes behind him…
The trapdoor opened up again, so jump/grab to the
ladder and go down to drop to the platform, go down the stairs to the Store
room and find the open door NW, go into the passage to the Silos and shoot the 3
SAS coming for you. One leaves a small medipack.
The Rocket Silos.
Follow the passage passing the Silo entrances first D
01 where the General went in and then D 02 (up left), go around the
corners there and just around the last corner is an entrance to the Exterior
Area Access up in the wall to the right. Climb in and push the button on
the S wall to lower the Barbed wire behind the fence, notice the Card
reader on the N wall and go back out to the passage, head R (S) and into the
next opening right, Silo D 03. In the NE corner of the room is an
alcove, jump over the NW corner of the N wall to land in the spot where that
Barbed wire went down. Stand against the W wall and back flip onto the slanted
block, jump/grab to the crack in the W wall and shimmy R to pull up at a pipe
spanning the room below, walk over the pipe to the button in the alcove S and
the door below will open up. Drop from the alcove and enter the open door E.
Timed Run in Silo D 03.
Go to the S wall and spot the ladders, climb the one W
to the top and back flip/roll/grab the one behind, quickly go up and wait on
the top of the ladder to time the overhead Burner, don’t pull up but
just back flip/roll to a ledge with a button. The button will open a Timed
door in the N side of the Silo (you can just see it behind the rocket.
Check out the route, a ledge on the W wall and a sloped arch kind of structure
S with the door above. There’s a Secret on a platform E, but a burning floor
protects it.
Push the button, hop back while turning left and
you’ll be lined up for the run-jump to that ledge NW, then a running jump with
a sharp left curve to jump onto the slanted side of the arch, then side jump
right into the open door (Second method: Push the
button, hop back while turning left and you’ll be lined up for the run-jump to
that ledge NW, curving R in the air to bump into the wall, roll and run with a
right curve then a run-jump to the edge of the ledge in front to the door while
curving left so you can quickly side jump into the opening).
On the walls are signs, "#2", so when you
push the button you’ll know Silo D 02 will be open now. Make your way down from the arch and shoot that SAS below before
you run-jump to the platform E to get Secret#1, Golden Bars and some Arrows, safety
drop from the platform and pick up a small medipack the soldier dropped.
Go out to the W passage, shoot another SAS in the Silo entrance and go
out to the passage. Head back N and just around the corner after the grated
wall is the entrance to Silo D 02 up in the right hand wall.
Silo D 02.
A ceiling hatch opens up when you approach the opening
in the W wall of the entrance room, look in the right hand wall of the Silo and
shoot that grating with Pistols (while crouching). Then grab the ceiling and go
to that duct, drop/grab and get in, follow to a button in the left corner and
this will close the hatch back up. Now you have to go the E and crawl through a
duct, drop from the other side and you’re back in the passage with the grated
wall, re-enter Silo D 02 and now go straight over that monkey swing and drop on
the ledge W. Go down and stand jump to the slanted ledge N, hop over the gap
and get the 2x Shotgun Ammo there, now go down the ladder to the Silo
floor, go get the Uzi Ammo SW and go to the E side into an opening to a
room with a Laser floor, there are platforms going up and down.
Laser Room jumps for the Exterior Area Access Card.
First get the Medipack on the walkway on the
left and then line up for the first platform and the ledge beyond that. Stand
back against the wall next to the entrance and stand jump as soon as you expect
the platform to go up and do a running jump to the ledge ahead. Line up for a
run-jump to the platform N and from that a stand jump to the next safe ledge,
now hop onto the walkway E and go time the Burner to get the (Exterior Area)
Access Card. Jump back to the last safe ledge,
jump to the ledge on the corner right and drop down through the only safe spot
in the Laser floor W of this ledge and get Secret#2, a Golden Skull. Climb back up and stand 2
steps back from the edge before you stand jump S when the platform is about to
go up, a running jump will get you back to the S side safe ledge, stand close
to the platform and take 2 steps back, stand jump and a running jump back into
the exit W. Go up the ladder and over the ledges W to the monkey swing, get
back to the entrance room E and go out to the passage, head S and around the
corner, shoot that SAS and go back into the opening right around the
next corner. Open the door using the Card in the reader on N wall.
Exterior Area.
Follow the dark staircase up to a room with a crate,
go around the crate and pull it once into the passage W, turn around and go up
to a Barbed wire trench in an outside area (to the R and down in the trench you
can spot a trapdoor), run-jump to the left onto the opposite slanted side and
keep jumping left till you land on the grassy field, there’s a closed door and
a Radar, go behind the radar and find a button, it will open a timed trapdoor
in the N end of the Barbed wire trench.
Timed Trapdoor.
Save and push the button, turn right and sprint
straight to the trench, release sprint and run-jump as far as possible onto the
lowest part of the R hand slanted side of the trench and jump to and fro
towards the end (past the barbed wire), then just let Lara fall into the
hopefully open still trapdoor and you’re back in the Silo D 02 entrance.
Go back out, then to the S again, just around the corner jump up to the right
and into the Exterior Access room, go up the stairs to the crate you pulled
before, now you can enter the passage hidden behind it before and push the
button to the left (a door opens in the courtyard outside).
Climb up N and go over the safe part of the floor to a
pit, safety drop down and go into the dark passage S, shoot the 2 SAS in
the next room and go to a block SE. Stay close to the E wall and climb the
block, wait with your back to the wall till the laser moves away, then take a
run-jump to the swing pole and swing to the other side. Turn around and take a
run-jump/grab to an upper ledge E. Then jump/grab up W and last a stand jump
into the opening in the S wall. Grab the monkey swing on the ceiling and time
the Burner to get past, turn left in the end and drop/grab to the slide going
out to the courtyard, pull up over the top and draw a gun as a SAS is
waiting for you around the corner. Enter the open room W and push the button to
open the Secure Silo D 01 door. Now you have to do the timed run/jumps
to that trapdoor in the Barbed wire trench again, so go behind the radar and
push that button and run/jump towards the trapdoor and climb out of the Silo
D02 entrance, go right and around the corner to the entrance of Silo 01.
Silo D 01.
Straight at the end of the passage is a Card reader
and to the R is the door the General went through, go left and follow to Rocket
Silo D 01, go down into the passage N and follow through to the N end, run
sharp right around the corner of the fence at the Burner drop down and
shoot the SAS. Then go to the S side of the room with the yellow
cylinders and up into the opening S. There are fences in the next room and you
have to get through the crawlspaces with the Blades by hopping in as the
Blade moves aside and then crawl through and stand. Side jump out of the trench
and find a push crate and a Burning tile in the first quarter of the
room, you’ll be back here. Go through the next and pick up a small medipack
near the S wall. Then take the next one W and push the button to stop the
Burner in the N end of this place.
Now you have to do this all over again to get out,
back to the N past the Yellow Cylinders to the end and run-jump over the
slanted W side of the passage where the Burner was before, in the N side of
that place is a button to stop the Burning tile at the push crate. Jump back
head to the S into the rooms with the Blades and head through the first trench
to get to the crate, push it to the S (could be Lara won’t push, just try a
couple of times till she does) and push the button behind it. Watch the flyby
as a fire will start in the N side of the passage and the cylinders will
explode, the liquid gas will run over the floor to the next set of cylinders
and the rockets will overheat, causing them to launch…
The Access Card.
The floor of the passage is now in
ruins and quite deadly, turn R from pushing the button and crawl through
the triangular opening N, onto a narrow and low ledge, look for a block in the
deadly mass where the floor used to be and slide/jump to that block. Walk onto
the NE corner and hop back, then run-jump E onto the next part of the narrow
ledge, crawl N to the next fence and grab the grated ceiling. Go around the
fence when the Burner is down and go to the N end, stand one step from the
wall, facing W and slide down, jump hard left and land back in the remaining
part of the passage. Follow back up to the Rocket Silo and watch out for those
Burners under the grated floor, stand with your back to the wall and take a
run-jump towards the ladder and climb the ladder and from that ledge you can
jump to the ledge E. Run-jump up into the opening in the E wall and follow
through to an outside structure, grab the monkey swing and follow into that
structure.
Grab the Access Card and return to the other
side, jump down to the ledges and go down the ladder, up through the opening W
and follow back to where you saw the Card Reader before. Open the N door with
the Card and enter. Inside you’ll see the General walk through the passage
behind the fence and to the E is a 2x Revolver Ammo pickup. Then climb
up the shaft at the radiation sign and get into the duct, follow to a corner
with a Blade, time it and quickly crawl through the corner to the next
trap, do the same and come to a drop off into a Store room of some kind with a
deadly floor and there are 2 Security cameras, you have to stay out of their
range.
The Store Room.
Just walk N a bit and grab up to the
monkey swing, go over to almost the end of the monkey swing and drop, stay on
that spot behind the crates and look for gratings in the NE corner of the room
and shoot all 4, then turn W and go into that passage. At
the end to the left is a button, use it to open the door in the storeroom. Go
back and go right in front of the rockets to the S wall, get the Revolver
Ammo and head along the wall to the corner where you shot the gratings,
grab up to the block and shimmy left past the camera to drop in front of the
open door. Go in and right, in the NE corner at the Secure Access door is
Secret#3,
Golden Coins. Opposite the door are 3 Uzi Ammo pickups and a small
medipack. Then head to the S and find the General…. The level changes.
Level 10 – General Contamination.
Lara took care of the general….
Pull the General’s corpse away, holding him by the
head, and pick up the General Access Card. Go out of the office to the
door you saw before in the NE corner (in the previous level), open it with the
Access Card and enter, follow the winding passage to a Danger Sign. Drop down
into the room below and find yourself in a nuclear waste pit, still sizzling,
to the left in the pit is a trapdoor opening, it opens up later and in the
middle is a “Fire” block.
Stand jump/grab to the “Fire” block with the flame on
top and shimmy around the left, pull up in the next corner and stand jump/grab
over to the other side walkway, head left and open the door with your Card. Go
down into a Store room, thrilling music starts and 2 Guards attack in
their Anti-contamination suits (you’ll be visiting this room later over that
walkway above). Take out the Guards and head to the E wall, there’s a grating
you can shoot with pistols. Grab up and crawl to the end where you can pick up 2x
Revolver Ammo.
The Reactor Core.
Shoot again the grating and drop/hang out of the
crawlspace, shimmy right and come to a broken steel walkway (From this point there are more ways than one to get through
this level, this is how we did it).
Walk down to the lower part of the steps and shoot the
gratings out of the wall, aiming at the R hand side you should be able to shoot
them. Stand jump with a grab into the opening and shoot the SAS there,
from this small room you can only go N for now, so grab up and follow to a pit
with Burners. Stand left and jump with a grab to the higher part of the
floor under the Burner (of course when the Burners is off), then stand right
and run-jump up onto the higher opposite passage past the second Burner. Follow
the passage to the store room you’ve crossed just a minute ago, shoot the
gratings and use the monkey bars under the walkway to get to the high stack of
crates. Turn R and drop/grab to get onto those crates, jump NE onto the steps
and go over the walkway to the S and follow the tunnel to a grating, shoot it
and you’ll see the Reactor Core again. Look out left to spot the broken steps,
run-jump out with a sharp left curve at the end of the run and jump to those
steps, go up about 2/3 and run-jump/grab E to the top of the Core.
On top you’ll find the Uzi and a closed trapdoor
(we’ll be back), go over to a ladder on a pillar NE and turn around facing W,
drop/hang backwards over the edge drop/grab to the walkway below and follow in,
when you get into the upper Control room, all technicians duck behind their
consoles, go to a Card reader on the E wall, use your General Access Card and
open a door (close to the start of the level) with it, go to the shelves S and
get a small medipack left and 2x Uzi Ammo from the right hand
shelf.
Head back to the Reactor room and from the walkway a
jump/grab to the ladder, go up and back flip to the top of the Reactor. Go over
the top the SW, then take a run-jump back to those steps W, walk down N and
from there a right curved run-jump (no grab) back into the opening, follow back
though to the store room and hop to the stack of crates, down to the floor and
W into the room with the Fire block and straight to enter the room W you’ve
opened.
Room with the Malfunctioning Cranes.
Run-jump through the opening in the fence to the block
in the waste and the time the crane to run-jump/grab to the block E with the Medipack. Get it and stand back to jump/grab forward and up to
the walkway over the Crane, you’ll get hurt a bit but there’s a small
medipack available. Then run-jump into the opening in the S fence and go
left, onto the block and at the opening in the fence you can see a monkey swing
a closed door and a crane, grab up and follow the monkey swing to the Crane. Go
right and to the waste waterfall W, drop/grab a lower crawlspace behind it and
go in for Secret#1, a Medipack and
Golden Bars.
Climb out W at the side of the little fence and drop
onto a slanted block, slide and jump to a ledge, run-jump (no grab) NW into an
alcove and then SW to the Copy machine, over to the NW again and use the button
to open that door in the Crane room. So jump back to the Copy Machine, then to
the alcove, run-jump NE back to the ledge where you came from. Look for a climb
wall NE, run-jump/grab to it and climb down left around the corner into the
opening, climb up E to the ledge in the Crane room and stand under the monkey
bars. Check the health bar and head over to the Crane, hang left and pass it
quickly, get into the open door and follow into a Ctrl room. On the E wall is a
button to open a trapdoor in the waste room with the “Fire” block and near the
pipe S is a small medipack.
Go back to the entrance and save, stand about in the
middle of the opening, turn R a bit and run out curving sharp to the right,
you’ll land on a slanted block below. Slide and jump/grab to the block in the
waste pool, run-jump into the opening S with a grab, follow out E and in the
next room, near the toxic waterfall is the trapdoor you’ve just opened.
Run-jump to the block where the Fire is gone, now SAVE, face E and run-jump with
a bit of a left curve to the hole E (leap into the unknown) slide and jump to
the next slanted block, slide far and jump/grab (you obviously have to face
forward here) to the cracked pillar. Shimmy right around 2 corners and drop to
a safe ledge, jump to the ladder wall SW and climb to the far R side and down
as far as possible, back flip/roll and slide/jump to the ledge in front of the
S opening.
Thumping Presses, 1st Nuclear Fuel Cell.
Go through to the room with a Crane, run-jump/grab to
the block and over to the other side and left of the Thumping Press,
under the Press is a Fuel Cell you need, you can’t get it now so head E and
stand jump (or side flip) around the left side of the Presses to get to the
button on the E wall. Push it to stop the W side Press and have a look W if the
Fuel Cell is available, could be the Press is down so try again then. Go pick
up your 1st (Yellow) Nuclear Fuel Cell, also a small medipack
on the workbench and go back past the Presses E to the door over the button,
the door is opened, so go up and you’re back at the Reactor.
Drop/hang from the E side of the ledge, shimmy right
to the wall and safety drop onto the slanted green block below, run around the
Reactor till you found the 2 Guards you have to shoot, then enter the
passage E and follow up to another part of the broken walkway. Run-jump S to a
single platform and then S again to the steps, go up and run-jump/grab to a
walkway at the Reactor, push the button there while Lara looks at a door in the
W wall, it will open after the button is pushed, now run-jump to the SW corner
ledge you came from before (diagonal from the walkway or the approach will be
too short). (Tip: stand back against the railing, just
walk W one step, then holding the forward key release “Shift” immediately
hitting “Alt” and Lara will jump to the ledge with only a one step run.)
Line up for a run-jump NW with a right curve and grab
in the end to just land inside the opening with the open door. Go in and get a
screenshot of 3 Technicians taking cover (the probably aren’t expecting
anything good), you have to shoot one of them later to get a Nuclear Fuel Cell,
but for now that’s impossible. So stand at the W tip of the lower part of the
floor and side jump over the fence N (if you can’t manage that, drop into the
Ctrl room and climb up an opening in the ceiling N to end up behind the fence),
go into the R hand (NW) passage and come to a room with a trapdoor in the
corner, go up the ladder SW and climb left into the passage, go in and just
around the corner is a button opening a door (S) in the next room, go on and
drop down in a room you visited before.
The Laser Doors.
Go up into the open door S, follow the passage through
some rooms to a place with a green Laser door in the opposite wall, pass
through and come to a room with a single crate and a hatch in the ceiling, 2
red Laser doors and one green. So pass the green Laser door N and come to a
room with more doors and a sand hill. Pick up some arrows on that hill
and shoot the Guard and go through the Laser door S to come to a room
with a pipe, shoot the Guard coming from the passage S, pick up some
flares near the S wall and go push the button W (Laser
button, changes several Lasers doors to safe while other ones turn deadly,
you’ll get to know this button real well). Then head into the S passage;
the way back is now blocked by a red Laser door. In the next room are 3 crates,
an opening up in the ceiling over the higher stack (shortcut later), but if you
want the secret you have to get in there now, jump from the single crate to the
high stack and jump/grab into the duct, follow in to an open door to the right
and get Secret#2, a Golden Skull, 3x
Revolver Ammo. The way onwards through the duct is still closed, so head
back left and drop down into the 3 Crate room.
Booby Traps.
Go through the Laser door E and slide into the room
below. Careful, there are Mine-traps (yellow signs), just get behind the work
bench W and take the 2x Uzi Ammo from it, from where you stand turn left
and run-jump S over the Mine-trap near the yellow sign and follow
straight S to the corner, then walk to the button on the S wall (the green door
in the room with the sand hill opens up, for later) and return the same way you
came to the button. Hop up to the green Laser door and in the 3 Crate room; a Guard
will be waiting for you.
Head into the NE passage and follow to a small room
with a single crate and a hatch over that crate, go into the only green door
and push a button on the wall in the next room (trapdoor in the floor), the
hatch in the previous (single crate) room opens up and provides a shortcut
between rooms.
Go back out and left through the green Laser S to the
room with the 3 crates and back through the passage NW to the Pipe room, push
the Laser button W in that room and go out N to the room with the sand hill, to
the right is the door you’ve opened in the Mine field room (this one is for
later). Go out E and back to the room with the single crate and the open hatch,
from the crate you can jump/grab up to the duct and follow past the now closed
Secret door and follow to where you can now drop into the room with the 3
crates. A new door opened there. Go through the green lasers to the rocket room
S and hop onto the walkway S on the left side, go to a button and push it to
open another trapdoor.
Back to the room with the 3 crates and up into the
ducts, get back to the room with the single crate and drop. The trapdoor you
opened is behind the W door, but the Laser is red, so no access at this point
in time. Head N into the room with the sand hill and out S to the pipe room and
use the Laser button there. Out S to the 3 crate room and through the NE passage
to the single crate room, now you can enter the W room and go down into the
open trapdoor.
Deadly Waste Basement.
In the far end of this passage you can grab the monkey
bars and follow them with some curves over the deadly waste, go into the next room
and stand near the N end of the ledge, face S so you can side jump to the
slanted block in the waste, slide long and jump hard left to land on the next
block, jump two more times to get to a ledge and stand jump (grab) to the ledge
in the far end, go up the ladder, climb higher and grab the monkey bars to get
to the other side and go out to the room with the sand hill, where the N door
is now safe.
Go up the ledge N and push the button to get a flyby
showing another door opened in the Reactor room. The flyby takes you through
the rooms you've already visited and rooms you still have to visit. Go back out
to the room with the sand hill S and because all other doors are red you have
to go back through the Basement. So go left (W) into the room with the waste,
go right onto the walkway, check the health and run-jump into the opening with
the ladder W. Hop to the ledge E and line up for a run-jump/roll to the far
side of the NE slanted ledge, slide and jump hard left to get to the E side of
the slanted block, then jump twice to get to the E ledge, go back over the
waste using those monkey bars and go straight E through the newly opened door.
Up the ramp, follow through, slide down, jump up straight (E) and in the next
room on the left is an opening to the Reactor room.
Walk up to the opening E and jump right around the
corner onto the broken stairs and spot the triangular ledges on the corner of
the Reactor Core. Run-jump onto that ledge and hold “Ctrl”
while Lara drops along those ledges to the ground floor.
Temperature Regulation Puzzle.
Go S and into the room you saw in the flyby, pick up
the Safety Instructions from the floor and read them:
“Temperature regulation
Used switches add temperature
Unused switches subtract temperature
Beware of overheating”
On the S wall are 3 buttons, a wrong combination will
set Lara on fire, you have to get 270 degrees (see left wall under the door),
so push the 360 and then the 90 to get that and the door W will
open up, go through, notice a block with a Mine-trap standing in a waste pit W,
push all the buttons on the E wall a bit right of where you entered and see
several doors opening in and around the Reactor room.
Core Level B door.
Head back to the Reactor room and go into the passage
E, up to the ledge in the Reactor room and look NW, run-jump to the broken
steps there and then run-jump with a grab in the end down into the open door W,
follow in, push the button to open the Level B door of the Reactor Core and go
back out. Drop/hang from the ledge, shimmy left against the wall and drop onto
the green slanted block, turn right and shoot the Guard, then go into
the wide corridor N, to the R is the opening with the door you opened, go in
and push the button to disable the Mine-trap on the block in the waste pit.
Core Level A&D doors.
Go back out and shoot the Guard to the right in
the corridor, then go S and around the Core to the room S and up through the
opening W and at the waste pit a run-jump to the block in the pit and onwards
to the W side ledge, more buttons and two doors, one for Core level A (360) and
one for Core level D (180)
At the buttons, use the 90/180/270 and the door
S to the Core level D button opens, go in to push that button and get back to
the 4 buttons, push the 270 again and then the 360 to open the
door in the W wall to get to the Core level A button, go into that room and
push the button, now return over the block in the waste pool to the E side of
the room. Head S and go through the showers to jump up to the contaminated
area.
Contaminated Area.
You can run here, but your level of contamination will
be shown as the air supply bar in the top R corner of your screen, when you run
out of health, either head back into a Shower area or die, there are some
instant death spots spread around the area. Go S, just sprint straight heading
into the right hand opening ahead, and along the left side walls (deadly spot
in this place), then around the left into the next part of that area and onto a
little mound in the end so you can run-jump (NO grab) into the opening
(almost impossible to climb the ledges in this place) with the grey ledge in
front. Go R into a room and sprint past the Guard as you can’t shoot him
now and down into the next still inactive shower area, past another Guard
and jump up into the opening in the left wall where the air is safe again. Grab
up to the slanted ledge right (E wall) and opposite the waterfall to back flip
onto the waterfall, follow the flow of water up a waterfall to a kind of
crossing, grab up to the left side waterfall and roll up to the wall to grab
the monkey bars, go over to the other side and head left into the tunnel and
take the first left to push a button opening the valves so that Shower area you
passed will now be a safe area.
2nd Nuclear Fuel Cell.
Go out and left to follow the rest of this tunnel and
slide down, go left and run through the room with the Guard once more, straight
down into the Shower and this time you can shoot that Guy there, pick up the 2nd
(Yellow) Nuclear Fuel Cell he drops (you could also shoot the Guard in
the other room if you like) and hop into that N tunnel again, follow the same
route back, and slide down that ramp again. Now go straight and back into the
Contaminated area, go straight N, around corners along the R hand wall till you
are back in the first cave, sprint N and down into the main shower. Turn around
and save after the contamination washed off.
3rd Nuclear Fuel Cell.
Hop up again and go S once more, near the split in the
road go into the left side now and stay right on the path, so in the end you
can just run-jump up into the passage (couldn’t get Lara to grab up). Run into
a room with a Guard and just sprint past him, hop up into the opening W
and run through the flames (Lara will burn but the flames will extinguish
themselves) and onto the trigger tile in the end of the passage and see another
Nuclear Fuel cell appearing (it’s back in the Main shower). Turn around and run
back, the same route as you took getting here and to the Main shower S, slide
down and get the 3rd (Blue) Nuclear Fuel Cell.
Wash off the contamination and get back in
that stuff, at least if you want to go for the next Secret… And the jumping to
get there is really hard…
(For PC users there is a new move you can
use to save precious seconds while crawling. It is the crawl/roll move)
Hop up the ledge again and turn sharp
right (E) run to the ledges there (screenshot)
and jump up, follow through SE down the slopes. Crawl
through the left side of the cave to a trigger tile and when you go over that
tile you’ll see Secret#3 appear in the Showers. Go crawl back out and stand as soon as
possible (You can save while Lara stands up) hop onto the low ledge and stand
jump with a left curve to the left and quickly grab up to the ridge (the left
is a spot you can grab up to). Run SW and down the ledges to the main area, to
the showers (probably pumping medipacks) and get the Golden Coins and
Grenade ammo in the Showers.
Head N through the room with the block in the waste
and up left to the room with the 3 buttons, go out to the Reactor room.
4th Nuclear Fuel Cell.
Go around the Reactor into the passage E and follow
back up to the ledge. Run-jump S to a single platform (you can also climb the
ladder on the E side of the Core and back flip from the height of the grated
texture) then jump S again to the steps, go up and run-jump/grab to a walkway
at the Reactor. Run-jump to the SW corner ledge again and run-jump NW with a
right curve and grab in the end to just land inside the opening where you went
in before. Follow in and side jump over the fence S again into the SW corner
and down the now open trapdoor, follow the crawlspace and climb up into another
narrow tunnel, shoot the grate to find yourself at the Ctrl room with the
scared technicians. Shoot the one in the middle (you can shoot the technician
because you are out of reach of the Security cameras) and follow the path back,
go up the ladder at the trapdoor and go S and R around the corners to drop down
into that Ctrl room, go get the 4th (Blue) Nuclear Fuel Cell.
Climb back up through the same opening you just came down from and go left
around the corners to the open trapdoor, this time climb the ladder S up to the
rooms above again and go into the room near the Reactor.
2 Routes from here to the top of the
Reactor:
1:Go up N into the opening with burners, run-jump past
the first burner, hop back and again a run-jump passing the next burner up into
an opening straight ahead. Follow the passage to the store room, use the monkey
bars under the walkway to get to the stack of crates and drop/grab to get onto
those crates, jump NE onto the steps and go over the walkway to the S and
follow the tunnel to the Reactor Core again, run-jump out with a sharp left
curve at the end of the run and jump to those broken steps, go up about 2/3 and
run-jump/grab E to the top of the Core.
2: Or jump to the right out of the room onto the
broken stairs and jump onto those triangular ledges on the Reactor again,
holding Ctrl till you are safely back on the ground, go to the E side of the
reactor and climb the ladder all the way to the top.
On top you’ll find the open trapdoor, drop in and
place one of the Blue Cells. Go to the W and the door opens up, run-jump
back W to the steps and just run off the N end with a grab to land on the steps
below. Stand jump/grab back into the opening W and turn around, now you can run-jump with a grab into the open Level B door.
Firing up the Reactor.
Place a Blue Nuclear Cell left and roll, go up
the ladder to back flip onto the C Level, use a Yellow Nuclear Cell and
the door opens, walk out and run-jump to those stairs left. Turn around and use
the triangular ledges again to get back to the ground floor. Grab up into the
Level A door and get the revolver Ammo to the right before you save at the
receptacle for the last (Yellow) Nuclear Cell. When you place it a flyby
starts, the Reactor is on the point of a breakdown, looks like you have only a
certain amount of time to vacate the premises.
Time to get Out!
Run out of the Reactor, left around that Flame and
jump E over the Nuclear waste, then turn R to run-jump from the green ledge at
the corner of the S corridor onto a second safe ledge in the left side of the
corridor, then run-jump SW with a grab to the opening in the W wall, turn to
the SE and run-jump to the next safe ledge, from there into an alcove SW and drop/grab
back out and hang on a climb wall, stay on that level and climb left, almost
from the end of the climb wall a back flip/roll/grab to an alcove behind. Pull
up and quickly grab the monkey bars, swing S into the corridor and left into
the next opening, from there a run jump to a save ledge ahead and again a
running jump to the broken staircase to the right. Running jump to the ledge
down and again a running jump (NO grab) to the ledge a bit further and climb
the ladder. Run E and run into an Elevator and get to the
controls E.
If you made it in time... Just before you reach the controls the level will
change and you'll have a Bonus level at hand.
Got here with time to spare, save before you go into
either opening and wait out the 4 minutes, Zone D will be sealed off as shown
in the cut scene.
If you do not want the Bonus level... head N from
climbing the last ladder and run into the Elevator there, a cut scene starts
where the Elevator crashes down. Skip the next part and go to Level 12 The Hidden Palace.
Level 11 - Bonus Level.. Nuclear Hazard.
Go out of the Elevator and follow the corridor to
where you find Flares in the corridor to the left. Go to the Hazardous
waste door and of course we open this one.
In the next room you have 2 choices.
Infectious Waste, a Torch:
So open this door first and hop to the ledge ahead and
stand on the utmost SE corner, line up for a run-jump (holding the forward key
down) to the next ledge. Then SW and another jump to the slanted rock next to
the falls SW, slide and jump to land on the solid
waste S. Go up into the SW corner and jump up onto the corner ledge, jump back
N and then over the gap to the E. Walk to the wall and left and go into the
next room, open the door S. Grab up left and crawl through, drop into the area
with those Zombies and shoot them while hopping back. Get the small medipack
from the floor in a corner and use that wheel N. If you look left through the
window you can see the door opening up in the E. Back through the crawlspace,
into the open door and get a Torch. Now go back to the N and jump down
to the waste pit below, From the NE corner a run-jump left around the corner to
land on a slanted block, jump hard right to land on the ledge. Jump to the one
NE and run jump onto the slanted wall NE, slide and jump to the ledge at the
entrance. Stand back and face NE, stand jump with a right hand curve into the
opening, drop the Torch for a moment and go to the..
Fire door W, Mutant DNA Sample:
Open the door W and do take the Torch in and hop down
from the ledge, ignite the torch on the flames and jump back up to the ledge.
Here you can now hold the burning Torch under the Sprinkler and the Sprinklers
burst, extinguishing all flames. Hop down in the pit and get the Mutant DNA
Sample. You will see some doors opening; this is for later. Get out and
leave S, back to the corridors.
Go left and head to go into the last opening left, up
the ramp to a room with a pool. In the pool you’ll find a Medipack and a
closed door. So head up the stairs into the passage above and
come to the Main Room.
The Main Room.
You can run-jump out with a
banana curve right to land on those stairs, or just safety drop down. Climb the
crate S and jump to the corner block to get the Medipack and Revolver
Ammo. Run off the block onto the crate and grab up to the stairs above.
Jump E to the next and spot the glass stained windows E, shoot out those
windows and walk up to the end of the platform, stand right and turn right a
bit to run-jump with a left curve (no grab) under the low ceiling and into that
alcove. Get to the one with the Access to Occidental Enemies Chamber Card.
Pick it up and watch the show. Then hang from the edge and drop onto the slated
floor below, shoot remaining Mutants and be sure not to hit those UN
soldiers...
The First Cooling System Fuse.
Go into the corridor NW and up the block to use that
Card. Go through the now safe Lasers W and get a Shotgun in front of the door
W. Enter the Occidental Enemies Chamber and save in front of that Timed switch to the right of the picture. Pull, turn right
and sprint out of the room turning right to end up straight in front of the
next Timed switch. Save while Lara operates it and
immediately side jump right, run into the room and left to jump up into an opened
door. On the desks are a small medipack and the First Cooling System
Fuse.
Go back out and through the green lasers to the room S
and continue up to the dangerous waterfall S
Up the Waste fall.
Standing at the waterfall that looks more like a waste
fall, you'll see a niche in the left hand wall. Jump in there and then onto the
green rock in the waterfall. Go to the corner and jump/grab up to the last
opening in the SE. Turn around and take a running jump to the other side and
grab the ladders there. Shimmy to the left and climb as high as you can, and
get into the alcove around the corner. Shoot out the grate at the opposite side
and jump to the monkey climb, stay to the right, at the end let go and grab and
crawl through.
Go down into the passage and get a small medipack E,
turn around and follow the other end of the passage to a slide down into the
room behind the windows E of the Main Hall, get the Revolver Ammo near
one of the windows and stand under the radiation sign on the E wall. Back flip
to the sign and jump to grab the crawlspace. Follow through, shoot the grating
and go through the passage, jump over that slanted block to the upper floor. In
the SE corner is a Valve, use it and see an overhead door open up. Go to the
only open window W and get down to the ground floor of the Main Hall by running
out left onto the slanted floor.
Up in
the main room
Your next task is to get away from this room via the
way you first came in. Find the suspended stairs on the W wall. Stand next to
them and jump/grab and pull up. Run-jump-grab to get on the
next series. Turn left and run-jump to reach the next platform. To get
to the next series of stairs, the best is to perform a swan dive over the
pipes. Then, run-jump-grab the first rope. Better make
a safe here, as the next jump to the second rope is a very tricky. Best way for
me was to line up Lara quite a bit to the right of the second rope and swing at
least two times to grab the second rope (takes some tries to get it right). You
can now use it to get in this passage in the wall (savegame.2). Get down the stairs to reach the water poolroom.
Waste Basements, the Second Cooling System Fuse.
Head NW down the ramp and right around the corner to
go down the ramp to the opened overhead door (crawl underneath as it is too
low). 2 UN soldiers are guarding this place, don't
hurt them as they can help you taking care of another Mutant, which will appear
as soon as you enter the next tunnel. Follow in along
the right hand wall and in the first corner is a higher ledge, face NE and jump
to grab that waterfall, pull up and back flip into the tunnel above. Follow
down ladders to a room with Secret #1, Golden Coins and Grenades. Jump and
grab back to the ladder from the block and go up ladders, back flipping into
the higher tunnels. At the end you can run out left with a grab and land on the
safe side of the deadly waste flow. Jump to the N side and look for gratings
you can shoot. Go in and slide down into a lab with a moaning Mutant, shoot him
and use the valve (S wall) to open the air lock. Follow through and in the next
room is a Valve on the N wall, turn it and see a rocket change position. Go
back to the previous room, shoot the Mutant and go into a lower room E to get
the second Cooling System Fuse.
Go out, climb the block where the rocket was and
run-jump N and a bit left to grab the ladder on the small block. Pull up and
back flip, keep jumping right while going up the slope and end up next to the
waste flow. Follow back and go through the overhead door, then left to the
staircase in the poolroom and up to the Main Hall. Jump out right and land on
the stairs, drop to the ground floor.
Cooling system
Back to the Main Hall and go to the air lock door W
(under the opening you came from), open it and jump across the pit to place the
Cooling System Fuses, hop into the now safe pit and go into both tunnels to
operate the Valves. Go back out to the Main Hall where the tunnel S is now
cooled down.
Bulldozer Keys.
Head to the tunnel S and drop into the pool below,
swim S for the Bulldozer Keys and pick up the small medipack NE.
Swim down into the hole in the bottom and you're back in the pool where that
Medipack was. Get back to the main room via the stairs and get this Dozer to
work.
The Mini Dozer.
Drive into the corridor N and keep up the speed going
left up the ramp, jump 2 pits holding the pedal to the metal. (After the second
pit you can grab a medipack). Go through that narrow passage and arrive
on the ground floor E, go straight into the open Elevator doors. The Elevator
goes up and you can back up out of it (use the sprint key).
Turn the dozer around (Shift) and head S up the sloped tunnel, save there, as
the next part is tricky.
Drive the dozer along the left hand wall, carefully up
onto a ledge N, you have to end up facing W. Back up
and run over the gap to the W wall, left around corners and finally end up on a
floor with a pipe. Park the dozer there and walk down N, jump and grab the wall
with the pipes W and shimmy right to the end, down a bit and back flip onto a
ledge. From there take a run-jump N and left around the wall and go over to the
big machine S. Place that Mutant sample there and the flames at the 2
Valves will stop. Use the 2 Valves and the whole place turns safe, because of
this, the deadly goo will drop into the Main Hall and eats away the ground
floor, revealing a hidden cave.
Go around (not down into) the pool to the SE corner of
the dry pool and get the Shotgun Ammo there, behind a crate with a
mutant in it. Walk through the now safe riverbed to the N and right around the
corner where that pipe wall is. Grab up into the
crawlspace S and get Secret #2, 2x Uzi Ammo and Golden Bars. Go back
to the dry pool and slide down to the middle section, jump onto the NE corner
between those fences and drop grab to the platform below. Hop down onto the
stairs and jump to the next to get down to what's left of the ground floor.
The Big Cave-in.
In the SW corner are some yellow cylinders, face W
there, drop backwards from the edge of the floor and grab/drop/grab to a
crawlspace below. Follow through to the end (spot a Golden skull through the
window to the left) and at the end you first have to shoot those stained glass
windows left and some gratings at the crack in the pillar down E. Drop/hang out
and shimmy to the right to get the 2x Uzi Ammo, face S and hang on the
edge of the ledge, drop and slide jump to a ledge. Run-jump and grab the crack
in the pillar to shimmy around to the other side, drop and slide jump, jump a
few times more while steering left a bit and finally a jump from the slanted
left side to a flat ledge at a pipe wall (N). Go up and get into the narrow
tunnel, shoot a stained glass window and face E on the next ledge, drop from
the ledge onto the slope below. Slide and back flip to a ledge. Go jump to the
ladder on the left, climb up and drop onto the broken stairs, from there a jump
to the roof of the building. Go over to the SE corner
and jump into a hidden tunnel behind the waterfall, follow in to get a Medipack
and Secret #3, a Golden Skull. Jump back out to the roof (leap of faith) and stand on the E side of it, look
down for a slanted block and hang from the roof over the block. Drop, slide and
then jump hard right to get into the opening. Walk through to the next
challenge.
Start here if you didn't play the Bonus level...
After the
Reactor Core explodes the Elevator will crash down the shaft and hit the
bottom, step out of the wreckage and find 2x Flares in a plant left,
then go get the small medipack opposite the crawlspace in the wall to the left.
Get into the
crawlspace and follow around to a Lava pit. Drop and immediately back flip/roll
to grab the crack in the green wall, go right around and do the same. Drop,
immediately back flip/roll and grab the vegetation under another crawlspace. Go
through to drop into another Lava cave, slide to the end of the slope and back
flip/roll to a slanted rock, keep jumping R (be sure you face into the cave)
and you’ll land on a sideways slanted rock, then slide and jump the 2 lower
ledges till you can grab a higher slanted block. Hang a bit to the right and
pull up over the top, slide far and then jump with a left curve to land sliding
backwards, grab the edge of the pillar and pull up, back flip over the ridge
and grab the edge on sliding off. Shimmy left as far as possible and back
flip/roll with a R curve to grab a ladder on the wall, climb R and from one
step higher than the deadly entrance (Burner floor) a back flip/roll/grab to a
ledge on the ridge, push the button there and run-jump/grab back to the ladder,
climb right into the opening and go inside. Continue
here***
Start here after playing the Bonus level... Go into the first opening to the right, jump out left
to a ledge on a ridge (or use the ladder on the S wall to back flip/roll and
grab that ledge). Push the button there and run-jump/grab S to the ladder,
climb right into the opening and go back inside.
***In this room are 3
more buttons, 2 on the walls and one on a balcony E you can reach by using the
monkey swing, starting from the ledge with the Bell at the N wall. Finally the
gate in the passage SW will open up, go through to a room where 2 Ancient
Warriors will attack. On the ledge in the SW corner is a small medipack,
then go to the ledge NW, get the Shotgun Ammo and go into the passage W,
leading to the Courtyard and have a look S, there’s a pillar with a
Yin-Yang on it, on the grassy ledge NE of the pool you can collect Uzi Ammo
between some grass.
Go S and
dive into the pool, on the E side of the pillar in the pool is an UW lever,
throw that to lower some Spikes on a ledge and a Wraith will
probably kill itself while you’re at it (if not it will appear when you climb
out S). Go S to a small hill with a Gazebo on top, stand left of the rock and
jump up and again so you are next to the gazebo. Turn and face N. A run-jump and
a grab will get you hanging from a ledge on the pillar, pull up and run-jump to
the ledge W where those Spikes went down, hop around the NW corner to next
ledge and again run-jump W around the low railing. Then run-jump N to a swing
pole sticking out of the wall and land on a balcony, from that balcony you can run-jump/grab
to pillar with a Water Bowl in the pool. Then run-jump along the E side
of the Bowl (no grab) to pillar with Yin Yang Symbol (E) and run-jump
back N into the pool, because another Wraith will appear. Go climb out S
and open the door W with the Yin Yang Symbol.
The Elements room, to the Water skin.
Shoot an Ancient
Warrior and go to the back of the room and locate a windowsill in the E
wall. Take a curved running jump from there to the pillar with the Burner on
top. Hang on the right hand corner, pull up and turn R, grab up when you expect
the Burner to go down and take a quick step forward. Grab the Flares on
that ledge and look E and run-jump/grab to the upper window sill E, shimmy
right and when you come to the waterfall you have to time a Blade in the
wall, wait till it comes out and quickly shimmy R after it, pull up in a
windowsill over the rooms entrance. Do a left curved run-jump NW with a grab in
the end, around the string of Lampions and into the windowsill N.
Hard Swing pole Jump.
Stand in the
middle of the opening (screenshot)
and face NW. Then stand jump with a bit of a right curve so you will already be
facing that swing pole a bit when you land just after the Spikes went down (screenshot)
(the timing is crucial here), quickly turn a bit more R and stand jump/grab to
the pole, swing and land on the sloped block so you’ll slide off and end up on
a low ledge in a lava room.
Stand jump
onto the block in the middle of the room and run-jump S to a Spike ledge
when you expect the Spikes to be down on landing, immediately side jump left
onto a small balcony and push the button to get the Burner on the ladder N to
burn with an interval. Stand jump back to the Spike ledge and a running jump
right to the low ledge where you came in, back to the block in the middle and
now a run-jump/grab to that ladder after you timed the Burner, quickly climb up
and come to another room and watch the fly by.
Grab the
overhead monkey swing and go follow over a Spike block to the end where
you can go R to the wooden part and you’ll fall onto a pillar with fences, grab
the small medipack. Face W and stand back to do a right curved run-jump
onto a wooden ledge on the W wall and push the button there to retract the
Spikes on that block S and open a door E. Run-jump/grab to that block and then
look E, another swing pole next to the monkey swing, stand jump/grab to it and
get launched into an opening in the E wall.
Stand
jump/grab over the gap onto the Circle tile in the lower room and squeeze
between the Puzzle piece and the S wall to go push/pull that piece onto the
Circle tile, the trapdoor opens behind you. Save and hop back to land on a
sloped block and slide/jump to slide into a windowsill overlooking the
courtyard, look for a Spike-ledge SW and stand back in the corner of the bamboo
window, run-jump over the corner of the sloped block onto that Spike-ledge and
run into the next room to stop immediately inside. Stand jump down to the
closest ledge in the lava and time the Burners to run-jump over the
ledges to the opening in the N wall (A secret Rose lies on that pillar with the
Spikes).
The Puzzle Piece Lift.
Inside the
room is a lever W and a Puzzle piece S, go pull the piece onto the circle tile
to stop the Spikes at the lever and then pull it onto the white square N of the
central pillar, throw the lever to raise the block and go grab up to the
central pillar from the higher floor in the corner near the lever. Pull/push
the piece to the raising block on E wall and use the lever again to get the
piece one level up and move it to the next raising block. Go back to the lever
again and then push it onto the circle tile. The gate up in the S wall will
open and you will have to use the lever once more to get the raising block
close to that gate up. From this block (SE) you can do a right curved run-jump
into the opening and then you have to do a run out R, from the corner of the
ledge onto the Spike block and jump (grab) with a right curve around that open
door up into the opening E.
A Secret. (skip the next
paragraph if you don’t want to go for the Secret)
In
this room is a button on the S wall and the button will lower Spikes on the
Secret block in the Lava room you just left and also in the opening E. So if
you’re in for a little detour to get a Secret, go back to the door W and stand
R in the opening, face NW and run-jump/grab with a left curve around/over the
Spike-ledge into that opening you came from. Go down in that room and stand
jump out past the Burner and run-jump to the block where the Spikes went down,
get Secret#1, Golden Coins. Then stand jump to the ledge NW, get
into the opening S and up the pillar and ledges to get back into the upper E
room by jumping from that nasty Spike ledge again.
Go to the
opening E and grab the ceiling, go out onto the monkey swing over the pool and
in the end you can drop/grab an opening behind the waterfall, slide down into a
room with a shallow pool. Do a run-jump/grab to a ladder and go up to the top,
back flip/roll/grab the ladder behind and go up and left over the sloped stone
ledge, drop and slide jump to back flip over a Burner tile onto a ledge
and look up W for an opening in the wall, jump/grab up and pull up over the
top. Slide and jump over the Spike-trap onto a ledge, go around the
wooden fence to push the button, the Burner outside will stop.
Run-jump
back over the Spike-trap and the sloped ledge to land on the extinguished
Burner and from there a run-jump/grab to that waterfall, shimmy right to a
ledge and pull up, take one sidestep left and turn around, look S and spot a
different wooden wall (boards are horizontal) just left of the waterfall. Stand
jump and grab that wall as it is climbable and go up to where you can climb
left around the corner over a slanted ledge, drop and slide/jump to a ledge N.
Go out to
the top of the room you’ve come through in the start, go right and get the Revolver
Ammo there, then go back to the opening in the railing and look for the
tightrope with the banners and use it to get across to the N, the camera will
be from below when Lara moves forward, so the going is tough (Tip: and this normally works quite well for me on
tightropes, as soon as Lara stops walking, release the forward key and tap the
left key once, immediately go on as most of the times you have to correct with
the L key).
The Waterskin for the Bag of Sand.
Go right (W)
over the landing to get the small medipack there and then look on the E
side for the Waterskin. Do a safety drop down from the landing into the
room below and go to the NW corner. Then go out the passage behind the red
pillar, you’ll end up near the small brook; dive in to get rid of the wraiths.
Walk up onto the shallow part and fill the Waterskin. Go up the hill in the NW
corner and hop over the rock, follow the tunnel in to a cave and put the Water
in the Bowl there. The door will open up, go in and take care of the 2
Ancient Warriors, go into the room N and another Warrior will
attack. Look for the Puzzle Clue behind the central fence and go to the S room
to move the pieces accordingly (Black-SW, Blue-SE, Red-NE, Green-NW) The difference
between Black and Blue is hard to determine, but the Blue piece is standing in
the SW corner of the room. The gate S opens up, go in and shoot a Warrior
then go get the Bag of Sand from the pedestal on the balcony, return to
the puzzle room where you’ll have to deal with another Warrior and head
out E to the courtyard (you can also just outrun the last 2 Warriors).
The Waterskin for the Jar of Oil.
Go down to
the shallow part of the brook again and refill the Waterskin, go to the S side,
over the pool and up the hill next to the Gazebo, run-jump/grab to that N
pillar again and follow the W side ledges and the swing pole route so you can
run-jump/grab to that pillar in the middle of the pool, put the Water in the
Bowl and the trapdoor in the bottom of the pool opens up.
Dive
in and follow the submerged rooms to where you can climb onto a ledge, go into
the passage E and right around to throw the lever in the back, go back to the
water rooms and find the S side of the room is now drained. Get down into that
part and mind the Spikes at the button when you go open that small door under
the ladder. Climb up the ladder over the doorway and roll/back flip and grab the
ledge, go in E again and this time left around to throw the lever again and
bring the water back into the room. Head back and dive in, swim through the
small door you opened and follow over a wooden fence to the end where you’ll
find an UW lever (Spikes go down at the button). Swim back (can be tricky to
get out) and climb onto the ledge and go use the flood lever again to get the
water out for the last time, go down into the dry room to push the button (a
wall lowers on the ledge). Get back onto the ledge via the ladder and find the
open wall W, get the Jar of Oil and swim back S to the pool as you’re
done here.
Go up to the
S side of the pool, then go in the Element room and up in the N side
windowsill, push button to open a gate. Go out to the NE corner of the
courtyard at the big pool and run-jump onto a submerged rock E next to the
waterfall, fill the Waterskin again and jump/grab into the hidden opening
behind the waterfall E, in this passage the gate opened and you will come to
another Puzzle room.
Puzzle room, Crowbar and 2 Dragon Seals.
Open the
small door S and go in to observe the clue to the puzzle and shoot an Ancient
Warrior, go back and push the green piece (middle one) all the way S, then
go into a passage N (behind a red pillar) and follow to a lever, throw the
lever to change the position of the Spikes in the Puzzle room and go back there
to move other two pieces all the way N and door opens in S passage. Spikes
will pop up as you enter the new room, top up your health and just run through
Spikes to the most left ladder and only use Ctrl to grab the ladder and climb
up. Go climb R and back flip to a slope, jump/grab a ledge above, shimmy left
to the middle and back flip into a passage, follow the dark passage to another
small door and drop out onto the landing in Puzzle room. Go look E for a small
medipack and then go back to an opening in the railing to run over a thin
wooden lattice to the S landing to throw lever left (which will change the
position of the Spikes), go W to get 1st Dragon Seal (Burner goes off at
the 2nd Dragon seal). Throw the same lever again, to switch the Spikes once
more so you can get 2nd Dragon Seal E, now you can safety drop down to
the ground floor and go back out SW with a bunch of Wraiths on your
tail. Run into the pool (SW) and swim over to the N side, climb out and go back
into the Elements room.
Into the Caves for the Torch.
Place the 2
Seals S; enter the door and follow the passage to the end, turn around and go
up the ladder to 3 steps from top, back flip/roll/grab to catch the slanted
rock and go over the top. Slide/jump/grab the wooden pillar in the lava, go
shimmy around left and drop onto the ledge, run-jump (carefully lining up as
you can easily step off the ledge) over ledges to the button E, push it to get
a flyby of the cave system and a waterfall starts flooding the lava pool so it
becomes safe.
Climb up to
the waterfall and on the second one you have to shimmy all the way to the right
hand side, do a back flip/roll, slide and grab the edge. Go shimmy just R
around the corner and do another back flip/roll, slide and grab the edge.
Shimmy left around the block and drop next to the waterfall. Go up into the
tunnels, to the right is a closed gate (for later), go on and climb up to slide
down into room with Torch.
Push the
button S to open that small gate you saw back in the tunnel and pick up the Torch,
go to the NE corner and Save facing S, throw the Torch onto that slanted
corner and it will bounce off into the crawlspace, go in after it, pick it up
and crawl with the torch, almost to the end (looks
like you CAN crawl with the Torch here, but for MAC players: you CANNOT crawl
with the Torch here and be careful not to fall down the hole) and throw
it down, crawl back out and go back to the steep slope N, grab the W vegetation
and climb up R (use Ctrl) over the slope, drop back into the tunnel and go into
the now open gate left. Jump/grab the ladder on S wall of the shaft and go down
to drop onto a sloped ledge grabbing the edge when you slide off, saw the
Secret didn’t you…Just drop to the ground and go into
the SW corner, jump/grab to that lattice wall and go up to about 3 steps from
the top, back flip and land next to Secret#2, Golden Bars, now slide down forward and jump to
the hill.
One more
time a run-jump/grab to that pillar ledge N and if all’s well the Torch
will be on top of it, if not it must have fallen somewhere next to the pillar,
so throw the Torch off (look where it ends up) and go down behind it, look for
a button on the N side of the pillar and push it to light a fire in the Gazebo
on the hill. Get the Torch and go up the hill again to light the Torch.
Elements Puzzle, first part.
Go down and
take the Torch into the Elements room, drop it somewhere safe near the Bowls.
Put the Oil in the central bowl and light it with the Torch and the Spikes at
the other Bowls will stop.
Detour
for a Secret: Take the Torch N to the pool, run-jump onto the rock NE (shallow
water) and then run off facing W. Swim into that brook left behind that pillar
and walk up onto the shallow part. Face N against the bank and jump up, hit the
#1 key and Lara drops the torch. Now light the bowl in that Gazebo and a gate
opens up. Leave the torch, head NE and enter the building there to the first
hall. The open gate is in the S wall; get in for Secret #3, a Secret Skull. Make your way back
to the N side of the pool and enter the room to the Elements Puzzle.
Note
from the TC14: If the player takes Secret 3 before using the torch in the
Element Puzzle room, he can go back after the secret by swimming in the water;
there's now a raising block to get out of water on the other side of the water
(next to Element Puzzle room), triggered when you get Secret 3. When Lara's on
the block with the torch, she needs to perform the jump-pistols shortcut (push
1) to get the torch up.
Elements Puzzle, continue.
Put the Bag
of Sand in the right hand bowl and empty the Waterskin in the left hand Bowl.
The floor will open up and you’ll drop into a steep tunnel…
Level 13 – Tears of a Lost Dynasty.
The Temple Courtyard.
Lara drops
into a pool with a Sea Hag. Turn around and swim up to the right hand
side of that tree N, climb out there and shoot the Sea Hag from standing there
(hit her in the tail, Revolver/Crossbow/&Sight). Dive back in and swim W,
to the right behind the building and open the UW door in the building, Climb up
E and jump/grab the ladder, up into an opening and run-jump/grab across to the
other building. Open the door and inside to the R is a receptacle for a Sacred
Stone (later) and a closed trapdoor, throw the switch on the wall behind the
trapdoor and see an UW gate open up under the tree in the pool.
The 1st Dynasty Symbol.
Go back to
the opening and run-jump out left to get down into the pool. Swim N and up for
air at the tree, then Save and dive into the tunnel under the tree, a long and
winding tunnel with a nasty surprise, because halfway down a school of Piranhas
will attack (if you want to get rid of them, Save and reload) Follow the rest
of the tunnel into a cave with the 1st Dynasty Symbol hidden in the
grass and a small medipack in the NW corner, hop back in the water and
swim back to the pool.
Climb out on
the right hand side of the tree again and side jump to the N, slide off and
grab the roots, shimmy R along the roots to the grass and climb up (or do a
left curved run-jump SW from the triangular ledge to the grass). Go NW and find
2x Flares there.
Raise the block for the Yin-Yang Symbol.
Head E along
the wall to the grey rocks near the fence and climb up into the crawlspace
behind the blue flowers on the right hand side rock wall. Follow through, some
bats will attack and come to a small cave, hop over the fence into a shallow
pool with a lever (the lever will raise a block near the building as the flyby
shows),
in the SW corner is a small medipack for you. Return through the
crawlspace and go E, that block you raised is next to the building left and is
needed when you have to place the Yin Yang Symbol there later.
The Temple, Spiked Swim.
In the NE
corner you’ll find some fenced off steps, go into the passage there and follow
to a Temple. Run to the back, be sure to collect the Wraith and quickly
go into the passage E to open the door. Behind it is a small pool to get rid of
the Wraiths. In the pool N side is a small tunnel, swim in and in the end is an
UW lever (raises a platform in the room with the Chain). Save, roll and time
the Spike-traps to swim back to the Chain room (there are save spots
between the traps, turn right or left to swim against the wall after a trap so
you won’t swim into the next trap too soon).
To the Balcony.
Arriving
back in the pool you’ll notice the raised platform in that room, jump/grab the
chain, go up and back flip to the platform, hop over the fence and go up to the
door W, open it and step out onto the balcony, turn R onto the balcony and on
the opposite side is a small door.
Open it
(there is a small medipack a bit further on the left) and go in and at
the end open another small door. Continue over the balcony N and on the white
tile in the corner, pull the hardly visible chain, the block in the W passage
lowers. Go back and through the new opening to come to the treetops on the
Courtyard.
The 2nd Dynasty Symbol.
Jump to the
right hand side branches of the closest tree and make your way over to the SW,
then take a run-jump/grab to the grey ledge W and climb the Vine on the tree R,
go left around over the fence, down a bit to back flip/roll/grab a ladder behind
you and climb up to the rooftops. Go over the roofs to the N, with
run-jump/grabs (where the ceiling is high enough) and on the last roof you can
shimmy around the left side to the back to get the 2nd Dynasty Symbol (a
gate opens up).
Shimmy back
right around to the other side of the roof and run-jump/grab back over the
rooftops to the white ladder block SE and jump E to the branch, grab the monkey
swing above. Swing over to the next tree and drop onto the branch, run-jump to
the one in front of the waterfall E and run-jump/grab to the cave behind the
waterfall. Follow in to a slope down into the Temple, slide off backwards and
grab the roof, shimmy left to the end and back flip/roll with a hard R curve to
land on a white ledge.
Go into the
opening N and follow to where you can jump to the roof of another house and on
top you’ll find a chain, a cut scene will show a gate to a house opening up.
Now you can jump down into the pool and watch out for another Hag, climb out
again and head SE, but if you want a Secret follow the route below.
Route
for the secret: go back to the opening NE you just came from and follow back to
the white ledge in the temple, run off to the W and land on the balcony below.
Follow the route back through the door W, to the trees and over to the SW
corner house, stand on the W side of the roof and look down right of that small
waterfall, an opening in the rock wall, stand jump with a grab to land inside
and get Secret#1, a Medipack and Gold Coins. Safety drop
out of the tunnel and go to the SE corner of the Courtyard.
Spikes and a Hammer for the Sacred Stone.
In the NE
corner of the Courtyard you can enter the passage up the steps again and go
follow into the SW corner of the Temple. Follow to a room with Lava, Spikes and
a Hammer. Run-jump/grab to the Spike ledge and stand facing the Spikes wait for
the moment they go up, just before the hammers open up and run-jump/grab to the
next ledge. The next one is a very tricky jump (screenshot),
you have to run curving left and jump (start to run when you expect the Spikes
to be just down when you land) to the Spikes and land as they are just down,
then a curved running jump left over the corner of the ledge to grab the block
with the button.
The button
will lower a block in the opposite corner of the room. Turn right and against
the fence, aim for the most left side of the Spike-ledge, hop back and hold
"look", start the run-jump when the Spikes are about to pop up (so
they are down again when you land) and do a running jump with a left curve from
the Spike-ledge to the button NE. Push the button and get a cut scene of the
Sacred Stone.
Now you have
two more tricky jumps. One is a stand jump back to the Spike-ledge from
standing back against the button, and then a running jump to the safe ledge.
Save and then do a run-jump to the Hammers when they are about to open up and
run-jump through the Spike-trap.
Go back to
the Temple and find the Sacred Stone on the pedestal, when you take it
the earth will move. Go back to the Courtyard through the NW passage and get
into the pool again, swim W and to the right behind the building; watch out for
another Hag and go through the UW door in the building, climb up and jump/grab
the ladder, up into an opening and run-jump/grab across to the other building,
to the R in the windowsill the Sacred Stone can be used to open that
trapdoor in the same room.
To the Yin Yang Symbol.
Drop into
the trapdoor and hop down from the block, in the NE corner is a hole,
safety drop into the cave with the Symbol, still protected by Spikes. Take care
of the Ancient Warriors and look for a hole in the floor. Dive
into the water, follow the tunnel into a room with Statues, go on left (closed
gate to the right) and come through a room with air above, better just go on as
the Croc will catch up soon, in the next room go up R immediately and find the
sloped pillar, pull up on that and back flip to the walkway, near a closed
gate.
Grab up to a
crack in the rock W and go all the way around to the wall before you drop. Roll
and look NW to spot the chain in the corner of the pool, do a left curved
run-jump/grab to the chain from the corner of the pillar where you just landed
and turn around to back flip to the W landing (if you happen to miss the chain
but catch the walkway instead, just pull up through the fence).
Go to the S
and from the flowerpot I did a left curved run-jump/grab over the fence to the
S walkway, pull up and go stand in the left side of the opening in the fence.
Face NE and stand jump to the right hand side of that Spike ledge when the
Spikes are about to go up (screenshot)
and a sharp left curved running jump with a grab in the end to land on next the
part of the S walkway on the other side of the pillar.
Get into the
tunnel N, shoot a bunch of Bats and climb the E wall up to a ledge
right. Follow the next tunnel to the right and step out on the red arch to get
the small medipack. Now go back in and R to the other arch from which
you can run off to the E side walkway where a lever will open that gate S. get
into the water and pull out at that slanted block and back flip near the open
door.
Spike Jumping.
A Wraith
will show up while entering the new room, run back for water and go in again,
in the NE corner is a nice set of Spikes you have to conquer. Hop over
the fences to the Spike-traps and stand close to the fence with your back to
them, listen to the sound of the Spikes and when you expect them to go up, back
flip, side jump left and immediately a stand jump forward to the balcony in the
corner. Push the button to stop the Spikes on one of the ledges, turn around
and stand back against the button. Stand jump when you expect the Spikes to go
up and immediately a hop up to the highest ledge.
Jump/grab up
to the bamboo lattice and go forward to get out of the way of the Spikes.
Follow the monkey swing to the end and drop/grab to a wooden pillar, turn
around and grab up onto the bamboo lattice, go over to the SE corner. Follow
the tunnel there to the Poolroom and SW of the red arch is a block, look NE from that block and if you want the next Secret you
have to do a banana run-jump from the block to the red arch in that NE corner,
around that waterfall. Get Secret#2, Gold Bars and 2x Revolver Ammo. Do a banana jump (sharp left curved) back around the
waterfall pillar. Or jump down in the water and do the Spikes route
again to get back up there (yeah right!).
Hazard Falls.
Go onto the
flat block and stand back a bit to stand
jump/grab the chain, climb up to the room above and back flip off. Jump to the
S side of the room and don’t fall in the hole, climb up left of the waterfall S
and go up the ledges (about one step aside from the waterfall) till a Snake-ball
comes crashing down, side jump to the right, jump back as the second Snake-ball
comes down and go up again jumping from side to side (if you happen to slide
down from the falls, just back flip when you come into the room below and give
it another try). On top of the falls another Snake-ball will go down
through the middle, jump to the tunnel W and turn around there, grab up to the
ladder, go up and follow to a switch opening up that gate in the room with the
Statues as the flyby will show.
Go back to
the Hazard falls and just slide down from the end to drop into the Pool room,
swim through the S tunnel and this time go up for air in the next room. Save
there and swim through the Statue room, through the open gate S and open the UW
door to the left in the next room (remember you can go back for air any time),
swim in and throw the UW lever and a cut scene shows the Spikes go down
at the Yin Yang Symbol. When you are out of the door swim
left to get a medipack on the floor. Now return
through the Statue room to get a lung full of air and then swim back N through
the Statue room, go to the right before the open gate and follow the tunnel
(stay high, nasty Lampion) back to the room with the pedestal. Get the Yin
Yang Symbol and now you have to swim back to the room with the Statues.
Swim right
through the open gate in the room where you opened the UW door E before, now go
up N and find another UW door, open it and swim to the tree N. Climb out at the
tree and go to the NE corner, close to the steps there is a low red block
against the building, from the block a run-jump/grab to the white pillar you
raised before and place the Yin Yang Symbol. Drop from the W side of the
block and go left to the poolside of this building, a ladder appeared there and
now you can climb up to the gate you opened before by pulling the chain on the
roof. Go through the opening and run off sharp R around the corner to land on a
sloped block and slide to the floor, in the other corner is a lever which will
open a gate in a tunnel in the rocks W.
Back flip
onto the sloped block, jump/grab to the pillar and jump to the next,
run-jump/grab to the opening W and go down the ladder, head NW and go right
around the building there, get the Uzi Ammo near the waterfall and then
go through the waterfall to find an opening in the rock wall left. Get in and
follow to a plant on the floor. There’s a crawlspace up left, get through and
in the end of that short passage is a ladder if you turn around, climb up along
the left side and to 4 steps from the top, then go right, hanging two steps
from the left wall and back flip immediately jump hard right from the sloped ledge
and curve just past the ladder to land on the floor.
The 3rd Dynasty Symbol.
Climb up E
an shoot an Ancient Warrior, Hammers start banging away and on
the E wall is a switch to open the gate there, but don’t go there yet. First
run-jump/grab over the fence W to the chain in the Hammer-pit, turn around and
hang with Lara’s head just sticking out over the Hammers, back flip when they
are opening up and land on a ledge with a switch, the switch shows things
happening outside in the Courtyard, a platform rises and a gate opens up.
Jump/grab back to the chain and climb all the way up, back flip off and go S
and left to drop down the hole, just slide down to where you come back to the
ladder you came up from before. Climb up E again and now go into the E gate you
opened before, run-jump to the platform on the building and go inside, jump to
a ledge across the high room and jump/grab the W wooden wall with the
horizontal boards, climb down and get the 3rd Dynasty Symbol. Climb up
the W wall again and off left to the ledge, run-jump/grab back to the entrance
and from the platform outside you can just run off straight W to land back near
that tunnel in the W wall on the ground floor.
The Torch and the 4th Dynasty Symbol.
Go back in
there and follow to the end, to come to the small Courtyard where an Ancient
Warrior attacks. In the W wall is a tunnel behind the vegetation, follow
the crooked tunnel to a Statue room. Hop over the fence in the middle of the
room and open the trapdoor (spot it with a flare) from facing S. Go down and
just around the next corner is the Torch, follow the rest of the passage
hopping onto the blocks and at one point a run-jump back to a higher level and
finally come to a slope back into the Statue room. Ignite the Torch at the wall
torch E and light a wall torch S (and the Campfire N for a Secret later) in
this room, get back down in the trapdoor with the Torch and light 3 wall
torches there, the gate at the wall torch in the lower tunnel will now be open
and inside you can get the 4th Dynasty Symbol.
The Way Out.
Take the
Torch back to the Statue room and go out NE, back to the small Courtyard, light
the Campfire there (opens a gate on the roof), leave the Torch and go into the
NE corner next to the house. From the rock you can climb up to the roof (only
use "Ctrl") and throw the lever on top to open the door below. Go to the SW corner of the roof to find the gate opened by
lighting the Campfire, on the roof just outside is some Uzi Ammo, then
go in to get Secret#3, a Golden Skull and 2x Uzi Ammo.
Now get back down from the roof and into the
house, place the 4 Dynasty Symbols to get the Spikes at the button S
down, use the button and hop/grab back into the opening in the floor, safety
drop down and go down the end slope…
Level 14 – Wrath of the Dragon.
Slide down
the wooden slope and land in the opening to a room with some Stone Dragons
behind a fence, drop down into the room below and go through the opening E.
Lava Jumps.
Stand jump
onto a sloped rock N, immediately jump with a hard left curve and land on
another rock, from which you can immediately jump and land on the red ledge
with the fence (it’s also possible to run-jump straight to the rock ledge NE
and back flip to the ledge with the fence), face SE and stand jump onto the
rock in the corner when the Burner is about to stop, immediately jump/grab the
monkey bars and Save, then time the Burner and get past it, go left around the
corner and turn left at the fence to get over the save ledge where you can
drop. Hop back, grabbing the edge and shimmy right around the corner to drop
onto a safe floor, now you can enter the room with the Stone Dragons.
Stone Dragon Room.
Stand jump
onto the red block on the right and get the small medipack, then hop
back and stand left facing the Lava pool, run-jump/grab the platform and shimmy
to the left side before you pull up in the corner. Turn SE and wait for the
Flames to stop so you can run-jump
straight onto the corner of the next platform (no grab). Then jump onto the
slanted one SE and turn NW to run-jump to the even higher one, grab up S to the
platform above, turn left (W) and grab up to the edge of the sloped wall,
shimmy left and close to the Spikes, then pull up and back flip, keep jumping
left to get into the NW corner with the button and stand right of the button,
then hit Ctrl and Lara will sidestep to it (can be a bit tricky to get it
right), a Burner SE stops. Then jump back onto the E slope and keep jumping
left till you are in the corner where the Burner stopped. Hop down into the
lower passage and then up again around the corner, drop backwards into the hole
and climb down next to a bamboo fence, go to the slope and slide down into the
Connection room.
The Connection Room.
A Beast will
attack, shoot it and walk up to the N side gate and it will open up.
Connection Room, S gate.
Go through
to a Lava pool and stand in the right hand side of the opening, there’s a rock
to the right, turn right a bit and take 3 steps back, then hop back once and
run-jump onto the slanted back of the rock, then jump and land on a rock ledge.
Turn SW and run-jump up into the opening in the W wall, go through and shoot
the Midgets. In the back of the cave, left around the corners is a button to
stop the Flames on a lever, Go back stand jump to the ledge and jump to the
floor NE, pass under the Dragon (notice the Dragon Seal on the balcony under
the Dragon’s Breath) and find the Trigger tile on the SE corner of the floor.
Timed Gate.
This Trigger
tile will open a Timed gate in the passage E, go stand back under the Dragon
and run to the corner of the Trigger tile (this way the gate is still opening
up when you are getting close, otherwise you won’t make it), jump to the ledge
SE, then a running jump up into the passage and hold the forward key to get
into the gate before it drops shut. Inside to the left is the lever with the
extinguished Flames, opening another gate in the Connection room (there’s a
shaft with a ladder in this room (later)). Throw the lever, go back to the lava
lake and jump to the ledge below, running jump to the dragon and a jump to the
W side ledge, stand jump from the SE corner onto the slanted ledge near the
entrance and jump left to get back into that entrance, get back to the
Connection room and R into the E gate.
Connection Room, E gate.
Go up into
the passage E and follow the stairs up to another jump series, stand jump to
the sloped block in front, jump to the next and slide to the end of it before
you jump/grab to the swing pole, swing into the opposite side of the room and
get the 2x Uzi Ammo, then go to the opening S overlooking the upper part
of the Connection room. Run-jump to the right hand roof and shimmy left to
where you can pull up (notice the gate in the wall here), then turn left and
run-jump to the roof near the blue balcony, get to that balcony and use the
button to open the last (S) gate below.
Connection Room, N gate.
Safety drop from the roof and go in, time the jump
past the Moving Pillar and shoot the Beast in the next room (Receptacle room). There’s a lava pool and 2 receptacles on the E wall,
a pillar went up between those receptacles. Go through to the room S and find
some Puzzle pieces.
Elevating Puzzle, the 1st Dragon Seal.
In the NE
corner next to the blue pillar (behind the red puzzle piece) is a grey Trigger
tile, stand on it and Timed pillars rise throughout the room, look W and see a
low block, step from the trigger and save, step back on the trigger and run to
the rising block, jump on it with a roll so you can run-jump onto the pillar N,
then jump to the one E and further to that blue pillar NE. Use the button there
and see that pillar in the receptacle room get smaller, there seems to be a
passage behind it. Get down from the pillar and move the green piece (SW) onto
the block W (when it is down), then go stand on the Trigger tile again, run to
the block and climb up to push the piece onto the blue ledge. Go into the
passage W and shoot the 2 Midgets there, go get the Green piece and push it to
the entrance (you can sidestep to the N side of the piece and hit Ctrl so Lara
steps to the spot where she can push it), then push it inside and onto that
greenish tile in the first room left. This trick has to be repeated for the
other 2 pieces, the Red one goes 2nd room right and the blue one 2nd room
left, then go into the passage in the back and get the 1st Dragon Seal from
the pedestal.
The 2nd Dragon Seal.
Go out and N
to the receptacle room, climb the block E and grab the monkey bars, go over to
the opening SW and push the button to see that gate in the top of the
Connection room open up. Go back and go S past the Moving pillar, to the
Connection room, left into the E gate and up the stairs, Do the jumps to the
swing pole again and head to the roof, run-jump to the R, grab the edge and
shimmy left to where you can stand and jump into the open gate. Go in and
run-jump left to that wooden ledge, then run-jump/grab to the balcony E, push
the button and see the Dragon Breath stop at the 2nd Dragon Seal. Safety drop
down from the balcony and go W to the Connection room, left into the N gate and
jump to that ledge again, over to the Dragon and get the 2nd Dragon Seal,
return to the Connection room, go in S and past the Moving Pillar to the
receptacle room, place the 2 Dragon seals E and the block goes down.
Go in and
use the lever, the hatch over the ladder in the room with the Stone Dragon
opens up. So return to the Connection room, head into the N gate, jump over the
lava to the Dragon and do the Timed jump to
the E gate again. Inside to the right is the shaft with the climb wall, go up
and come to a Huge Room.
The Dragon Pagoda.
The flyby
will show you around and you can already see buttons and various passages.
Going straight E over the bridge will bring you into a room where 3 Dragon
Seals are to be placed. So that’s for later, but from the end of that bridge
you can jump NE to a slanted rock on the corner of that structure and then
immediately jump onto the block. Run-jump onto the platform N and stand on the
middle of the N side, turn right a bit and stand jump with a R curve to the
platform at the Dragon, grab in the last moment and time the Breath to pull up
and run-jump/grab W. From that platform a stand jump/grab to the crevice NW and
crawl in, drop into the passage left and follow up to a hole in the ceiling,
climb the wall and shoot the 2 Midgets up there, follow the balcony to where a
familiar sound is heard.
Moving Pillar Jump.
First: Indirect approach jump: Go into the room and stand one square away from that lampion, face the
Spike-ledge, with your back against the wall, so you face SSW, then start a run
when the pillar starts to move left and jump to the Pillar ledge, the pillar
should just move away when you land, now stand jump to the Spike-ledge with a
right curve and immediately stand jump again with a grab in the end to get into
that opening in the S wall, try to land in at the left most side.
Second: Direct approach jump: Stand close to that lampion, back against the wall and face SSE, then
start a run when the pillar starts to move right and run-jump to the right hand
side of the Pillar ledge, it should just move away when you land left curved
running jump/grab around the Spike-ledge to grab the edge of the opening in the
S wall, shimmy left.
If
you are able to jump to the left most side of the opening, you can slide and
jump with a hard left curve and you should just land on a small balcony with Secret#1, a Stack of Gold Coins, then run off onto
the slanted block below and slide, jump two times over the slanted blocks and
then jump to and fro with a right curve, to get onto the sideways slanted
block, slide and jump/grab with a left curve to the climb wall. Go left into
the opening and follow over a balcony to a hole in the floor.
Safety drop
down, follow the balcony to a button that will open the gate up at the ladder,
go back up and left from the ladder, grab the monkey bars and go to the gate,
drop/grab and hoist yourself into the passage. Go
through a room with 2 Beasts and head into the passage NE to come to a ledge up
in the Dragon Pagoda Room.
Stand
jump/grab to the lone pillar W and pull up, run-jump/grab to the Dragon ledge W
and turn SW from the right hand corner where you pull up to stand jump to the
wooden ledge under the Dragon Breath (when she inhales off course) and
immediately run-jump through to the platform SW. Turn NW and run-jump (/grab)
around the corner to a wooden walkway, then run-jump/grab to the roof of the
Pagoda N and find the closed gate in the N side (needs Key). Hop to the rock
ledge behind the Dragon to get the small medipack and hop back to the
roof. Go run-jump to the platform right of the dragon then look for the wooden
ledge under the Dragon Breath NE, run-jump over to it when the Dragon inhales
and a running jump straight NE will get you on the next platform, run-jump/grab
E and then run-jump SE, from the last platform a run-jump/grab to the opening
in the E wall.
Dragon (monkey) swings for the Pagoda Key.
Stand one
step from the left side and stand jump onto the sloped rock left, then
slide/jump onto the balcony, go to the opening in the railing and grab the
monkey bars. Time the Breath of the Dragons (plenty of time) to get across to
another balcony and go into the passage to where you can climb up to the Pagoda
Key. Now get back the way you came and from the balcony a run-jump W onto
that rock in the corner below, be sure to slide forward to the left and
jump/grab to a crack in the wall, shimmy R to the opening.
The Dragon Seal.
Stand left
and run-jump back over the platforms to the Dragon ledge, do a run-jump with a
right curve and grab the wooden ledge under the Fire Dragon, then shimmy left
around the corner till you are close to the Dragon, pull up (only move when the
flames are off) on that corner and turn left a bit to jump back to the platform
NW and then run-jump back to the Pagoda. Open the gate with the Key and the
Dragon Seal is yours (a gate opens up). Go out and go to the left corner of
the roof, run-jump/grab E to a stone pillar and then to the platform S,
run-jump/grab to the gate that opened in the E wall.
First way in: Face NE and
run-jump with a roll to the slanted wall near the Spike-trap,
immediately jump and grab monkey swing, go swing to the end.
Second way in: Face NE and
run-jump with a roll to the slanted wall near the Spike-trap, slide and
jump/grab the opposite climb wall, go up and left, just over a slanted wall,
drop and immediately jump/grab to the grated monkey swing. Go to the end.
Turn left at
the end of the monkey swing, drop/grab and hoist up into that crevice, crawl to
the S end and climb out onto a ladder, go left around 2 corners and pull up on
the ledge, go inside and follow to a Circular Knife-trap. Stand real close and
hit “roll” when they open up, turn and continue, shoot the 2 Midgets and time a
short run through a Spike-trap just around the next corner to get to the next
Circular Knife-trap. Follow to a pit in the corner and hop to the right, run up
the slope a bit and immediately roll run back around the corner as a Snake-ball
comes down and drops into the pit. Follow the passage up to a cave with a lava
pool and 2 Beasts, shoot those and go for the opening SW, looking out into the
Dragon Pagoda.
The 2nd Dragon Seal.
Run-jump
left around the corner to a balcony and go over a
bridge to the Pagoda, go left and past the gate to the SW corner of the roof,
jump to a ledge in the rock wall W and then run-jump N to grab a crack in the
wall at the last moment.
Shimmy right
around corners till you can hoist up into a crevice, follow through to a
balcony and do a run-jump to the block in front of the Dragon. Take a stand
jump NE once more, then E to the platform and a run-jump to the N to push the
button on the balcony. Spikes retract on a block E. Go back the way you came to
the dragon and back to that blue block in the SE corner.
Stand on the
N edge, then grab up and follow the dark and winding monkey swing, just after
the lower part you have to turn R and left again, otherwise you’ll fall, go to
the end of the swing and drop onto a balcony E. You
probably saw the Secret already, jump/grab the dark blue wall S of the balcony
and climb up to get Secret#2, Golden Bars. Climb down a bit and back flip to the
balcony again, look NW and spot a crack in the blue wall. You have to do
a diagonal run and curve left to jump/grab to the crack (straight to it the
balcony will be to short, or use the short-run jump Walk holding shift, release
Shift immediately hitting Alt while keeping down the forward key), shimmy right
around the corner till you can pull up in an opening, go in and down left to
get the 2nd Dragon Seal.
The 3rd Dragon Seal.
Get back in
the opening and look for a slanted grey rock W, run-jump with a right curve,
slide off and grab the edge, pull up to back flip/roll/grab the ladder behind
you and go left around the corner, go at least 6 steps up from the bottom and
back flip/roll/grab to a platform. Then a far run-jump (no grab) to the balcony
down NE and get 2x Shotgun Ammo there, climb the ladder on the pillar up
to the top and climb off right into the passage. Follow to where you can jump
to the top roof of the Pagoda and go crawl or shimmy all the way along the edge
of the roof to the opposite corner to get the Pagoda Key lying there.
Get back to the N side of the pagoda near the entrance you came from and safety
drop down onto that bridge below, go left and open the gate to the 3rd
Dragon Seal. Go out and head to the bridge N, face NW on the first part and
run off the bridge to land on that platform below (right of the Dragon), then
run-jump S to the roof of the Pagoda and go right to the front. Safety drop
onto the bridge below and roll to go E and into the Building, place the 3 Seals
there and a trapdoor opens up in the floor. Save and run in forwards, slide
down and meet the Dragon.
The Dragon.
(Tip:
There are a number of med-packs around, I will mention where they are and it is
up to you to go get them when you need them, another tip: The corners where the
buttons are, are relatively safe and when Locust comes out to play, save and
reload to get rid of them *saves on med-packs*, there are also plenty of Beasts
around, shoot them when you are in a relatively safe corner, important is to
keep moving when out in the open)
A flyby
starts while the Dragon screams…
Turn right
after the flyby and get the small medipack on the floor, then run to the
far SE corner and get the Medipack, run N along the lava pit and find a
lever under the Dragon ledge at the E wall, you’re safe here, so throw it at
ease and look for the blue block N, run-jump onto the block and stand-jump/grab
up to the balcony run to the right (left is a Medipack) and jump right
over the corner to get to the balcony with a closed gate (right is a small
medipack), run N into the NW corner and find a lowered white block, push
the button there to lower another block (small medipack in the SE), this
one on the ground floor SW. Push the button and the block on 1st floor NW will
go down so you can go up again and push the button there, back to the ground
floor and the button SW (Medipack in the SE) and now the gate on the 1st
floor W should be open.
(Short
description:#1- lever ground floor E, #2- button 1st floor SW, #3- button
ground floor NW, #4- button 1st floor NW, #5- button ground floor SW).
Go back up
from the blue block and quickly get into that open gate, it will close behind
you, follow the winding tunnel up to where you have to climb up several times
and come to a dark cave. To the right is a closed gate, go up left (S) and to a
button, that button will release 2 Snake-balls who will find their way down
onto the head of the Dragon and kill her.
The Dragon Claw.
An Artifact
will be visible, go down the passage where the Snake Balls went in and come to
the hole in the floor, check the health, maybe pick up and use the small
medipack lying there and slide down backwards, grab the edge and safety
drop down to get the Dragon Claw. Now you could go and get any left over
Medipacks and get up and into the re-opened W gate (1st floor), follow that
tunnel back up and head straight E to where another gate opened. Just before passing through the open gate is a crawlspace
in the left wall, get in and take Secret#3, a Golden Skull with you, climb out and go
through the open gate.
Follow the
tunnel, run into the bright light and the level ends…
Level 15 -
The Ship Graveyard.
If you want to play the Bonus level after
the Martinique series, you’ll have to collect all 12 Secrets in these 4 levels.
Mind the green lines in the walkthrough.
Search for the Batteries.
Get down into the water ahead and swim up
to the top of the mini sub to get Secret #1, Uzi ammo (S)
and Golden Bars (N). Get some air or immediately swim N into the
tunnel near the bottom, swim up into the next cave and left a bit to climb N
onto the wrecked submarine. First shoot the 2 Sharks, walk to the tower
W to get some Flares on the deck of the wrecked sub.
Dive in S to swim back towards that tunnel you came
from, look right and spot a hole in the bottom. You’ll be swimming in there in
a Timed swim later. Now swim W and when you come to a
floating crate, look to the right and behind the green plant are more Flares.
Swim W again and past the ship’s Propeller. Just behind it you’ll find Battery
# 1 (first of five).
Timed Swim.
Remember that hole in the bottom? Swim N and up to the
deck of the sub, walk E to the Tower and find a timed lever. Hop straight up
once so Lara is able to run and save in front of the lever. Pull the lever,
side jump left over the fence and swim E, a bit left to get to that hole in the
bottom past the tunnel you came from before. Swim down and right around the
corner through the Timed gate.
Climb up in a small cave, head S and shoot 2 Goons of
which the last will leave behind a small medipack. Follow through to
where you look out into the cave with the Wreck, run-jump sharp right around
the corner (NW) and grab to get into the opening with the coral. Crawl through
and come to a pole going to the Wreck, walk the pole while a Shark lurks below
and from about 2 steps from the Wreck you can jump forward and grab the crack.
Shimmy as far as to the right before you pull up back flip with a roll to grab
the block, get Lara’s feet op the block and climb around left, go down (with
Lara feet still on the block) back flip onto a crate in the water. Jump to the
ledge SE and jump along the S wall to grab the ledge W,
pull up and get to the end of the crevice. Look up W for a monkey climb, best
is to stand in the middle of the ledge facing W and hop back, turn slightly
left and run-jump curving right to grab it. Get on a block W and from there a
jump to grab a ledge N, get into the tunnel.
Battery # 2.
Follow going right and crawl a bit to the right
(you’ll see a crate with explosions) and you’ll come to a waterfall. Just dive
in and follow through the twisting tunnels to a cave with a wreck. Swim up SE
behind that pointy rock and turn left into the opening, follow through, swim to
the S end. Climb out quick and kill a Shark. Save here and use the lever
there and shoot a new Fish before you get back into the water.
Swim back to the previous cave and this time down left
into the opening E, swim pass a squishy block and notice the next squishy block
has stopped. If it is blocking the passage and the under water ceiling lever
(in the middle where the second block is) you’ll have to go back to the
previous lever and use it again till the underwater ceiling lever is available.
When you used the lever a platform will raise in the other cave, so swim back
there. Climb the platform and walk the pole to the lever N. Watch the fly by of
the diver dropping a Battery, first shoot another Fish and then swim
back to the cave again to pick up Battery # 2.
Battery # 3.
Go back through that tunnel N and follow all the way
back to the waterfall, climb out N and back flip to the ledge. Jump to the
waterfall and go N. Follow through to a triangular opening NE and do a running
jump to the crate in the water to pick up Battery # 3.
Battery # 4.
Dive into the water, get the Grenade Gun N of
the red coral and swim E, past a closed gate and along the Wreck till you come
to two pillars. Look right between those pillars and find the UW lever (face
E). The lever will bring out a pole near the crate SE. Turn right and
swim down NE to get the harpoons on the bottom.
Swim up S and climb up on the Wreck. Look into the NE
corner and spot the pole. Aim for the middle
of the pole and run-jump grab to it. Swing to that crate in the corner. Jump to
the crack W and shimmy right till you come to a ledge. Do a running jump to
grab the slanted pillar SW. Hang left before you pull up over the top and slide
far to jump to the next pillar, jump again with a right hand curve to the
corner ledge, slide a bit and jump to grab the pole, swing to end up on a
crate.
Jump into opening with squishy block and on the opposite
side of the block is a small medipack. Turn facing NW, walk back as far
as possible so you stand close to the block (screenshot).
Then take two hops back turning left a bit and hopefully you will grab that
jump lever below the middle of the opening (otherwise just grab the edge and
quickly get over the lever and use it before the block kills Lara). You will
drop straight in front of the now open gate, a Fish comes out so swim to
a save place and shoot him. Now go back into that tunnel, follow through and
climb up into a room. Shoot the crate W and get Battery # 4. (Look up
and spot the opening in the ceiling, that’s for later) Swim back to the Wreck
and climb up the E side.
Up the Cave for Battery # 5.
Go E into cave and watch out for the boulder, just run
in and left against the wall. Proceed into the next high cave and pick up Uzi
Ammo after shooting the Goon. Dive into the stream and swim behind
that coral W, press CTRL to open the UW gate there. There
is an underwater ceiling lever at the end. Wait in the tunnel a bit
before you get out, as another boulder will fall into the stream. Climb out E
and then W onto rock near the waterfall S, face W and run-jump to use the jump
lever W. This opens a trapdoor E on top of the old ladder. Jump and grab up to the ladder and climb up and
then climb off left, turn around and jump grab the crack S, shimmy
left and crawl in past the waterfall. Follow the path and at the end a
run-jump (no grab) to a rock N, notice the Jump lever up W. Turn E and walk
over the tight rope to get to the other side.
Go N and follow through, look left around the corner
to spot the Jump lever again. Run out with a left curve to jump to the jump
switch. (Use the tight rope again to get to the E side and go through the N
corridor and now get on top of the raised platform) Or
just jump/grab NE to that platform from the ledge under the jump lever.
Jump to another platform S and from there into the opening up S and pull up,
get the small medipack, jump back to the
platform and from the middle of it a curved jump to the opening SE, next to the
waterfall. Pull up over the top, slide down and jump to grab the opposite wall.
Climb up till you just see Lara over the edge, hang left or right. Save there
and back flip/roll (timing the squishy block) and keep the forward key down to
get out of the way.
Timed Gate.
Notice the Timed gate and jump SW to get behind that
squishy block. Around the corner is the lever, so save before you pull it, roll
and run around the corner, run-jump right so you’ll land against the wall just
right of the block. Now you can just side jump right into the opened gate.
Follow through, slide down on a grating and pick up Battery
# 5, the grating will give way and you’ll fall through into the stream
below.
Climb out E and get back up the old ladder, all the
way up into the passage and go left or right to find the receptacles for the 5
batteries. In the middle passage is door that will open up, go in and turn
around. Jump up to the jump lever W and the trapdoor will open up below. Slide
down into the next challenging room.
The Deadly Pool and even deadlier Jumps. (level changed)
Jump to a ledge S and spot the ladder on the wall,
there’s a burner on top of it. Face N and standing back against the wall and in
the middle of the ledge. Save and run-jump to grab to the
pole, aim left a bit when Lara lets go and grab the second pole. Then
curve hard left and land on a slanted side of the pit. Slide and jump with a
roll once, so you’re facing back from where you came and keep jumping the
sloped sides till you are on a save blue ledge, look N for a jump switch.
Run-jump and grab it and after using it you should keep jumping till you are
save again on that blue ledge.
The flames on top of the ladder S are gone. Walk to
the far SE tip of the ledge and run-jump as far as possible to the S along the
wall. Turn slightly left in the end so you will slide forward down the slanted
side, jump with a sharp right curve and land on the slanted block near the
ladder, slide and jump to grab the ladder. Go up to 4 steps from the top and
back flip into a corridor (or back flip/roll/grab).
There are two Goons you have to kill and
one of them drops Revolver Ammo. The next room has a lever E that will
open a trapdoor W with a flyby of the lower area with the Wreck flooded. Go to
the trapdoor and drop down into the corridor below. You are back at the Jump
lever you used near where you placed the batteries.
Swim into the cave (W) and go NW to that
Jump lever you used near the squishy block, swim into the opening under the
lever and follow through to the room where you got the battery before, this
time swim up through the hole in the ceiling and get Secret #2, a pile of Gold Coins, Grenades and Revolver
Ammo. Swim back out to the Wreck.
Into the Wreck.
Swim up over the tower of the sub and down into the
tower, through the open door in the E. In here and all the way up is a
breathing hole (“self contained air respirator”). On
the top ledge S you’ll find 2x Shotgun Ammo and NE is an opening to the
next room. Swim in and get the Revolver Ammo SE on the top ledge. Swim
into the opening to the lower part of the room and near the gate W is another
underwater ceiling lever; the W door in the tower opens up.
Get back and get some air and dive down, swim out W to
get into the other door W. In this room is on top also a breathing hole and you
open this with the lever on the N wall. Climb out onto the sloped sides and
keep jumping left back and forth till you are save on a ledge with a burning
lever (or jump back and fro till the trapdoor closes). Jump SW and walk over a
grated floor to the SW corner, there’s a Jump lever you have to use. The
stand-jump can be done from an angle and after landing in the room below you
can swim out E. Use the lever on the N wall again and climb out in the hole and
jump up to the burning lever again, go W into the next room again and use the
lever on the wall N as the trapdoor closed up under the lever.
You'll see a rock falling so back to the jump lever
you just did SW and dive down, there is a small tunnel in the SW in the corner.
Swim through and use the ceiling lever at the end, swim back out and climb onto
the platform W to shoot the Fish. Also shoot the darkest box on the
bottom and retrieve the Battery. Climb back onto the platform W and use
it on the contraption.
Watch fly by and get back to the now extinguished
lever up E. Use the lever and watch another fly by. Get back into the water
(room W) and swim E, out into the tower and up, out of the top of the sub and
swim to the W into the opening in the W wall a bit right from centre. Swim up
when inside and climb out E to go S, into the tunnel where the explosion
occurred. Follow through and get into a crawlspace, watch the fly by of a large
cave.
The Ship Key.
Drop from the ledge and open the underwater door S.
Swim in looking up and just before you hit the big ship propeller there is a
ceiling lever up on the ceiling. An underwater gate will open up when you use
it. Swim back out to the big cave to the N wall and turn right to the W and
left into the opening with the red coral. At the end is a jump lever up on the
wall, if you turn around you’ll find an underwater lever, a Key will show up on
a tile. Swim out of this tunnel and straight into this big cave, turn SE under
the ship, as there is the big ship propeller and in front of it is the Ship
Key on the grating, under the bubbles.
Swim to the S wall and find the poles up over the
water, facing W is a place (SW) to climb out, back flip with a roll and grab
the pole, swing to the next pole and land on a slanted pillar after that one.
Slide and jump to grab the jump lever in the corner. Then swim along the E wall
underneath the wooden ship and find an opening left, just past that propeller.
Swim in and use the underwater lever on the S wall in the end, a door opens up.
Swim out to the cave and go straight to the W wall,
turn right there and save at the surface before going into a triangular tunnel.
Swim in, and when you get into a somewhat bigger corridor that goes up, you
have to watch out for two boulders. Swim aside and along the wide part of the
tunnel when the tunnel starts shaking, the boulders will go by without harm.
In the next room you can climb up into an alcove E,
turn around and jump with a curve up to the NW. Use the Key W and go
into the open door behind you. Follow through and save at the end, face right
and jump to grab the crack in the rock NE. Shimmy around left and pull up after
the corner. Walk N over the pole. From there, go NW to the pink coral and
stand-jump NE onto the slanted rock, slide down and run-jump into the opening
in the waterfall. Follow through and walk further down in the waterfall. Behind
the waterfall is a jump lever you saw before. Slide down and jump to grab the
lever and swim through the open door there and go up to climb out. Use the
lever N and watch fly by.
Swim out S and about straight to the small wooden boat
(you can only climb out on the middle section). Shoot the Shark and jump
grab E to the ship. On deck, somewhere between the masts is a Medipack.
Then go to the S end of the ship, jump SW over the
railing onto to the crate in the water and then onto a ledge S (no Ctrl). Face
W and stand left and do a run jump with a last moments
grab to the climb-wall and climb all the way up. Now go N and jump past the
squishy block, jump to the ledge on the right and safety drop from the edge,
shimmy left past the waterfall around a corner and crawl into the crawlspace.
Follow in and use the lever, a gate opens up. Crawl
out and safety drop into the water below, climb up onto the wooden boat and
kill the Shark. Now go to the N end of the ship. Run off the end into
the water, turn around and find the opening in the stern. Shoot the crate,
crawl and go right at the intersection, hang from the edge and shimmy to the
right to crawl in S, use the lever there to detonate the explosives in the
crawlspace. Go back the way you came and crawl to the intersection and go right
again, crawl S and stay in the middle at the end, crawl out backwards and grab
that jump lever there.
Up, Up and Away.
Turn around and swim S into the open gate, in the back
behind the plant is an underwater ceiling lever you have to operate from facing
sideward, a rope comes down in the big cave. Swim back out to the wooden boat
and jump to the ship, head S and hop onto the crate. Face S and swing those
poles to grab the rope in the end. Turn right and spot a triangular opening in
the rock wall E, aim for the pillar right of it and swing to grab a crack in
that pillar. (savegame.6) – if you have
trouble with that rope.
Shimmy to the left and pull up into that
opening to get 2x Uzi Ammo and
Secret#3, a Golden Skull. Shimmy back along the crack.
Shimmy right past the pole and climb onto the next
ledge. Follow through and jump onto the platform at the end, jump W over the
next 2 platforms and then up left into the opening behind the waterfall. From
there, a sharp left curved jump to grab the dark ledge up in the corner, shimmy
right to the corner and pull up. Turn S and spot the hole in the top of the big
pillar, run-jump in and swim through the tunnel to where the level ends…
Level
16 – Voodoo Magic in Martinique.
Swim up and climb up onto the slanted rock, stay in the water for now
and fill the Waterskin from the inventory. Climb out and go stand on the
waterfall S, jump and grab up to an opening and climb in, turn around and jump
to grab to the roof N. Go up and into that triangular opening, use the lever to
open the gate below. Go back down the roof, shoot the Parrot and get
down to the ground floor to go through the door N. Jump over the ridge and get
down into the next room.
Go close to, duck and shoot the Demigod. Go and find the pushable
block in the NE of that central structure. Push and pull it on that red
bloodstain in the SW corner of the room. Shoot the Natives, and climb
the vine they came down from N of the central structure. Face E before you go
up and back flip to the top of a pillar and jump over to the SE corner. From
that pillar you can stand jump and grab the jump lever on the E wall.
W gate, Teeth
Doors, the Caves.
Shoot another Native and go W to the open gate. Go through 3 sets
of Teeth doors and use the lever to lower a block on the central
structure. Back to the large room and use the vine N again to get on top of
that structure. Jump/grab and hoist yourself up and pull up under the railing.
Poor the water (from the Waterskin) in the scale and see a gate opening, now
safety drop down to the floor. Go back to the start (S) and climb the waterfall
S again, now go straight into that tunnel as a gate opened there.
Into the Caves.
Climb the wall in the end and climb left around the corner to get in the
upper passage. Follow up to the E and you are at a vast flowing stream. Go N a
bit and on the left is a fern (plant), there is an opening behind that fern.
Jump up and follow through you are at the other side of that gate in the
stream. Follow the tunnel upstream. Shoot the Native and another one in
the opening on the right (W, the camera is fixed). Go in there and go down N,
slide down and shoot the Parrot. Go E and into opening to the right at
the Torches. Use the lever and go back out and climb up the waterfall to follow
the stream up to the push block straight ahead. Pull the block, go around the
block and push it into the stream. The flyby will show a pool in a lower room
filling up.
Head back into the cave W and downstream towards the
lever you just used and you’ll find a new opening on the right, go in to get Secret#1, 2x Uzi Ammo and a stack of Gold Doubloons.
Go back upstream to the push block.
Follow the now dry riverbed S back to the gate,
go left through the tunnel with the fern and left again. You’re now at the dry
waterfall into the start room, safety drop with health loss or stand jump with
a grab from the left side of the opening and land in the small pool below.
E Gate: Blades and Demigods.
Go to the room N again, and now climb into the E gate. Go right (N) and
turn around at closed door in the end. Use the jump lever in the higher part of
the ceiling. Go back and right, the gate there is now open. This is the pool
you flooded, dive into the pool and use the underwater lever E. There’s a
passage E where you’ll come to later.
Climb out, leave W and go back to the room with the central structure,
go into the gate W, through the Teeth doors and the gate there is now open.
Save and slide through the Blades, shoot two Demigods (mind you,
only one will be active at first so don’t go shooting the wrong guy). One drops
a Voodoo Key, so pick it up and use it in the keyhole W to open a
gate S. Look for 3x Uzi ammo in one of the holes without
a pillar SE.
Go into the gate S and in the NE corner of next dark room is a
crawlspace up N, get in, go left at the burner (the next part is about turning
that burner off) and end up in a pool. Swim S and climb onto the part of a
wooden bridge. Jump to the next (E) and dodge the Blade when you time
the flame to jump the next one N. Hop back and hang from the edge till it’s
save again to do a running jump straight N to grab the ladder. Climb up and to
about a block away from the Blade, hang right and back flip onto a platform.
Jump up W and grab up to the monkey swing above, time the emitter and follow to
the bridge, go over to the S side, crawl and shimmy along the lower ceiling.
Stand jump to the ledge down E and then jump up E again. Turn around and run-jump
grab W to the bridge under the Blade, first shimmy left so you can pull up
safely. Walk to the S end of that wooden bridge and turn E to jump and grab
that jump lever (a bit from an angle). This raises a block so you can exit this
place later. Fall back into the water and swim S to open the left hand gate of
the two. Swim in up for air, face W and an underwater lever is hidden behind
the base of a pillar along the W wall (second from the right).
Underwater Blades.
Swim through gate S, safe here, as the next part is very hard to get
past those Blades. Swim under the first, then up to the ceiling and over the
next two to the end, just swim through those flames, get a medipack E,
there are 3 rooms leading from this central room. Swim up into opening S and
get air.
Burning Underwater Levers.
There is a lever down S, just pull it, Lara might catch fire but doesn’t
loose health or die. You opened a gate in the N room; get back for air and
save. Swim N into the opened gate, same kind of lever, same fire but be aware
of Teeth doors as well as you have to swim back through those and
there’s no air there. Save some distance away from the first door and go when
it is closing up, just swim immediately down and through the next one. (or wait high up in the space between
the 2 sets of doors to get some speed to swim through the second set)
Swim into the room and better get some air S before entering opening W.
Another lever awaits, the flame in the crawlspace is now extinguished. Go get
some air S and dive down into opening in the bottom of the central room and
swim back where you came from before. Watch out for the Blades again, swim high
first and down after the second Blade. Get up for air in the room with the
pillars and you’ll hear the echoing sound of Teeth doors.
Crawl Lara crawl.
Swim N and up through the shaft to the big pool and in the NW corner of
the pool is a block so you can jump back into the crawlspace.
Go left (E) and crawl further, over a collapsible floor and you’ll fall
into a small room, could be you land on a ledge halfway down, just slide
further down. Note the dark tile on the floor and a
lever on the wall way up.
Go through the gate S, shoot a Demigod and use a jump lever
behind the second pillar E. Notice the gate SW and then go to the SE corner to
get 2x Uzi Ammo near a block, climb that block and jump grab N to grab
up into the open hatch. All the way N is a small
medipack. Turn around and go left (W) into the
crawlspace, the rest of the floor you fell through before collapses and you can
now look over the edge and spot a jump lever, so place Lara directly over the
lever, jump backwards and grab that lever, slide
down to the lower room again and a block has risen under the lever.
Timed Gate.
It is a Timed lever, pretty tight
and the door is all the way S through the room with the pillars and on the
left. Pull, back flip/roll with a bit of a left turn run around that wooden
fence and turn back left a bit to sprint straight S along those pillars. Curve
left at the end and sprint (or jump) into the hopefully open gate.
The Huge Room.
Once inside shoot the Demigod, go look in the NW and SW corners
to get the Revolver Ammo and a small medipack along the S wall
and standing N of that central structure is a push block.
Push/pull it to the tile (with the diamond shape) W of that structure, a
trapdoor opens up SE and in the hole is another Timed lever.
Timed run up the Block, the Vegetal
Keystone.
This lever pushes up a block NW, pull, back flip with a roll curving
right and run SW to the block, jump on block and do a running jump to the
wooden ledge SW as well. Jump and grab the roof N (do not pull up) and shimmy
around to the right and after the second corner you’ll find a jump lever.
Shimmy to the right and pull up on the steaming tile,
turn around and run-jump into that “window” S, get Secret#2,
Gold Bars and 2x Shotgun Ammo. Jump back to the roof and
go shimmy left to the jump lever.
This lever opens a door W, around the corner in the building. Get the Vegetal
Keystone and watch the fly by of where it should be placed.
Go NE and find another lever under an opened trapdoor, a block will rise
in the trench N. Take the push block and push it onto the raised block near the
N wall. Use the same lever again to lower the push block into the trench. Push
the block to the other end (W). Pull the block back once and look behind it,
there is an opening in the N wall now. Go in and up the passage W; watch out
for the pit.
Take out the binoculars and see those pots, shoot them (pistols will do)
and a block appears in the room behind you, climb it and face S. Jump and grab
up and climb all the way to the top, then to the right and drop. Follow through
and jump through the narrow gap.
Breakledge Jumps.
Jump SE to a small walkway, now you have to do a few hard jumps to get
to an opening up E and of course there will be more ways to do this but I
thought this one to be the easiest (Map).
Stand to the right facing S, pull up over the top and slide to jump to a
breakable ledge N, try to grab it so you can have a look where the next is.
Shimmy left around the corner to just before the next corner, pull up turn left
and stand jump to grab #2. Shimmy right around two corners and pull up, run
turning right and jump from under the low ceiling to grab ledge #3 (W). Shimmy left around two corners and pull up near the wall to
do a right curved run and a jump onto the tip of ledge #4, immediately a right
curved running jump and grab to the hard to spot opening N. Use the lever there
and see that big trapdoor open up in the room below.
Go stand in the opening and just run out into the water below. This is a
familiar place, turn to swim N and up through the shaft. Out of the gate and to
the block NW. Go through the crawlspace and right to drop into the room with
the deadly red pool. Jump to the platform and place the Vegetable Keystone.
A Sorcerer appeared somewhere. A gate also opened in a room where you
found the Voodoo Key before. Go N out of this room and go the knife NE and now
you can climb over that block.
The Big Cascades Cave.
Climb backwards off the block, hang and shimmy till right you can crawl
in (E) Crawl through and watch the fly by. Look down to the bottom of this cave
and spot some pots, shoot them to raise a block you need later. Then crawl out
backwards and shimmy right and crawl in when you are on top of that wooden gate
below. Go on through this crawlspace and find
the block you raised, look up E and jump grab to another crawlspace. Follow
through and kill a Native. Go to an opening to the big cave and jump out
to that platform in front. Walk up to the NW corner and look with the
Binoculars to spot the block on the pillar W. Run jump over onto the block and
you’re now standing right over a Secret that will become available when the
block lowers later. Look for a rock ledge W and shoot the Native from
here. Now you can jump down onto that ledge.
There is a small medipack on the floor there.
Teeth Doors.
Go stand SW facing W and see another nice trap in front. Time the burner
and run jump through the Teeth doors, run and curve right to jump onto the roof
there, grab when you slide off. You’ll have to end up on the green
pillar, so pull up and back flip to it. From there a run jump NW through more
Teeth doors, landing against the wall past the doors, so you won’t go too far.
Stand close to the next doors and stand jump NW through both sets.
Pillar Jumps.
Now you have to jump some pillars. A Parrot will also bother you.
Go NW and then SW and then W, NW and N. The last one is best done with a run
jump and grab to the N under the lower ceiling. Go NW into the tunnel and
follow through and then crawl through the wooden tunnel, stand up at the
railing and go down into the room or just a stand-up there to shoot the Demigod
below. Get down, go E to get Revolver ammo and use the lever at the
opening overlooking the cave. A rope appears outside. Go back the way you came.
And Down…
Get back up to the pillars and stand jump back to the first from
standing left facing S, the next a stand. Jump E and stand in front op the
rope, just a hop and grab to the rope, slide down the rope and drop onto a
block. Something is firing at you and it must be that Sorcerer on the
stage NE, so go all the way to the E and shoot that Guy. A Native will
also appear. Notice the lowered block on the NW corner of this floor. That’s
where you have to get to in a Timed run later. That
being done, head back W and get the small medipack in the water.
In the building W is a push block, pull/push it SE and over that small
wooden bridge near the trench E (don’t push it onto the water though), leave it
next to that pit there. In between you will also have to shoot another Parrot.
You have to raise a block in the pit to get it any further. Dive into the
trench S and swim to an underwater door E. Open it and follow in to an
underwater lever under a trapdoor. A gate opens up, swim back and climb out of
the trench, shoot the Native.
Timed Run for the Block.
The timed lever is behind a door you just opened a bit further to the E
and on your left (S). Save and pull, roll run out jumping left and do run-jumps
along the shallower parts of the stream. Jump SE onto the floor and run with a
right curve to jump onto the block, immediately a right curved running jump
onto a wooden platform NW of the block.
The 1st Voodoo Key.
From the platform take a run jump to grab the opening W and go up the
ladder to where you look out high into the cave. Jump and grab the platform to
the right and use the monkey climb to get to the pillar E. Grab the Voodoo
Key from the pedestal. Look W over the edge of the pillar to see the
trapdoor which opened up in the shallow pool below and run off the pillar into
that pit to get down fast (you can also take the same route back). Shoot a Native
and go straight S from that pool to use the Voodoo Key on the pillar
left of the grey door, shoot the Native coming out and go in to use the
lever. A vine appears and a gate opens, this will be the way out for later….
A 2nd Voodoo Key.
Now go to the building N where that timed lever was, outside on the
right around the corner is a jump lever, run jump and grab it from the higher
part of the ground, Go NW and to that push block remember? A Parrot and
a Native will attack, while you have to
move the block to that Diamond tile S past the stream. Something shows up on
the tile of the floor in the E. Go E and up to where you shot the Sorcerer and
pick up another Voodoo Key.
The 3rd Voodoo Key.
Climb the vine from facing SE all the way to the top and back flip onto
the roof of the structure. Side flip to the W and slide, shimmy and hoist up at
the next corner. Jump up the roof and climb up to the crack N. Shimmy right and
crawl in, follow through to a lever. Use the lever and return to the top of the
roof. Slide down and shimmy to the corner where the vine is. Jump to the vine,
climb down and back flip to that wooden platform NE. Jump back SW to the
structure to get the 3rd Voodoo Key. Jump back to the wooden
platform.
Walk to the SW corner of the structure and look for
that pillar where you jumped to at the start of the level, a Medipack appeared
and that’s the Secret. Run jump down to that ledge and pick up Secret#3 that Medipack and a Golden Skull. To get back
down, just run down W into that opened trapdoor in the pool below. Climb out
and shoot another Native. Go up to the floor E and up the vine from
facing SW. Back flip to that wooden platform in the SE corner.
Go into the open door (it’s a passage you’ve visited before) and follow
through to the right to come to that pool with the underwater lever, go to the
E side passage and follow to where you can use the 2 Voodoo Keys. Go in and
through the next door to the next level…
Level
17 - The Flying Dutchman.
The door opens, jump down and go right because left you’ll need a key.
Jump down and the floor gives way. Just slide down and follow through, climb up
the ridge and slowly walk into that tunnel to the red stream and watch the fly
by.
Jump S and keep jumping till you are safe at the other side of the
“Blood river”. Jump up and go N, carefully around the
obstacles. Follow through and at the end look down, there are breakable tiles
in the bloody water.
Break ledge Jumps. (Map)
First is a stand jump from standing a bit left in the opening, a running
jump to the second one S and to the right, landing close to the left side. Turn left a bit and stand jump to the corner of the
third where it touches the island, turn left again and stand jump onto the
slanted side of the island, try to slide backwards so you can slide and back
flip landing back to the wall. Turn right a bit and run jump to the island,
keep jumping and do a roll so you will be facing the island, go jump right and
slide to the break ledge, do a U-turn right while running and jump into the
opening. You will probably land against a crate, just shoot it, pick up the Medipack
and continue S.
Blade Ladders.
To the right is a lever over a lowered block and in the end facing E
there are ladders to the left and right. Take the right hand one (N) and climb
past the static Blade to use the lever on top, climb down and from just under
the lower Blade take a back flip roll and grab, and then climb off, left from
the ladder. Go back N a bit to where the block has
risen and use the lever there.
Jump back on the N ladder and climb up right, go close to the Blade and
time the Blade to back flip/roll (the moment the Blade is against the ladder)
to the ladder S and hopefully have enough health left to go up to the next
Blade (you can use a flare here if you have a fresh one, as the Blade is hidden
in the dark). Hang right again and another back flip/roll grab, go to 4 steps
from the top and one more back flip/roll to get back to the S ladder, go up and
hoist up.
The Voodoo Key.
Get the small medipack and walk up to the next room. Walk over
the wooden bridge to the pedestal where you can get the Voodoo Key.
Walk S over the bridge and step through that dark
textured wall to get Secret#1, a Golden Skull and 3x Uzi Ammo. Walk back
to the pedestal where the Key was.
Jump to the block E and enter the passage, you’re now back
at the crossing where the level started. Go N and
right to use the Key.
The “Flying Dutchman”.
Hop down the passage and come to a room overlooking the cave with the
“Flying Dutchman” where you’ll find a Medipack NE, in the NW corner is a
crack in the grey wall outside the railing. Jump over the railing, grab that
crack and shimmy left till you can stand up on a ledge with a plant. Check the
health and run jump N to the wooden platform in the deadly water. (A curved
running jump) Jump the platforms ignoring the opening with the Burner and the
Teeth doors and walk all the way around the ship. Jump into a cave opening N.
Grab up and use the monkey climb to go around the building and drop onto a
ledge with a Blade, if you drop on the right hand closest corner it is OK, so
watch out. Face S and side jump left onto a slanted block, jump and grab the
wall to climb left and up to the ledge with the lever. One of the Teeth doors
will stop; is it in a closed position you’ll have to use the lever again.
Through the Teeth Door Wall.
Get back to the monkey climb, the burner and the blade pose no threat
anymore (but even though it isn’t working the Blade is still deadly, but if you
stand on the wooden platform facing SE that tiny corner is safe). So from there to the monkey climb and jump the
platforms along the ship to the Teeth door wall NE.
Run jump left through the door to the walkway and immediately hop back
and hang from the side to let the boulder pass by.
Jump to the ship and shoot 2 Harpies. SE and NW are some Shotgun
Ammo pickups. You can trigger another Harpy if you climb all the way
on the back (E). From there jump to the plant covered opening in the middle of
that wall. Jump up to the higher floor and a block rises to close off a room,
so go straight. At the pit in the end stand left and do a running jump with
grab (watch your health) shimmy a bit left, drop/grab and pull up into the dark
opening.
Look NE and jump on the wooden platform, turn SW and jump to the bright
stone ledge to use the lever around the corner there (the block you passed
before lowers again). Jump back to the wooden platform and then to opening S
(or jump into this opening directly from the switch ledge). Jump to the opening
NW, and then to the SE corner, climb the block and turn to jump to the opening
NW. Turn around and from there; take a jump left to the slanted roof left (SE).
Slide and grab the edge to and shimmy right. Pull up in the passage and follow
back to where the block lowered, now enter a water room.
In the Wet.
First walk through the waterfall N and get
2x Revolver Ammo and a stack of Gold Doubloons posing as Secret#2.
Go back out and save at the pool.
Dive in, into hole and S, go right at the plants,
open the next (metal) underwater gate to the right. Swim in and to the end,
swim up (a bit hard as Lara might get stuck in the rocks, but then just dive
again). Turn around and climb up, run forward a bit and kill 2 Lizards.
Find a crawlspace left (N) and use the lever to stop a Blade, when it stops fully
open (blocking the tunnel) it is in the correct position. Get out of this crawlspace, go W and into the
water in the corner, go left and use the lever behind the Blade, the water
level rises. Swim back a bit and up into that room, climb on a wooden walkway. Fill
the Waterskin here (jump up once so Lara can run again) and jump N to grab
into the opening.
Go to the back wall N and face W, back flip onto the slanted block and
jump/grab the ledge above, shimmy right to pull up. Take a curved jump to the right
over the railing and empty the water skin in the scale.
Watch fly by and jump in the water, you have to take the way back by
going right and pull out (bit tricky) into the passage where the Lizards were,
at the end in the water again, swim through the open underwater gate and left,
go up and out at the end.
Go out of the room and go right (S), take a running jump back to the
ship. Go NW and jump on top of the structure with the Teeth doors at the end
and then into opening N. Follow through to a small cave with a shallow pool,
kill the Harpy.
Target Shoot.
Shoot 4 sets of pots (one at the entrance, one in the pool, one in a
crack SE and one NW) and the gate opens up S. You’ll find 2x Harpoons
along the E wall near the plant. Better you fill the Waterskin while here (although you can get back to fill it).
Go into the open gate N, push the block twice and kill the Lizard and
quickly go into the opened gate. Don’t dillydally but get into the other room,
as a burner will start on that dark tile on the floor.
Put the water in the scale and watch another tile around that Skull become active. Go NE and push/pull the push block around
till it is on its tile in the N passage, but be sure to pull it to the
tile as you have to get back to the room with the scale, a block lowers in the
SW corner of it. Go in there follow through to a lever to open a gate near the
ship. Go back to the push block and push it once to get out.
A Leap of Faith.
Go back to the ship, 2 stand jumps, one to the roof and one onto the
ship. Look over to the S and see a small blue flame in the “Blood river”. Go stand on the near by crate (on deck) and do a
running dive (Alt+Shift) and under the surface is an opening you can swim in
without dying.
Blocks and a Torch for the Voodoo Key.
Swim up and face W then pull up and start jumping left up the slopes
till you can jump hard left onto the floor. N is a vine you can climb. Back
flip into the room above and in the middle of the room are some Harpoons.
There are 4 pushable blocks in here that have to be pulled on 4 tiles. SW and
SE are 2, N are 2 more, the blocks can be placed onto
the tiles closest to them.
Climb the vine that appears near the NE block, back flip to the upper floor,
use lever NW and Zombies appear, you can shoot them now or later, the
harpoon gun works fine and one of them will drop the Voodoo Key (go look
for it). Go get a Torch NE and go down and down again at the vine
holes to the lowest room and ignite the Torch on the flame. Go light the snakes
head W. Drop the Torch and climb up to the top room (Kill the Zombies if you
didn’t yet and get the Voodoo Key one of them will drop).
Grab the second Torch (for the Secret), jump on the
block and slide down into the next room, drop it near the Keyhole W and open
the door on top of it, grab the Torch, jump into the passage and go through the
first set of Teeth doors. Stand close to the second set and light the Torch on
the Burner, turn around and get back into the previous room, light the Snake
head E and see a door open up. Drop the Torch and go up into the W passage
again.
Go through the first Teeth door; stand close to the second set and run
jump past those while timing the burner. Slide down and grab the edge over the
deadly pit, pull up, back flip/roll grab and hoist up to slide down onto the
safe floor.
Grab the Medipack SW and now you need water for the Waterskin, so
go S and jump up into the passage left (W), fill the skin and get the Revolver
Ammo.
Climb back out, go straight and jump into the room E
to get Secret#3, Gold Bars and 2x Shotgun Ammo.
Go back and fill the scale to activate the third tile at the Skull. Don’t forget! Go back to the
room with the water and fill the Waterskin again. In the room
with the scale behind the blue vine NE is a jump lever, go up into the opening
to the block puzzle room E and right to where the gate is opened. Climb out
backwards on a ladder and shimmy right and drop down onto that platform. Jump E
to get onto that ladder at the end.
Climb till you see a grey wall on your left and back flip. Walk over and
jump to the ship, grab and pull up and go kill two Harpies. Drop from
the N side of the ship onto the platforms below and go W, jump S once and then
jump and grab up into to the opening in the W wall. Under the Skeleton in the
next room is Revolver Ammo to be found. Stand facing the right hand side
of the crate with the Blade and jump up, grab up to a crack and get the Medipack,
drop back out and run jump to grab the slanted wall E and left of that Blade.
Pull up and back flip/roll to grab the roof, shimmy right and pull up.
Shoot the Lizard, grab the small medipack he drops and
look for the plant behind the roof left (W wall). Facing W you’ll see a Jump
lever behind it, run jump and grab the switch to open a gate upstairs. Jump
back up like you did before and follow through to where you look out over the
cave. Did you fill
the Waterskin before??
Grab the monkey climb and go to the first mast,
the fixed camera makes it hard to spot the right path, but you have to circle
right around the mast and stay on the path with the stars. Finally drop at the
4th Scale and pour the water in. The last segment is activated and
the Skull is now active.
To get down; stand on the SE corner of the ledge (higher ceiling), check
the health, face SW and do a running jump (according to Gerty), or a stand jump (according to Dutchy) to land on that
crate below. Go to the activated Skull tile and step on to get “aboard the
damned ship”.
Level
18 – Aboard the Damned Ship.
Follow through and open the door, go SW through the cargo hole and open
another door, go right around the corner and into the opened door to shoot the
sacks for a small medipack in the N and get flares SE.
The Key to Sailor
Brooymans’ Cabin.
Go to the crate with an opening with flames S; on the right is a big
barrel (S wall) that you can push. Pull/push it N as far as and then push it
onto that different looking piece of floor, between those two canons E. Go into
the door SW as the flames in the passage are off and jump up onto the higher
floor to grab the Key to Sailor Brooymans’ Cabin.
So now you can go upstairs (NE), open the door and the first on the
right is a bedroom, nothing there but open it anyway. Go to the second door
right this passage is still closed off, but leave the door open for now. Door
straight ahead, is a large mess room where two Ghost Pirates attack.
Mess Room: Left hand door E,
staircase leading down.
Open the first door left, go into the bedroom to open a chest SE. Inside
you’ll find the Ballroom Key. Back out and left, the door left is locked
so open the one to the right, go down some steps, take the slide there shoot
the bottle W to get the Key to Captain’s Cabin, then climb up N from the
slightly raised floor to the balcony (only use Ctrl). Jump over the chandelier
to the alcove S and find a Timed lever.
Timed Run Back Up.
Turn around and see the chain on the chandelier. The lever opens the
doors to that upper corridor. When you pull the lever, watch the fly by and
then save again for the timed run. Pull, roll
and run out to jump to the chain. Landing against it, jump up and grab, go up
five grabs and back flip/roll holding the forward key immediately running
through the doors. You are back at the corridor.
The Captain’s Hut.
Go back up the stairs and use the Captain’s Key NW. Shoot two Ghost
Pirates in the captain’s hut, high up over the table is an artefact and
there are 3 receptacles in the SE wall. Open up the door E, go up the stairs,
use the lever on the left at the opening to the room and see a door open up.
Jump down and head SW out of this hut back to the mess room and again go into
the E left corridor, down the stairs and go straight through the newly opened
door in the end.
The Wheel house.
Jump over the railing onto the higher floor, shoot the box for a small
medipack, then hop back to a Timed lever SW. That lever opens a door
in the passage N.
Timed Run Wheelhouse. (Map)
Pull the lever, turn left while Lara pulls and turn enough to sprint
just past that nasty open door, curve right a bit and hit Alt just before
entering the passage so Lara will dive from that slope. Hold the sprint key
down, aim to the right hand side of the timed door and just before the next
slope another roll so you will just roll through the gap of the closing door.
It’s a tight one so it may take a few tries.
The First Damned Heart.
Get in water and follow through, meeting a Shark in one of the
tunnels, swim into a cave and go right just past that first barrel and find an
underwater lever on the E wall. Use it quickly and swim to the barrel S.
Through a small triangular opening behind it, hoist up at the end.
Get a medipack straight ahead, go into the passage E and use the
lever at the window. Watch the fly by of a canon firing and blowing a hole in
the wall. So it’s time to get back to the cargo hold.
Swim back get out of the water go to the wheel house and go left through
the nasty door, up the stairs, straight through the
mess room into the door W, go straight
down stairs, go shoot the Ghosts first and then head NW through the
cargo hold to the first cargo hold, pick up Flares NE and find the
opening in front of the NW canon. Drag the skeleton from facing E and get his Damned
Heart.
The Ballroom and the Second Damned Heart.
Go back SW and S to the other cargo hold and
NE, back up the stairs, through the corridor and down the first stairs to the
left and use the Ballroom key there. Go to the E wall and find a hidden
crawlspace up in the curtain (left side curtain, one block up). Shoot the sacks
and crawl further to climb down in a foyer. Throw a lever in the window
immediately left (NE), head W and look in a window left for a second lever
(screen of a door) run around the corner W to shoot a Ghost Pirate,
there is third lever on the left wall around the corner (screen of a door
opening up), another Ghost Pirate will come running. Look along the W
wall for a lower part of the ceiling. Face E and grab up to the ladder to climb
up to the floor above. Head to the NE corner and run jump right around the
corner to the opening where the door was. Pull up and jump across the entrance
passage to the crawlspace. Go through and jump to a crate in the next room.
Face S, sidestep left and run along that side to jump to the grey tile S, then
a stand jump/grab into the corridor.
Timed run for the Damned Heart.
Go left and jump through curtain to chandelier and jump all chandeliers
to the highest one in the middle and climb the chain. Back flip off and use
lever up there, get back down the chain, stand jump down SE to the chandelier
and back into the curtain to the room as the fire in front of Timed lever is now extinguished. Save in front of the
lever so Lara will pull it and watch how and where the door opens first. Save
again and pull the lever, back flip/roll and run to the edge of the opening,
stand jump to the first and do running jumps over the rest of the chandeliers
to grab the one SW. Pull up and run jump straight with a grab to land in the
open door. The passage leads you to the other balcony to get the second Damned
Heart from a pedestal. Drop from the
balcony and leave N up to the corridor.
Mess Room: Right hand door E,
staircase going up.
Go left to the Mess room and open the right hand door E, go up the
stairs, shoot another Ghost Pirate, go to the keyhole a bit further to
the right use the Key to Sailor Brooymans’ Cabin on the door, shoot the
sacks in the corner, use the lever. Go out and left, down the stairs to the
Mess room, into the W corridor and take the first on your left.
A Mysterious Maze, the Cursed Book of Souls.
Shoot a Ghost Sailor upon entering the first room and pick up the
flares he drops. This is a mighty confusing maze I’ll tell you. Go in E and
if you keep going to the right you’ll end up in
the first room again with a Ghost Sailor on your tail. Shoot it and
enter E again, this time keep going left and you’ll end up back in the
first room again, but with a different layout. Go up the stairs left and end up
overlooking a bedroom. Shoot that Ghost Sailor running towards you, did
he run over an invisible floor? Walk slowly into the room and you’ll notice
half the floor is made of glass, you have to walk along the W side to the
opening across the room (walk slow and you’ll find it). Better save after this.
Now I lost direction a bit (can you imagine) But I think I went right
(shoot a Ghost) and then right again, shoot a Ghost, but you
have to get into a corridor where the camera angle changes and when using the
binoculars you can see a sort of shaft up in the ceiling. Face W and keep jumping up till you see a corridor in front of you.
At the end of this corridor (shoot a Ghost) you can safety drop down and
go N into a dark place, stand under that Book in the ceiling and use Ctrl to
get the Cursed Book of Souls from the floor.
Go S, keep going straight ahead to leave this place. Once back in the
corridor go right to the Mess room and again into the (E) right hand opening,
up the stairs and open the first door to the left.
The Library.
From the entrance a stand jump and grab to the crate with the flames W,
stand on the corner of the crate block losing a bit of health. Turn around and jump/grab E to the bookcase, your
goal is the jump lever way up SW, so crawl into the bookcase, out the other
side and shimmy left over the bookcases to the end. Back flip with roll/grab to
next bookcase and go down to climb left under the upper floor. Keep shimmying
till you cannot go further, safe and be sure that Lara’s feet are about one
block from the floor, and back flip/roll and grab the bookcase again. Shimmy
around the corner and then climb up and over the lever and drop/grab to pull
the jump lever, land on a slanted block and slide to back flip behind the
crate, the flames are all extinguished now.
Get onto the crate and run jump and grab the bookcase SE and climb up
where the burner used to be. Shoot the Ghost Pirate and shoot the little
box for a small medipack. Go to the SE corner and place the Cursed Book
of Souls between the other 2 books. A door opens in the Mess room.
Go SW and Lara will stare at the ceiling, climb up and
through the ceiling for Secret#1, 2x Harpoons
in the room and in a chest you’ll find Golden Bars. Go down to the
room below again.
Stand at the opening in the balustrade where the burner was and turn
around, drop backwards and go down the bookcase to back flip into the entrance.
Go out to the corridor and right to the Mess room, shoot a Ghost Pirate
and head S for the open door.
The Flooded Rooms.
Get down the stairs and look to the left to spot a small crawlspace (for
later).
Jump to the stack of crates just in front and dive down the hole between
them, swim through to find and use the underwater lever. This will raise and
lower the water in this room so remember where it was.
High level:
Swim N and back into the entrance where you saw the
small tunnel (to the right), near the floor (see above). Follow through to get Secret#2, Gold Doubloons and a Medipack. Swim out of
the small gap and left to get back to the water room.
Swim into the opening S and climb out on the stairs, follow up and crawl
in on the right at the closed door. At the hole you can lower yourself down
into the hole and drop/grab to pull that jump lever and save when you are in
the water. Now swim past the knife (stay high), and follow back past an opened
door to the right (can’t use the lever in
there yet) Go on over 2 short stairs to the S staircase, go left and back to
the Main room. Swim back down the hole between the crates to use the lever that
will lower the water level in the Main room again.
Low level:
Swim S and up the stairs go immediately to the right (E) and down some
steps and the door to the left is open now, use the
lever in the corner. See a camera shot for a jump switch, get back to
the Main room, down to the lever and raise the water level again.
High level:
Swim to the chandelier near the E wall and climb the chain, turn to back
flip to the chandelier NW. Jump to chandelier N and from there to the jump
lever. This opens an underwater door on the W wall way down at the bottom SW.
Swim in and when you come to the corner, better get air and swim along
the surface through the opening instead of diving through (collision of the
door posts). In the next room is an underwater lever. Throw the lever till you
see the Blade in the open position, so not blocking the crawlspace. You can go
back for air when needed. When you succeeded you can get out to the Main room.
Swim to the staircase S and all the way up the stairs and into the
crawlspace to the right again. Grab the edge of the hole and shimmy all the way
around. Watch the cut scene and after the low ceiling is a passage to the
right, go on and get one Torch from the pedestal. Go out and N to an
opening overlooking the Main room.
Stand jump to the closest chandelier and the Torch will stay in Lara’s
hands. Walk slowly off the chandelier and swim to the opening N. Straight in
front of that opening and about one and a half block away from it you best save
first. Then throw the Torch (spacebar) and see it float gently into the opening
underwater, landing in the entrance N. Go down between the crates to lower the
water level again and go jump into the opening S from the crates in front of
it. Pick the Torch up.
Go up the stairs to the Mess room, throw the Torch where you can find it
later and shoot two Ghost Pirates. Pick up the Torch and go W into
corridor and into ballroom (first on the right) to ignite the Torch on one of
the candles candle (NE).
Back to the Mess room and take the right hand passage E, go straight to
the end and into the door, to come to the room you saw in the cut scene; light
the two wall torches and the door to the Kitchen opens up.
The Kitchen, the 3rd Damned Heart.
Into the kitchen, shoot the sacks on the floor and go to the big barrel
in the NE corner. If you look SW from it you’ll see some drops falling from the
ceiling, place the barrel under it (pull twice and pull once). You can leave
the Torch here. The fire over the hole in the floor is out, so drop in, shoot
the Ghost. Go to the next room and time the burner to jump to the crate
in the middle of this inferno.
Stand back on the corner, save and run jump with a right curve to the
next crate with the Blade so you have room to do a running jump into the
opening across the room. Go up the stairs and come to a room where 3 Fire
Wraiths will come alive. Run right and upstairs, the door will open, go out
left and to the Mess room, sprint S through the door and down into the water.
Get out using the crates and go back to the right hand passage E and now
take the first door right (S) and in the chest W you can get the 3rd
Damned Heart. One more Wraith might show up, so get rid of it in
the water S of the Mess room. Go back through the Mess room and now go N into
the Captains Hut, to those receptacles NE and place the 3 Hearts. The room
above your head will be filled with water.
The Corsair’s Curse.
Go E up the stairs and dive into the water. Swim to the Artefact over
the table below and grab the Corsair’s Curse. The door N opens, follow
through and up and hoist up. Open a chest to get Secret#3, a Golden Skull. Stand on the block next to
the chest and jump up into the water above, swim through and that is the end of
the level. (When you didn’t get all secrets before,
these passages will be flooded and you can only swim past that chest)
Martinique Bonus level, only if you found all 12
Secrets…
Level 19 “Bonus” - Escape from the
Caribbean Depths.
*****DO NOT touch your keys while the cut scene is playing,
this might give you some control over Lara but in the end it doesn’t work well
(bug).****
After the cut scene Lara is wearing that diving suit
and she can barely move because of the weight (Hold “sprint” then hit “duck”
and Lara does the crawlspace roll to get forward faster, or just do back hops
if you have to walk far).
Walk S to the water lock and crawl in backwards, swim down and through
the tunnel N, you’re back at the wrecked sub.
The Underwater Levers, the Detonator Key.
To open a gate where you have to get in, find and use the 4 underwater
levers.
Lever 1: That
one is straightforward and a bit to the right on the rocks N
near the slanted pillars.
Lever 2: Turn
right from the lever and swim in straight S and a bit to the right and up, into
an opening left of that grated window, swim into the tunnel and just keep going
right around corners to the lever on the W wall, swim E a bit and get the small
medipack around the corner.
Lever 3: Swim back
out the way you came in and go right around corners, over that pole you walked
and find an underwater ceiling lever over the plant S of the submarine tower.
Lever 4: Swim NW from here and
there are 3 gratings on the ceiling near the W wall,
just E of the left hand one is another underwater
ceiling lever, the gate will open up.
Swim E a bit and down, go into that gate you visited before (under the
jump lever at the moving block) and follow through, up in the air pocket and
climb up W to you only have to take one step to get the Detonator Key.
Hop back and when in the water and swim into the alcove W to get the Revolver
Ammo there. Swim back out to the Wreck area.
Hunt for the Sacrificial Skulls. (for the levels
only Secret, so you might want to skip this)
Swim up a bit and turn around so you can look behind
the moving block to spot the first Skull, save and swim past the block with
some speed, get Sacrifice Skull #1 and get back out. Swim E along this
side of the wreck and just before the second slanted pillar to the N wall to
get the Harpoons there. Swim E again and in that coral bush NE you will
find Sacrifice Skull #2.
Swim into that cave E and swim all the way up to climb
up into the hole in the ceiling, follow, get the Revolver Ammo and hop
down to the Moving Block, face SW and do the sprint/ roll to get into the
passage W where Sacrifice Skull #3 lies. Go further into that passage
and use the lever to let the Moving Block stop in a position allowing you to
leave, hop backwards into the water (S) and swim out of the tunnel, sharp right
around the corner and into the tunnel there to get the Medipack.
Swim across to the N side and into one of the openings
there to get yet another Medipack. Swim out of this cave and back into
the Wreck area. Right and down to look for that tunnel in the bottom where you
went in during a timed swim (SE corner along the S wall) Follow in to get Sacrifice
Skull #4 and get back out, swim straight W along this side and just before
that big propeller to the right is a green plant and behind it are Flares.
Swim W again and into the tunnel just left of the
incoming blue light, into the opening NW and right at that explosives crate,
follow this tunnel and in the end on a crate is (the last) Sacrifice Skull
#5. Swim back to the explosives crate and out E, go up there and climb out
N and go into the room to use the Detonator Key.
Back out and into the water, swim in W where the
explosives blew a hole in the wall, follow through and climb out S from the
pool. Go SE and into the next room for the Secret. Place the 5 Skulls and Secret #1, a Golden Rose will appear in the middle of
the room (Inventory says: “That Secret was hard to find wasn’t it?”). Go get it
fast, as nasty Chickens appear, the longer you wait the more will come.
You can’t shoot them so get to higher ground and leave the room NE to the
poolroom.
Timed ‘Run’.
Go to the lever on the S wall and save,
the lever opens a Timed gate N and the best way
is to do back hops along the W side of the pool and into the gate. Head into
the next room and into the passage N, climb the blocks to the upper level and
walk out onto the roof. Almost at the end, face W and walk up to the edge, hop
back and save. Use “sprint” and then “duck” to roll forward and slide from the
roof, do not jump but only use ctrl to grab a crack in the wall. Shimmy to the
right and to a Jump lever, activate it and go into the opened door E. There are
5 Snake Stone receptacles. Use the lever on the block
and watch the flyby of a giant Monster coming alive.
The 5 Lizard Spheres.
Get back to the pool and down the tunnel, swim back and just past the
explosives crate take the second left, save there where you can already see
some of the Spheres, surrounded by blue sparkles in the E. First we go
sharp left (follow the wall) and into that triangular tunnel for the Lizard
Sphere #1, then E along this side and down to the bottom for the Lizard
Sphere #2, swim up along the S wall there and into the opening near
the 3 dark gratings (you went in there before), follow all the way through to
the end for the Lizard Sphere #3. Swim back and out into the
wreck area, N and to the left a bit for the Lizard Sphere #4,
turn right from there and swim to (the last one) the Lizard Sphere #5
you can see left of the Monster. Swim W again and into that tunnel there, to
the explosives crate and follow back to the room with the receptacles (Go N and
then left E). Place the Lizard Spheres and watch the flyby of the Monster being
destroyed. A fuse stays behind. That’s what we go for now, return to the Wreck
area.
The 3 Fuses.
On top of the wreck where the tower is now gone lies Fuse #1, go
E and into the cave and down into the trench, find that underwater tunnel on the
left and go in to get Fuse #2. Now swim up and into the opening E on top
of that ladder, go right and left around the corner, take a right again and
swim down and save in the entrance of the machine room where Blades now circle
around. You have to go left and up into the ceiling tunnel (swim along with a
blade) and get Fuse #3. Get back out and return to the Wreck area. Swim
into the tunnel S where the level started and up into the mini sub. Place the 3
Fuses in the Fuse boxes and watch the flyby. Walk to that ramp and go up to
leave.
Level 20 - Mountains of Saint Francis.
Coming from the previous level, a cut
scene will start this level series. Pierre finds his way through the Canyons
and will wait for Lara in a small valley. (Could be Lara’s hand is a bit strange after the cut
scene, This could happen when Lara had a flare in hand
at the end of the previous level, take a new flare and throw it to get things
back to normal)
After the cut scene Lara has to go W the
same way as Pierre, pick up a bunch of Flares, follow the passage to a monkey swing over a deep cave. Only problem is
the opening at the other end of the monkey swing closed off by the earthquake.
So instead of using the monkey swing, grab the wooden
wall to the right, go left around the corner and climb down, back flip over the
fence with the Spikes and go up a ledge left of the fence. Use the lever
in there to open up a gate near the monkey swing. Now for getting back up:
Go into the NW corner, face S and stand
one step away from the slope behind you, then back flip jump from the slope and
grab the wooden block to get back up to the monkey swing, go over to the
climbable wall and climb left around the corner to the opened gate.
Follow through and make a safety drop out
of the passage into the valley with the Boulders. Drop down and face N, run to
that block standing in the waterfall to the left, stop there while Boulders
drop all around you. Now go W and slide off the waterfall, get into the water
below. Look under the waterfall E for a narrow
triangular gap to swim through and find Secret#1, Revolver Ammo and Golden Coins. Swim back out and wade to the NW corner
where you’ll find a lever on the S side of the pillar, Lara will
look up to the door opened there. Go NE and get the Grenade Gun out of
the pool. Then climb the rock pillar in the pool and run jump to the broken
bridge W, follow up S and run jump to the bridge SE,
aim past the block and turn around to jump/grab up to the top of the block W,
run jump NW to the ledge and follow with a shimmy past that nasty plant and
come to a crawlspace, crawl out backwards and shimmy left around the corner to
a slanted grassy ledge, pull up there and back flip to a bridge, head E and run
jump straight down to that open door.
Follow this passage through till you meet
Pierre in a small valley, let him lead the way (into tunnel N) and come to a
pool near a house. The door over the bridge is closed, dive left (E) into the
pool and look for a small triangular opening under the waterfall, swim through and
in the room with the furniture you’ll find a lever on the wall, opening up the
door to the house. Go swim back and climb on the bridge, head into the house
and follow him into that passage NW, go up to where you can jump across the
room onto the wooden ledge and wait till he opens up the door for you (you may
have to go to the door (W) before he does that), go in and follow, climb up
left and head to the right and around the corner to where you will look out
over the pool at the house.
Just around the right hand wall is a small
wooden platform, run jump with a right curve and land on it, run jump/grab to
the roof of the house and grab the edge upon sliding off. Shimmy
left and pull up then back flip to another wooden platform. Hop up into
the opening E and go SW in the small cave with the closed gate, walk out onto
the waterfall and drop onto the wooden walkway S, go to the W end. Run jump to
a small part of the walkway W (mind the block up right) and climb onto the
waterfall S, go in and follow up to a lever, throw it and watch the cut scene.
Pierre will join you there and makes his
way back to the opening you came from before, but before you follow him you can pick up a Secret in
the cave he just came from. From this waterfall through the gate W, go in and
get Secret#2,
Gold bars after shooting the crate, pick up the small
medipack. Now you can take 2 routes to where Pierre
is waiting.
1: Go back up E and down the waterfall,
jump E over the blocks like Pierre did and drop down to enter the small cave E.
2: Go N from the Secret pickup and left to
where you jumped to the small wooden platform before, take the same route, jump
to the roof, shimmy and back flip to the platform behind, jump up into the opening
E to enter the small cave.
Keep following Pierre and go into the gate
SE and follow all the way to the top level of the canyon, there’s a bridge
leading to a closed door, go right around the corner and hop into the building
SW, throw a lever near the closed gate and go back out, over the bridge to the
now open door.
The
Waterworks.
Dive into the water at the waterwheel and
swim N, get out on the shallow part on the right hand side just after the
plants and grab the ceiling to get onto the steep N bank. Go into the garden
beyond and look along the right hand (W) wall for a hidden crawlspace, go in
and come to a room where you can throw a lever to open an UW door near the
waterwheel. Go back out to the garden, head to the waterwheel S and swim into the
open door S to a room with Wine barrels and Burners.
Time the Burners and make your way through to the
back, use the lever in the back and throw it to open
a gate in the N wall of the Garden. (You can crawl on the right hand slope,
avoiding the burners). Get back past the barrels and swim back to the
waterwheel, go N again to the garden and find the open gate in the N wall. Into
the gate and throw the lever to get the water running so the wheel will start
to turn and a gate opens in the building where Pierre is waiting.
Go back to the waterwheel and swim into
the open UW door again, this time go straight where the cave-in is now gone,
get Secret#3,
some Harpoons and a Golden Skull.
The
Maze.
Swim back and climb out at the wheel. Head
out W, over the bridge and hop into that building NW, follow in and go left
where possible (if you happen to loose track of your guide), you’ll pass a door
and at a second plant pot (in the left hand passage) go right and there’s
another door he will open for you. Throw the lever behind that door and go back
following after your guide to go through the other blue door (near the second
plant pot left), go straight and a bit right into the passage and follow to the
W side and left to where Pierre is waiting. You have to use a monkey swing to
get across the pit. Another gate will be opened for you and you have reached
the Omega room. Go to the gate in front of the crawlspace W of which only
Pierre seems to know the opening code and a flyby will show you how the gate is
opened for you. Get in and get 4x Flares, drop from the other side to
get to the next level.
Level 21 - The Hall of Legends (part 1).
“Quest for the 10 Legend Keys.”
Go through the passage to a lower corridor
and turn left (to the right will be visited later), follow the passage and a
flyby will show you the Hall of Legends, several levers, protected by fire,
proceed and when you enter the hall, 2 Gladiators will attack. Take care
of them and head into the passage N, up the steps and where you’ll go into the
bright light is a closed gate E (you’ll exit from there later), so climb up S and
follow to a large balcony overlooking the hall, the “N balcony”
from now on. To the W is a passage to be visited later and on the N wall are 3
Colour levers, protected by flames. For now go to the fence SW and run
jump/grab to the roof on the pillars in the Hall (aim right of the column). Go
over to the SE corner and run jump over the fence S to the S side balcony (“S
balcony”). To the E is another closed gate and on the S wall the “Blue/Pink lever” as I will explain
later, don’t use it yet or the order of the walkthrough will change.
Head into the passage W, at the opening in the floor, first go down that
lower passage, go down the stairs till the gate opens
for you (shortcut back up to the S balcony) and head back up. Follow the
passage to the W and to the right are some rooms with
closed doors (same kind of rooms as on the N balcony, all for later). Follow
the passage all the way to the end and get a cut scene of the Blue/Pink lever,
there’s a Pink block in the W wall and that lever will open and close the
passages on the Pink and Blue blocks throughout the Hall of Legends (there will
be more of those later, lever up is Blue, lever down is Pink). For now
go back a bit and climb over the Blue block into the room behind it, the
Poseidon gate will open for you. Slide down into a pool, swim through the
tunnel N and climb up at another steep passage, slide
down into Poseidon’s Domain.
(Blue/Pink lever is in up position)
Timed Entrance
doors, door I.
Wade through the shallow water to the
block E and climb it, to the W is a closed (Timed) door. Safe at the lever and
pull, turn left and run with a left curve off the block, run close along the
right hand (S) wall and jump over the (steep) deep part at the last moment so
you can keep running and curve a bit left into the still open door. Immediately
start shooting a huge Rat, go to the ladder on the N wall and up into
the passage above, follow to where a Rat shows up. Shoot it and go left
to a button, push that to open a gate in an UW tunnel and draw guns as another Rat
will be on it’s way. Get back to the lower tunnel and
look for a hole in the floor SW of the ladder.
Door II.
Swim through to an other
part of these entrance tunnels, climb out N and save at the lever (the fence
looks out into the previous room), left (S) of the lever you can see another
Timed door, this one is tricky. Pull the lever and turn left, stand jump S over
the hole and immediately start sprint before you hit the deeper water, Lara
will sprint right through the door before it closes.
Secret
Hall. (because there is one you can
get later)
Go through to a high Hall, into the SE
corner and dive to the UW lever there (door opens up). Save and pull the lever,
roll and get back fast, go sharp right around the corner while a Croc
nibbles at your feet, you can climb up onto the grassy ledge from facing E and
then shoot the Croc (or you could shoot it from standing in the shallow water
near the wall). Face E and look up to grab up to the lowest part of the
waterfall above (only use Ctrl). Looking SE on that waterfall you can see a
balcony with a Gold Skull, still protected by Flames so we’ll have to get that
one later. Look SW and spot the door you opened, from the waterfall ledge
(standing one step on the lower part) you can do a right curved run jump with grab
at the last moment to get into that opening.
Push the button in there and Spikes
will retract on a pillar behind you, turn around and grab the monkey swing to
get to that pillar, drop/grab to climb it and from the pillar a run jump/grab
to the waterfall left NE, Shimmy left to the flat part and make your way up
into the NW corner, at the long steep waterfall you can jump/grab the climbable
wall SW and go up to the top ledge, hop to the E to get the small medipack
and then jump back to jump down to the S walkway below. Climb up the ledge S
and shoot the Rat, run jump E and look for the ledge behind the hanging
pillar NW, a well aimed run jump with a right curve to the closest corner will
get you there, jump/grab up SW into the ceiling and climb over to the lower
passage S, look for the passage up SE and follow in to where you look out into
Poseidon’s Hall.
Poseidon’s
Hall.
The Flyby shows you around and 3 Rats
sing their song, finish them off before you go down onto the grated floor, to
the W is a Mechanism, to the SW a closed door. Look S for the hole in the floor
where you can drop down to the pool below, quickly swim to the low ledge SE and
climb out (I have no clue as to when Crocs are
triggered, so watch out in this Hall).
A
Little Wheel.
Take care of the Croc (or 2) and
then dive in to swim NE, into a tunnel in the corner near the bottom, leading
you to a dark place, there is a Spike protected lever and a pedestal NE where
you’ll find the Little Wheel.
To the Flood lever
Get back to the Hall and onto the SE
ledge, run jump NW, then run jump/grab to the opening with the closed door W,
turn around and do a banana jump right around the NE corner to the ledge N.
From there a jump/grab NW up to the block on the W wall and jump/grab to the N
to a climbable wall on the block in the NW corner.
(Remember the next part) Go up
and turn left to run jump/grab E to the “N balcony”, go to the E side of
it, turn left and run jump/grab the pillar S, from the pillar a run jump/grab
with a right curve SW to grab the grated floor above.
Go to the Mechanism W and open that door
NW with the Little Wheel. Turn right and run jump/grab to the open door,
get in and shoot that Rat, that door S is a Timed one, the lever is in
the passage to the right, head up the passage and hop over to the blue pillar
with the lever. Save in front of it, light a flare and pull, roll and run with
a bit of a curve over the ledge (or the run will be too short due to the lever
behind you) and hop over the gap, run in and curve left off the ledge, run left
and sharp right through the open door.
The
Flood lever, High Level.
On the S wall of this small room is the “Flood lever”, protected by Spikes.
Go to a button on the W wall and push it to stop the Spikes, a trapdoor opens
up somewhere and the entrance door closes up. Go to that Flood lever N and
throw it to raise the level of the water in the Hall, those ledges were
floating, as they went up too. Go to the closed exit door N and it will open
again on approach, dive down and swim to a ledge near the door in the W wall.
Climb out and shoot all visible Crocs,
then swim down NE into the same opening you went in before, this time you can
climb onto a ledge in that small room where you got the Little Wheel before, on
the back of the pillar is a lever, lowering the Spikes at that (now
flooded) lever below the floor you’re on. This lever is for later when the
place is drained again. Swim back to the Hall and over to the SW corner, a bit
below the surface is a slanted tunnel you can swim into now, there is another Croc,
so get back out to shoot it from the low ledge W and swim back in. Hidden
behind some plants in the SE corner of the flooded room is an UW ceiling lever,
opening up a gate in the SE corner of the Hall. Near the N wall behind that
little tree is a small medipack. Swim out of this room and go left.
Remember this route: Swim
into the “S room” (just over that balcony) and up in the SW corner
against the left hand wall, there’s a slanted sandy ledge, pull up facing S and
back flip/roll with a hard right curve to land on the floor next to the plant
pot (climb up, hold both the forward and right keys down and jump with Alt, no
“end” key needed). Go out on the balcony and face E, if you are carrying a
flare, first drop it and grab the grated monkey swing, go E and drop/grab to
the balcony where the gate opened. Turn around to grab up to get up onto the
grated floor and go W, hop over the gap into the opening W and come to a room
with a fenced of pit.
Hop over the fence into the water below and swim to
the UW lever S, it will open an UW gate somewhere. Swim out through the tunnel
E and follow up to where you can climb onto a ledge, grab up to the crack E and
shimmy left to get back to the room (well be back on this ledge with the crack
to get a Secret later), go left and left out to the Hall.
The Flood lever,
Low Level.
Swim back out and make your way back up to the Flood
lever, start on the low ledge W and jump the floating ledges to the NW corner,
then to the balcony, to the pillar and up to the grated floor where the Flood
lever is located in the room SW. Throw it to get the level down again and go
out of the room, look down to where you can dive into the pool below (not on a
ledge of course).
Swim to the fenced off floor part in the bottom (left
of you) and swim down into the opening in the floor, into a triangular opening
S and right around the corner through the door you opened into an UW chamber
with an UW lever (with Spikes) keep right and go right around the next corner
and left into the NE tunnel, walk up the floor and get the Revolver Ammo
there, turn around and walk back a bit till you can take aim on the Target ball
in the flooded tunnel W (room will shake). The Spikes at the UW lever will
lower so swim back and right to use it and lower Spikes at an UW lever
in the Hall (you might have seen it already). To the left of you is a tunnel
leading to a room where the Tridents will have to be used later. You could take
a look if you want, but now you really have to get back up, so roll and swim W
to get back to the Hall.
Swim to that corner tunnel NE where you can now go in
and look for the (formerly Spiked) lever in that dark
room and throw it to open a door in the W wall of the Hall. Swim back to the Hall.
Opening up doors.
Swim to the ledge SE and jump to that open door W. To
the left a closed gate (exit later) so go to the right (S) and follow to a
plant pot. Turn around and grab up to the climbable wall, upstairs a Rat
will meet you. Then go N, climb up to a higher floor and turn around again to
spot the ladder. Go up and traverse to the right as far as possible, then back
flip off (no roll) and slide/jump curved hard to the right to land next to the
flame. Push the button N and stand facing S at the left side of the flame.
Stand jump/grab over the left side of the flame tile into the passage beyond
and go out to the hall with the door that will open for you. Don’t go out yet
but look for a small medipack in the alcove S (next to the plant). Head
to the passage N and look down into the shaft, Spikes, so it seems this one is
for when the place is flooded.
High Level:
Shortcut: Get back up to the Flood lever, this time
you can use that ladder on the E wall near the SE ledge to climb to the opened
trapdoor above, back flip and follow the passage into the room with the Flood
lever. Throw the Flood lever to get the water level up again and dive down into
the water, swim to that pillar SE (near the ladder) and find the UW lever on
the E side.
Throw it and see the UW door next to you open up, swim
in and to an UW door in the S wall. Open it up and swim back as the rest of the
action here will take place when the place is drained (use a button and a lever
in these rooms later). Swim right into the Hall to climb out on the ledge W at
the opened door you came from before, hop into the open door W and inside go
left around the corner to that shaft (left of the fire) and dive down, stay
high in that room and swim along the E side to avoid the Spikes below
and look for the UW lever behind the open door (A door opens N in the Hall).
Trident #1.
Swim up to the ceiling and into the shaft to get air.
Face S and swim down to the open door, turn left after the door into the W end
with the plant pot and swim up to the ceiling in the end to look for a tiny
triangular hole in the left corner, swim through and follow to the end where
you can swim down to the 1st Trident. Swim back out to the
Hall.
Trident #2.
Make your way over the ledges to that open door N, on
the last ledge take one step back and stand jump/grab into the opening and
follow in to a room with Swinging Blades (Could be there’s a Croc
in the pool, it depends on where you hop over the fence, you can climb out on
the NE pillar to shoot it). Hop over the fence and swim through the pool to the
W, under the ledge with the Trident is an UW ceiling lever to stop the Burner
on the ledge. Swim straight back E and right around to the pillar NE and face W
to climb it, stand on the NW corner ands face S, time the Blades to do a run
jump/grab to the block S, shimmy right around the corner and pull up. Go stand here and time the nearest Blade, I started the run when it
was left and about to move right again curve left and when you land on the
Spike ledge, a left curved stand jump through to the balcony with the 2nd
Trident. Hop over the fence and swim back to that pillar NE, climb it again
and run jump past the Blade to the balcony E, go back out to the Hall.
Jump to the ledge in front of the opening and to the
corner ledge NW, go up to the Flood lever by using the same route as before (N
balcony).
Low Level: a Secret and the 3rd Trident.
After the climb up to the Flood lever to lower the
level again, you can dive down and climb the ledge SE, jump W and go up to the
S balcony, go right inside and through a passage to the back of that
Spike-trap. Light a flare and face the left side of the Spikes, stand back to
the wall and turn slightly right. Time the Spikes and stand jump into the
opening when you expect them to go up. Run jump sharp right out the other end,
grab the floor W and go out NW to the balcony. If you are carrying a flare,
first drop it, then use the monkey swing like before
to get to the gate SE, go up the grated floor. Go W
and at the end a jump over the gap into the opening in the wall, go in to the
room with the fence around a pit, head right and into the passage right,
drop/grab backwards into the shaft you came up from before and shimmy right
around to a ledge with Secret#1, Shotgun
Ammo and Gold Bars (this one can only be taken with the water level
down). Go back and to the Hall and hop over the gap to the grated floor, go E
to the grated ledge and look for the opening in the fence to the right.
Standing in the left side a stand jump/grab to a
pillar NE, climb over the top and from standing on the N edge a stand jump/grab
straight N to a monkey swing under the grated floor, swing N to the pillar to
the right and drop/grab to get onto the ladder, go down till you can drop/grab
to lower ladder ledge. Climb up onto the ledge and stand on the SE corner, hop
back run jump to the ledge (with the Spikes) behind the pillar SE,
(start run when the Spikes went down and wait a millisecond before you start)
landing on the nearest corner so you can do a running jump with a left curve to
grab the opening S and go in to shoot a Rat. But that’s not all you can
do there, go to a button NE and push it to extinguish a flame in a passage
(short screen). Now climb through the open UW door S and look for the 3rd
Trident SE. Go back to the Hall, dive down and climb out on the ledge SE to
get back up to the Flood lever using the ladder SE, throw the lever again to
get the water level back up.
High Level: The Torch and the 4th Trident.
Hop down into the water in the Hall and up get to the
NW corner ledge (jump there from the ledge W) and get up onto the balcony N,
turn NW and spot the opening in the wall a bit higher up, do a left curved run
jump up into the opening and find the passage where the flame went down, in the
room beyond are some Torches, pick one up and go out to the opening
overlooking the Hall, Run out sharp left to end up on the NW corner ledge, jump
the ledges to the open door in the W wall and inside is the only flame in this
place. Carefully light the Torch and make your way back to the Hall, hop out to
the right hand ledge and run jump SE to the ledge on the blue pillar under the
waterfall, then hop S and from that one you’ll have to use a trick move, see
the pillar SE and the slanted front of it? Stand on the NE corner of the ledge,
face the middle of the pillar (slanted side), save and stand jump onto the
highest point of the slanted part on the pillar and if all goes well, Lara will
slide back into the water with the burning Torch in hand!! Swim to the NE along
the E wall and turn left into a sloped passage.
Walk up the sloped passage and in the next room are 2
grated floor tiles, stand on a corner and carefully light those tiles, leave
the Torch go into the open door. Shoot the 2 Rats and on the floor of
the room is the 4th Trident. Get out of the room and swim to
the S, get some air and dive down into that opening in the fenced off floor, go
S and through the opened door, left at the UW lever and into a tunnel going up
and down and up again to the room where the Poseidon statues are. Place the 4
tridents and the door E opens up.
Go in and straight at the crossing into the next room,
there’s some Revolver Ammo in the shallow water N, fill up your
Waterskin while you’re there and then go look for the Target ball in
the SW corner, shoot it and a door opens in the passage W, to the right, go in
and climb up left just past the door, follow the stream to the right and shoot
the Rats, look around the left corner for a lever opening up the Timed
gate NW. There is a small medipack in the SW corner.
Timed Gate.
You won’t have much time here, so save at the lever,
pull and back flip roll, immediately start sprint curving a bit left after the
first fence, curve right around the second and aim for the right hand side of
the gate (that side is open longer).
The Cistern Key.
Follow to a shaft and face S, jump/grab up and pull
up. Back flip and jump again to land on top of a waterfall, throw the lever
there and see a shaft filled with water (the one up to the Poseidon statues).
Hop into an opening up right of the lever and follow
down a slide back to the N room of the Hall, if you didn’t get it yet you can
pick up a small medipack straight ahead and go side jump right over the
fence, swim out to the Hall and down into the hole in the fenced off floor,
follow to that shaft leading up into the room with the Poseidon statues and
look on the grated bottom of that shaft for the hard to see Cistern Key.
Climb out to the room above and hop up E, go right
this time and open the door with the Key, run jump straight into the passage,
landing just past the burning tiles, quickly take a step forward and grab up to
the ledge with the Bowl, put the water in it and that grey tile below will open
up, just hop back grabbing the edge and let go. Surface for air and save before
you dive down.
Wet Boulder
Surprise.
4 Underwater Boulders in the next room will make things pretty tough, one
of the objectives is to open that nearby UW gate (if you want the Secret that
is, swim right around the corner when Boulder #1 moves left and swim as high as
possible against the wall and to that UW ceiling lever (screenshot), stay high
and don’t move till Boulder #2 moves away to quickly use the lever, swim a bit
forward and up against the wall/ceiling again and
when Boulder #3 moves away you can roll and swim back to the front room (you
have to wait till Boulder#1 moves away to swim after it) and the now open gate
left (if you need it you can first go for air SE), pick up Secret#2, 3x Revolver Ammo and Gold Bars. Go get some air again SE and now swim right or left
through the ceiling/wall corner past all 4 Boulders and into the back of the
room, right through the tunnel to the next room. To the N is
a Swinging Blade, but also some air and a bunch of levers.
UW Puzzle and
another Secret.
Throw the UW lever (1st) SW
to open the gate NW, swim into an alcove E of the Blade and throw an UW ceiling
lever (2nd), swim out and to the gate NW, through the narrow gap
under the gate into the next room N, and go up for air. Spot the UW door W and
open it, go in and use the UW ceiling lever to stop some Spikes at an UW
lever E, swim around the central pillar and into the opening to use it, the
Blade in the previous room will stop, but it has to stop well away from the UW
door left of it, so if it is not in the right position, use the lever again.
Watch out for the air supply though. Then swim back to the room S through the
gap under the gate SW, look for the UW door W of the Blade and open it to use
the UW lever there. Doors open up just over this alcove, so swim out and up and
go into the room you’ve visited before, the Secret room.
Wade or run jump to the W and right around
that grassy ledge again, climb the waterfall one more time and jump up onto the
balcony SE to get Secret#3, Uzi ammo and a Gold Skull. Go back down
to the doors E and before you leave you’ll have to fill the Waterskin again. Go
down into the pool and swim SW through the gate again. Climb the ledge on the
central pillar in the S room and put the water in the bowl.
Small UW Maze and
Poseidon.
An UW door opens down N, hop over the bowl, swim in
and up over a plant pot, in the next room into the tunnel up left and keep
going left and swim up through an opening in a room with a fence. Save there
and stay high timing the Spikes (there’s an UW lever for later) to swim
left out of that dangerous place.
Swim around a structure to the W side and climb out,
there is Poseidon, it is possible to shoot him, about 3 point blank
rounds of the Shotgun/Revolver and then run away or dive into the pool. One
time I couldn’t drop him so I just did it without killing him. On the corner
pillars NW and SE are 2 buttons for a gate in a monkey swing. Run jump from the
floor onto a ledge E and run jump with a left curve around a fence to land on
the block S, grab the monkey swing and head to the ledge with the Crowbar
lever. Throw it (yep, always from the other side) to raise a platform in the NE
corner of the pool, swim over there and climb out to jump/grab the ladder to
the roof of the structure.
The 1st
Legend Key.
Shoot the 3 Rats and use another Crowbar lever
to lower the Spikes back in the tunnel you came from before, dive down and swim
under the structure from the N side and use that UW lever just around the
corner, a gate at the roof opens up. Swim back and get back on to of the
structure. Jump to the ledge N and throw the lever to reveal the 1st
Legend Key. Just run off the S side of the ledge to land on the floor to
get that Key and make your way back up to the roof as another door opened
there, jump to that opening and go through the tunnels, climbing up the ledges
to come to a slide, just hop down and leave this level.
Level
21 - The Hall of Legends (part 2).
You ended up on the top S side balcony, throw lever on
the W wall there to make the Red and Yellow levers on the N balcony safe
(flames go down). Go stand jump straight down N into a flooded pit and swim
through to hall with timed blocks.
Timed Blocks.
Go to the lever NE and throw it, back flip/roll onto a
block raising up behind Lara and do a running jump with a left curve to land on
the raised block in the opposite corner, roll and turning left a run jump/grab
to an opening up in the E wall. Pull up and grab the crack to the right to
shimmy along the crack to the ledge NE, turn around and use the monkey swing to
get to the open gate W, you’re back on the S balcony at the Blue/Pink lever.
This time you can use it to open up the passage over the Pink block. Go into
the passage W and all the way to the end where you got that cut scene before,
hop over the Pink block and the gate will open up.
Level 23 - Myth of Sisyphe.
(Blue/Pink lever is in down position)
Nasty Entrance.
Stand in the middle of the opening and safe, slide and
“stay cool”. You really have to slide to the very last moment before you jump
to grab the break ledge, pull up on the ledge, turn left and hop to the next
ledge, then turn a bit left and jump/grab into the opening in the wall and
slide down into a room where a flyby kicks in, don’t move an inch! A Boulder
(you will get to know very well) will come down some slopes and you have the
task to get it all the way back up again.
The Big Boulder
Push.
Push the Boulder into the passage and leave it in
front of the passage left (S), walk through opening between the Boulder and the
wall into that passage and pull the Boulder in as far as, go through the
passage E (over a Circle tile) and right around to push it one more time,
through the corner to pull it E and get it onto that Circle tile in the E side
passage to open that gate S, the Boulder has to go with you into that passage,
so push it in and onto the Circle tile, the next door will open up. Push it all
the way against a gate S and look up to the right, there’s a slanted wall, go
stand against the W wall and back flip onto the slanted wall, jump/grab and
pull up into the crawlspace in the bright light, go through and go to a button
in the end of that passage, open the gate with it and return to the Boulder.
Get the Boulder up.
Push/pull it all the way into the room S as far as it
will go, the gate closes up behind you. Go SW and follow through to a room with
a Lava pool. Hop onto the higher ledge and head S.
Jump over the pillar bases to the SW and
into the opening in the s wall to get Secret #1, Gold Bars and a Medipack from the box.
Jump back to safe ground and head over the ledges into the SE corner of the
room.
Have a weapon drawn, as 2 Gladiators will attack.
Shoot the box on that terrace to get the Shotgun Ammo and spot the Spike
protected lever E. Go back N and stand on the NE corner of the ledge, turn
around and look up to the ceiling. Shoot that Blue Target ball to stop the
spikes at the lever. Go back to the SE terrace and throw the lever to open a
gate NE in the room, go there by jumping over the block in front and in the
room another Gladiator will attack. On the N wall is a lever, throw it
and watch the flyby, showing a Key you need. (Leave it like that for now)
The Elevator Key.
Climb the central pillar in this room from facing E,
stand right of the plant pot facing E and run with a left curve around the pot
to jump with a left curve onto the slanted ledge SE, jump/grab the crack in the
E wall and shimmy right into the alcove. Look up NW and stand jump with a left
curve into the next alcove, then a stand jump/grab up to the bridge crossing
the room and head into the S passage, straight ahead
you can see the next secret, still unavailable. So head W and follow to a cave
with a crawlspace to that secret and a hole in the floor. Drop through the hole
onto the roof below. SW is the Timed gate to the Key
and you have to go E over that wall, grab the monkey climb in the end and drop
onto the balcony on the E wall.
Line up for a run jump NW to the balcony with the
button, push it to raise a block near the wall behind you. Now just run SE off
this balcony to land on the block below. Jump back into the room N and safe in
front of the lever N.
Pull the lever again, back flip with roll and run to
the gate, stand jump to the block in the lava and a running jump to grab the
lower block at the wall, run left a bit so you end up facing SW and have space
to back flip onto the highest block. Jump forward onto the roof and sprint over
to that gate SW, jump in with a grab and get the Elevator Key. Jump back
out to the roof and drop from the NW corner down to the ground and go out W to
the Boulder. Use the key in the lock near the Boulder and wait till you and the
Boulder reach the top floor. Push the Boulder S into the corner and leave it
there for now.
Major Push.
Go on to a big lava cave and look up S, shoot the
target ball there to raise platforms NE, then jump the ledges to the lever SE
and use it to raise more platforms. Back to the Boulder and push it all the way
over the new walkway to the other side (E) to another Elevator. The Elevator
goes up, push the Boulder into the opening and the
gate opens, then push it into the next room. On the S wall is a lever, changing
the action of the Spikes and you have to get the Boulder to the gate NW. Don’t
push the Boulder onto a square close to Spikes or you will die. You’ll have to
move it over the ledge in the middle of the room, as it will not go through the
corners. In the box N is a small medipack.
The gate opens up, so pull it into a
passage near that bridge with the fixed camera. First have a look S and see the
fire at the Secret is gone, so go W to the cave with the hole in the ground and
through the crawlspace E to get Secret #2, Gold Coins.
Head back to the Boulder and push it N over the bridge
and onto a raised platform in the next room. Run jump to the ramp NE and look
for a Jump lever up W on the Hammer pillar, back flip onto the ramp behind you
and jump/grab the lever to open a gate in the passage W.
Scary Moves.
Make your way over there and enter left to pull the
lever, the platform drops and the Boulder falls onto the floor. Go back to it
and walk straight to the Boulder, that part of the floor is safe. Save before
you pull it under the Hammer and you will fall through a trapdoor, slide to the
end and back flip to land on a ledge behind you. Follow the room to the W,
through the narrow gap and climb the block in the next room (just run past that
Gladiator, you’ll never see him again). Jump/grab to the roof W and shimmy
all the way left and around the corner to the end, pull up there and hop to the
W to climb up into the alcove W, turn around and run jump/grab to the thin
ledge E, from there a run jump/grab to the opening in the fence W. Turn around
and hop SE over the fence to the balcony, throw the lever there and see your
Boulder gets on the move again, it will roll into another room with deadly
floor and a Hammer.
The 2nd
Legend Key.
You can run jump over the fence to the thin ledge and
into the opening W (or straight into that opening) with the now raised blue
blocks. Climb them and hop onto a triangular ledge in the corner, face N and
run with a right hand turn over the ledge to jump/grab up to a crack W, shimmy
right and go up to the ledge, hop through the crack and slide down the same
ramp the Boulder went down from, turn around at the close gate and slide down W
to the room with your Boulder. Push the Boulder to the corner at the Hammer and
then PULL (yes only pull will work) it to the place where a flyby shows
the Hammer smashing the Boulder (try to hop back before that happens, just to
be safe). After the flyby ended you can pick up the 2nd Legend
Key. Turn left and go down the small ramp, get a small medipack at
the open gate and run jump N with a slight left curve onto the roof below over
the burning hot part, slide off backwards and grab the edge.
Shimmy right around the corners to the wall and pull
up, back flip/roll and grab the breakable ledge. Hoist up and run jump/grab the
roof in front, shimmy all the way right till you are over an opening below and
top up the health, drop and roll upon landing, losing some health. Grab up into
the opening S.
Shaft of Death.
Run jump/roll over to the opposite slanted side of the
pit and keep jumping left till you are on a flat corner ledge near the fence,
from the highest part of that ledge a run jump to the ladders across the room.
Go up and left to climb onto a grey platform. Look up and spot Spikes, a Hammer
and flames, up NW is a Target ball you have to shoot to stop that Hammer
from moving. Only problem is… the platform will drop. So before you shoot stand
back against the ladder and then you’ll land on the slope below, you have to
start jumping again till you are on the same safe corner ledge. Run jump/grab
to the ladders again and go up till you bump your head on the ledge above, stay
on that level and climb left just past the platform. Back flip/roll/grab a
ladder on the side of a Spike block and don’t go up too high. Climb left around
the corners and go up till you’re over that roof like ledge left.
Look left and see an Omega sign, get over
there and climb into that wall, drop into the passage behind the Omega sign and
get Secret#3,
a Gold Skull and after turning around and near the Omega tile 2x Uzi
Ammo and Shotgun Ammo.
You can’t get back onto the ladders from this passage
so just run out with a left curve onto the roof like ledge, grab the edge and
shimmy left, drop near the wall and slide, jump with a left curve to get
jumping to the corner ledge again so you can go up to the ladders again, as you
did to go to the Secret. This time go further up near the roof like ledge and
then left, climb left around the block near the Hammer and go against the wall
to the left, from the bottom of the block 2 steps up and back flip/grab the
ladder under the Hammer (you will get hurt a bit).
Now climb right into the passage and drop, use the
button, the Hammer will start again, so you will be able to jump into the
passage behind it. Walk up to the edge of the passage and stand jump right and
up into the passage behind the Hammer (stand in the middle of the opening and
aim for the far corner of that passage). After checking your health you can go
on and shoot the Gladiators you’ll encounter, or just run to the end of
the passage and slide down leaving them behind. Slide down into the Hall of
legends again, this time onto the top N balcony.
Level
21 - The Hall of Legends (part 3).
On that upper N balcony is a lever on the
W wall, throw it and see all the flames at the last 2 levers below are gone. Go
stand at the opening in the fence and Save, then stand jump straight down to
land in another pit in the floor, swim through the tunnels till you come into a
wider part with a closed UW gate, swim left and left into the tunnel and Save
before you throw the Timed UW lever, quickly roll and swim out, sharp right and
with a bit of a wide curve left around the opened gate (otherwise you’ll get
stuck at the corner of the gate). Follow the rest of the caved in tunnels to
where you wade out to a gate that will open up for you. You are back in that
staircase with the bright light, hop down and climb up S to get to the N
balcony with the Colour levers.
Opening
up the Code Doors.
To the W is a passage, a similar passage
as on the S balcony, there are 2 side passages in each of them has closed
doors, all the doors have a colour code on the wall. So we have 4 doors and
inside those doors are Pink and Blue blocks giving access to different places,
so all in all you’re about to visit 2x4 places to collect more Legend Keys. In
case of any mix-up in colours, I numbered the levers 1 to 4 from the right to
the left.
1=Yellow / 2= Blue
/3=Red /4=Green
Combination #1:
1/2/3 (Yellow/ Blue/ Red)
Blue/Pink lever down
Artemis, the 3rd Legend Key.
Go E and down the stairs, through the hall
to the Shortcut gate you opened, go straight up to the passage (S) with the
rooms and climb up left and go left into the first room. Hop over the Pink
block (there’s also a Blue block E for later) and push (Ctrl) the double gate
open, now you can enter the Artemis rooms. Run into the shaft grabbing
the ladder and drop down, go into the room and shoot all the Lions. Go
around the room to pick up the Harpoons. There are gates and levers on
the central wall; this is a Target practice (the name Artemis rings a bell?).
On the W side of the wall is the first
lever you can use, opening up the S gate. Save with the Revolver/Sight (or
harpoon gun with explosive arrows) ready and throw the lever, side jump left
drawing your weapon and run turning left to the middle of the N opening, hit
shift so you won’t run in, quickly look up and shoot that Target ball on
top of the sloped shaft. The lever on the E side is now safe to use to open the
gate W. Pull, side jump right and run (jump) drawing your weapon to the gate.
Hit shift to stop at the edge to shoot the next Target ball. Lever S
opens gate E, side jump left to the gate for the next Target ball.
Finally the N side lever will be safe and throwing that one will raise a block
behind you. Climb it, turn around and grab up into the crawlspace, go into the
room and shoot the 3 Lions. Look for the Target ball up in the
ceiling SW and shoot it to reveal the 3rd Legend Key on the pedestal. Go down to the room
below and throw the last lever one more time to lower the block again and you
can leave. In the entrance passage you have to back flip to the slope.
Jump/grab to get onto the ladder, go up a bit and back flip into the passage
above, turn around and follow the passages left and back to the S balcony.
Go to the Blue/Pink lever and pull it up to
change the blocks, go back to the same room, Pink is
now closed and Blue opened up. Hop over the Blue block into the room of Hades
and push the double gates open.
Hades, the 4th Legend Key. Blue/Pink
lever up.
In the room you have to stand jump onto
the break ledge from standing back a bit, landing on the closest left side and
run with a right curve to jump/grab the climbable wall, go left and up at the
last ladder, two steps down from the top and back flip/roll/grab another break
ledge, take a look at the situation and Save. Pull up and quickly turn right,
jump/grab to the climbable wall and go up along the right hand side. At the
level of the right hand ledge a back flip to a slope and a jump with a hard
right curve to land on that ledge, grab the monkey swing and use it to get to
the other side, but don’t let go yet, go all the way to a slide. Line up
straight and drop/grab the edge to climb up in there. Nothing to worry about,
it isn't Lava down below; it's a big pool of Blood. Wade through the Blood (the lone block in the pool has
to be lowered to get the Key from under it) to the big face object on the W
wall, grab up and pull up through the wall, go in for Grenades and Secret #2,
a Gold Skull. Go out and over to the S side to grab up
into the passage there.
Follow through to a dark block, grab up to
the left side and pull up over, slide/jump left and land on a ledge in the
roof, jump/grab up NE to that window and shimmy along the crack to the next
ledge with a lever, throw the lever to get 2 more blocks up in the Blood pool below.
Run jump to the roof on the E side and grab the edge, shimmy right to the light
beam (just before the Hades sign) and pull up to back flip onto the first of
the blocks. Jump to the one against the W wall and turn around, look up E (with
Binoculars) to spot and stand jump/grab up to the ledge with the column. Turn
around and run jump onto the ledge on the roof W, turn N and look for the Jump
lever up on the beam N. Run jump/grab to that lever and slide back into the
pool (couldn’t get to that new pillar from there).
Get back up to the roofs through the
passage S and jump to the S side roof ledge (like before) this time turn around
and run jump onto the W side roof, shimmy to the light beam and pull up to back
flip onto the new block. Hop NE and run jump/grab to the new block under the
ladder N. Get up the ladder and climb up, then left just around the corner and
drop onto the slanted ledge, slide and jump (grab) onto the ledge W, walk up to
the wall and turn around to grab the monkey swing to go E and turn right to a
ledge, run jump to the SE from there and stand on the highest point to run jump
to the S, grab the tip of the ledge at the last moment and pull up to push the
button there, that original block in the Blood pool goes down and reveals a
Legend Key (if you could see it, but there are
bubbles on the surface). Safety drop from the
room side of the ledge and turn around, look for those bubbles with the
Binoculars, go over there and grab down to get the 4th Legend Key.
You hardly notice, but Lara went from a standing into a swimming mode, so maybe
the floor gave way (I looked for an hour for the exit of this place). Swim down
and follow the narrow winding tunnels to where you can climb out. Hop to the W
side and crawl out into the Hades entrance room. Go out and make your way back
to the N balcony of the Hall. (Go down the shortcut and up the stairs to the N
balcony) Go to the Code levers because it’s now time to change the Code.
Combination #2: After
pulling the blue one (#2) back up, pull down the Green so you’ll have 1/3/4
(Yellow/Red/Green) Blue/Pink lever is still up.
Hermes: the 5th Legend Key.
Make your way back to that S balcony and
head into the W passage once again, take the first right (from coming out of
the shortcut) and go over the blue block through to the entrance of the
Hermes rooms. You’ll come to a hall with a gazebo, if you climb the block
S, Lara will look up to the top of the room. Drop down into the hole under the
Gazebo and take the E side, careful at the edge, Save and run in, jump from the
slope to the sliding tiles and keep jumping till you can grab a balcony with a
lever, a screenshot of that light Lara was looking at before, with some blue
spheres visible.
Jump off the balcony to the tile N and
jump till you can grab the crack in the wall, shimmy left around and drop in
the exit. Before
going further face N and drop/hang backwards into the room. The only safe pace
is right here under the exit, duck to get Secret#1, Gold Bars and climb back up, jump up left to the passage
to the gazebo, climb out at the plant pot and go to that block SE in the room.
Look up S and a small sphere will indicate an invisible ledge, jump/grab up to the
one S and then run jump/grab W, the next one is tricky, run jump NW with a
right curve and grab the ledge, then a run jump/grab N, but you’ll have jump NE
and curve right (to go around the low ceiling). Last one a run jump (no
grab) to the E and
then look at that bright light, just to the right of it you can see the next
Legend Key, run jump (and grab) onto to that ledge and pick up the 5th Legend Key. I just did a run jump to the right hand ledge S and run
off N to land on the yellow block with some health loss, either way, get back
down and get to the exit NE with a run jump/grab from the higher ground near
the bush, follow back to the Hall of Legends (you know where it is by now)
Go to the Blue/Pink lever and use
it to change the entrances. Make your way back there (W passage, 2nd
right) and go left to the Pink entrance to the Prometheus rooms.
Prometheus, the 6th Legend
Key. Blue/Pink lever down.
Open the gates to Prometheus and
follow in to a small hallway where a Gladiator will attack; pick up a Medipack
on the right. Go on to the next room and find a large Statue in a cavern.
When you go SW and left around that statue you’ll find some small medipacks
and Revolver Ammo. Go NE to the left side of the lava pool and a Bird
will start to attack that Statue and Lara will loose health. So get to the
statue and stand between the statue and the Bird, shoot the Bird without
hitting the Statue. Head to the Lava pool N and hop up to a ledge NE, slide
down and turn around, back flip and jump/grab to the climbable wall above.
Climb in to the right and go out on a balcony, grab the Revolver Ammo in
the shadow there and go push a button to open a gate near the Statue. A Bird
will show up, shoot it as fast as possible before it reaches the Statue. A gate
opened up in a crawlspace W of the Statue, go over there. Climb into the
crawlspace W, follow in to a lava room with break ledges.
Break ledges.
Run jump with a left curve into the room,
landing on the tip of the ledge left, side jump right and turn right, then jump
forward twice and from the second a left curved run jump onto the middle of the
sandy ledge (ceiling is high enough in the middle). Pick up the small
medipack there and crawl backwards out of the opening E, climb left around
the corner on the ladder and up into the opening there, hang out of the
crawlspace and drop. Jump twice and land on a break ledge, quickly run left
against the slanted block and grab up. Pull up over the top and jump/grab the
next crawlspace. Hang out of the crawlspace over the pool and shimmy left to
the ledge.
Grab the monkey swing and go over to the
Jump lever over the pool W (it can be a bit tricky but you have to get almost
into the wall and then pull it), use it and slide/jump/ one more slide/jump and
you’re back on safe ground, quickly take care of the next Bird and go to
that now safe lever on the slanted block E of the Statue (there’s another small
medipack near by). Throw the lever and an explosion will reveal the 6th Legend Key in front of the Statue (I really expected him to hit
Lara in the head while she bent over to get the Key). Climb into the passage E
of the Statue and head back to the Hall of Legends, use the shortcut passage
and go to the N balcony again as it’s lever time.
Combination #3: Put
the yellow one up and the blue one down so you’ll have this: 2/3/4
(Green/Red/Blue) Blue/Pink lever still down.
This door opened near by, so head into the passage W
from the N balcony and go first left hop over the pink block.
Hephaestus: the 7th
Legend Key.
Open the gates to Hephaestus and go
through the passage and watch out for the Burner, coming to a room with Lava,
look up right to spot a Jump lever and up left you can see a gate where a
monkey swing starts, to get to the gate you first have to run down left into
the room and land on the ledge with the column, jump to the brick block NW and
then look for an opening into a structure on the N wall. There’s a break ledge
in that entrance so run jump with a left curve and keep the forward key pressed
so you’ll immediately run into the room. You won’t have to go far as there’s
nothing to be done yet (Legend Key behind gate E), the first square on this
floor was a trigger to open that Monkey swing gate.
Go to the S wall and look for a Jump lever under a
block with hanging plants. This will rise a block W,
jump on the block, grab the crack N and shimmy past the burner to an alcove
near the gate. Take a running jump from the alcove to the block S and from
there, jump up SW to the Monkey swing gate.
Grab the monkey swing and time the Burners
on the blocks to get all the way over to that Jump lever SE (opens gate on
balcony down SW). Better Save hanging there as you’ll have to do some fancy
moves now, drop onto the ledge below and jump roll curving right to land on the
next slanted block, immediately jump again with a sharp right curve to land on
the tip of the big slanted brick pillar, jump to back flip onto the safe corner
block.
A
Torch.
Stand jump and grab the ledge SE onto the
roof of the entrance and time the Burner ledge on the S wall so you can run
jump to it and run off the other side onto the balcony below (I could grab the
ledge and shimmy around to drop on the balcony). Go into the open gate and
throw a lever inside to open a gate up in the NW corner of the room. Pick up
one of the Torches from the pedestal and go out on the balcony, jump
onto the slanted pillar N and keep jumping till you are on the safe corner
block, again stand jump onto the roof over the entrance.
Face the wall on the top of the roof and
hit the #1 key to draw pistols; Lara will drop the Torch where she stands. Now
we first have to raise a platform on the roof in the SW corner, go jump to the
same Burner ledge W and from there take a run jump onto the roof W, slide off
backwards and shimmy left to the wall. Back flip/roll/grab the Burner ledge
there and do a run jump to the roof N, from there you can run jump up into the
open gate NW, follow in to a booby-trapped button and time the Burner to use
the button (platform goes up), immediately back flip twice and go back to the
lava room.
Make your way over to the Torch (over the
Burner ledges) or the route along the N wall and the safe block NE, grab the
Torch and run jump onto the Burner ledge W, try to land in a corner next to the
wall, so you will be safe when the Burner starts. Carefully light your Torch
and time the Burner to run jump to that raised platform on the roof W, time the
Burner on the ledge N and jump to it to do a running left curved jump to the
roof N. Stand on the E end against the right hand wall and stand jump up to the
high block NE and light the Circle tile from standing on the corner. Turn
around to stand jump back down to the roof and find a lowered block into the
Key room. Walk in and just run down to the right so you’ll land on the raised
block W. Go to the gate E and carefully light the 2 Burner (Circle) tiles next
to it, drop the Torch somewhere safe and get in to take the 7th Legend Key. Time to get back…
For the next Secret, you’ll have to take
the Torch along with you to the Hall of Legends. You can’t use the
crack-route along the N wall bringing the Torch so you have to go to the ground
floor opening S and run jump out and a bit left to land on the tip of the
slanted block. Jump twice and you’re on the safe corner block run off SE onto
the ledge with the column and jump into the exit. Make your way back E to the
Hall of Legends, go down to the ground floor and drop the Torch somewhere safe
so you can use it later to get that Secret.
Atlas: the 8th Legend Key. Blue/Pink
lever up.
Make your way up to the S balcony and pull
the Blue/Pink lever
up, go back to the N balcony and go into the passage W, first left into the Atlas
rooms over the Blue block. Drop down from the passage and head to the ramp in
the SE corner, back flip to the slope and jump/grab up to the roof above, jump
up into the passage E and go to the Boulder Challenge.
The
Boulder Challenge.
Run jump with a left curve over the
Boulders into the room (aiming for the open gate), start when the Boulders are
up left, run to the slope and stop running to hop up into the opening (looked
like you could jump up more easy when you stop running just at the start of the
steep slope), push the button to open a gate across the room. Aim for the next
gate and run jump when the Boulders just start to come towards you, run to the
slope and hop up to the button to open the next gate, same MO and the last gate
will be SE, the whole room will change after pushing the last button, 2 pillars
remain and a passage opened up SW. But the pillars are Booby-trapped, slide and
jump onto the first pillar, immediately back flip and slide jump again to land
back after the Boulder dropped. Stand a bit back on the pillar and stand jump
to the next SW, immediately do a running jump into the passage SW before the Boulder hits you. In the end of that passage is a
lever to retract some Spikes in the Atlas room.
Dropping the
Boulder.
Run jump back onto the pillar and stand jump/grab back
into the entrance W, go down from the roof to the ground floor and walk to the
N, turn around and do the back flip/jump/grab again to get onto that side of
the roof. Look for the ledge with the ladder to the W and run jump over to it.
Climb up and left onto the ledge, run jump/grab E to the sandy ledge right of
the trapdoor, go S over the trapdoor and immediately drop/hang from the side of
the ledge as a Boulder comes down (or shimmy along the edge of the ledge past
the trapdoor and pull up to trigger the Boulder, then hop back grabbing the
edge), hang there till the Boulder stops moving and pull up to climb the ladder
on the E wall, go over the Jump lever and use it to open a gate in the Atlas
room (down N).
Jump N over the Boulder and run jump back to the
ledges with the ladder to get back down, get into the open gate N and follow
through to a slide onto a Spike-trap, slide when you expect the Spikes
to be up on landing and run through, around the corner is another trap so watch
out and time the run to the button, the Boulder will drop and ends up on the
Atlas tile. Now you have to get back through those nasty Spikes, in the Atlas
room you’ll find the gate in the opposite S wall opened up, go in and careful
at the corner, slide and jump to the break ledge, side jump right and then
jump/grab forward into a lower passage. Follow to a pit and a passage right, go
up the ramp and use the lever to open the trapdoor. The Boulder will now drop
into this passage, so quickly run to the pit. Run left around/over the corner,
the Boulder hits the tile in the pit and another Legend Key will be revealed in
the Atlas room. Go up the trapdoor (W) the Boulder came from and get the 8th
Legend Key from the tile between the statues. Go stand under the exit W and
grab up to get back into that opening. Head back to the N balcony of the Hall. Time to change the combination again.
Combination #4: Pull
the Red lever back up and the Yellow one down: 1/2/4 (Yellow/Blue/Green)
Apollo: the 9th
Legend Key. Blue/Pink lever up.
Go W and take the second opening left. Hop over the
block, open the gates to Apollo and follow the passage to a high room,
go left and hop over some fallen debris to the opening E. Go in and left to a
Circle texture, left of it in the SW corner is a shaft down, hang in the middle
and drop grab the Jump lever below (a gate opens up). You’ll drop into a lower
passage, go through and climb out to the middle level of the room, go to the S
and make your way down over the blue/grey blocks, get into the pool and find the open gate NE,
inside a pushable object. Pull it out as far as it will go, get behind
it to go into the passage the block came from and swim through to an UW lever
in a pit, opening up a gate on the middle level of the room. Then swim back out
to push/pull the block onto the grey tile in the pool. Get out of the pool S
and climb the blue blocks S to hop over to the S ledge of the middle level,
where a gate opened up.
Get the Block up.
Go into the open gate and find a room with
2 levers, a blue one and a red one, the blue one controls the blue/grey raising blocks and the
red one several floor parts throughout the room. Throw both levers and run out
of the room. You’ll land on the high blue block below, go over to your push
block and move it over the W ledge to the S to one square past the W gate then
one pull to the E onto a raised floor part (don’t
push it onto the blue/grey tile). Get back up
to the levers and again use them both, go down to the pushable block and move
it around the S side of the high blue/grey
block to the grey square E of the high blue block (under that trapdoor).
Up to the levers again and now only use
the blue one and go to the block to push it into the opening E, go up to the
levers to throw them both again, go pull/push the block on the Circle tile S, a
gate opens below on the W ledge.
First go into the lever room S to use the
red lever again, then go down into the open gate W where a block lowered now,
use the lever there to raise the trapdoor on the E ledge, get back to the push
block and pull/push it all the way over the trapdoor to the N. Go back into the
lever room S to use the red
lever for the last time and go pull the block twice onto the middle square (in
front of the opening E). Use the blue lever for the last time and go all the
way around the E to the NW corner ledge, walk S and get a small medipack on
the ledge W, just next to that ladder, drop/hang from the ledge there and
shimmy right to the ladder to go up to the top ledge. Go left around to the
pushable block and pull it as far as it will go into the passage E. Then move
it S onto the Circle tile, a gate opens in the passage N, go in and through the
open gate.
Get the 9th Legend Key and go out to
the room, right and hop over the debris, follow the S passage back to the N
balcony and go over to the S balcony to use the Blue/Pink lever for the
last time. Get back to the N balcony and W, into the 2nd left and
hop over the Pink block this time.
Damocles: the 10th
Legend Key. Blue/Pink lever is down..
Below the entrance is a pool with a
purpose, hop down swim across and climb up, follow down to a Lava room with
hanging Swords, no danger yet so jump the blocks to the entrance S and
go up to the pedestal with the 10th Legend Key. Save before
you pick it up, health topped up. Then take it and run down the steps with Sword
Wraiths on your tail, stop one step back from the Lava pit and hop to the
right hand side of the first block, line up and time a run jump to the one with
the popping Spikes landing on the far right hand side. Immediately stand
jump to the right hand side of the next block (so against the wall) and run
jump through to the block in the corner, run straight into the corner of the
walls and turn left to run jump/grab back to where it all started, pull up and
run jump up into the exit, run to that pool (timing the Spikes) and wait for
the Sword Wraiths to disappear. If you are in somewhat short supply of health
go W and find a small medipack around the corner and then make your way
to the coloured levers.
Now go pick up your Torch and go back
into the passage E and follow back down to the ground floor of the Hall of Legends.
There is a pedestal you can light with the Torch (the hint was the burning
pedestal across the Hall). Drop the Torch, you don’t need it anymore and go
into the room opened by the lowering block in the E wall. Get Secret#3,
Gold Coins, jump over that little fence from near the entrance and get Harpoons
and a Medipack.
Go W out to the passage where the level started and
look up left when you reach a cave-in, climb into the crawlspace and follow
through to the other side of the cave-in. Go down and to the next room.
Here you can use all 10 Legend Keys in the
locks around the central wall, best do the silver one on the E wall last (not
really necessary but easier later).
A cut scene and the room changes, an eerie
creature lurks around grinning at times. If you’re not there yet, get to the E
side ledge and then a stand jump down to the NE, onto the small balcony, turn
around and stand jump straight W onto that hardly visible yellow ledge in the
deadly pool. See that grey pillar W? Stand jump/grab
the pillar and go 2 corners around the left, to a ladder. Climb down till
Lara’s feet are in the deadly stuff and back flip/roll/grab to a ledge with a
lever. Throw it to open the gate and also lower the Spikes on the next ledge S,
stand jump/grab to the S ledge and run jump to the one right of the pillar S.
Drop hang from the E side of the ledge and
shimmy right along a crack in the wall till you reach a crawlspace under the
terrace. Get
in for Secret#1,
Gold Coins and Revolver Ammo. Crawl
forward and a trapdoor opens, so you can climb up to the terrace.
Go to the fence E (W is for later) run
jump over the fences onto the brick block below and run jump/grab to a crack in
the structure E, go left around the corners till you come to a slanted wall on
the E side, pull up and back flip/roll/grab to the rock-ledges E.
Break Ledge Jumps. (screenshot)
Face S and run jump down to that break
ledge, landing a bit left of the middle a running jump to the next, curving
right a running jump to the corner ledge with the Spikes and (you have to be
lucky here, the Spikes have to be down of course) curve sharp left with a
running jump to the next ledge W, aiming for the left side of it (because of
the low block above) and an immediate running jump with grab to the ledge ahead
W, shimmy left around 2 corners and facing back where you came from you can now
pull up and run jump/grab to that brown block up E. There’s an opening in the E
wall and a platform next to the pillar NE, run jump straight E and land on the
dark pillar in the SE corner jump to the platform N and grab up to the ledge,
you’ll find a button behind the open gate there. Push it to stop the Spikes on
the ledge below.
To the
1st Iron Bar.
Jump down to that ledge and throw the
lever to drop the platform and close the gate so you can now run jump/grab to
and climb the pillar with the ladder all the way to the op of it. You’ll come
to some traps, stand in the middle and jump over when the Spikes went
down just before the Hammers are about to open up and run through to hop
over the next pit, time the Burner and run jump over the last pit.
Follow the passage to a button raising a block in the Main room. Make your way
back the way you came (better do a run jump over the first “Burner” pit) and go
down the ladder onto the platform that went up again. Jump up into that opening
SE, past the now open door and shoot the Griffins (Grenade gun is fun).
Go on till you reach a pool and jump/grab to the opening W of the pool, shimmy
left and pull up on the next ledge, go through and slide to a ledge overlooking
the Main room and run jump down to the ledge ahead to the right of the pillar,
stand SW and stand jump/grab SW to catch the monkey swing under the bridge, go
to the opening in the structure S and drop/grab, climb in and dive into the
water in the building, follow through to the 1st Iron Bar on
a pedestal in an UW room.
The 2nd
Iron Bar.
The gate E is open, swim out and to the S
through a tunnel and up at the pool. Some more Griffins appeared, so
climb out to shoot them and hop back up into the same W opening as before so
you can jump to that ledge in the Main room again. Stand SW
and face W to grab up to the bridge, go right to the terrace and grab the
2nd Iron Bar.
The 3rd Iron Bar.
Gates open up, the one N is for later, walk about halfway
onto the bridge and jump/grab to an opening in the rock pillar E to go through
to the pool again. Jump out left and go up the cavern to where you came in
before (SW), run jump out to the platform SW and from the brown block a run
jump/grab to a ledge with blue columns N. Walk to the SW corner of that and stand
jump down to a tiny yellow ledge in the pool below W and look SW with the
Binoculars, under that broken bridge is a rock with a crack running along the side of it, to the right of the black block is a
small triangular rock ledge. Stand jump to that ledge. Run
along the lower side of the yellow ledge and jump with a right curve (no grab)
to land on that triangular ledge in the corner of the black block. Stand on the
lowest tip and grab up W, shimmy along the crack to the left around 2 corners
and hang on the W side.
Hard jumps. (Map)
The next jumps are the hardest of the level in my
opinion. Hang 2 shimmies from right hand the corner, drop and back flip/roll,
land on another slanted ledge, back flip back and then slide down as far as
possible before you jump with a left curve and grab a crack in the W wall (you
can only grab this crack on the left hand corner). Shimmy left around the
corner and drop on the ledge there. Stand on the E corner as far as possible
and run NW along the edge of the ledge, curve left at the end to jump and curve
right a bit to land on the far side of the entrance in the W wall.
Go in and shoot those Griffins to get the 3rd
Iron Bar from the dark room. Go back to the Main room and look out to the
right, there’s a block at the terrace, stand right, turn right a bit and hop
back, run jump out with a right curve and hit the slanted triangular ledge next
to that block, jump and grab to the block, climb up and get onto the terrace.
Climb the block on the S side and jump over to that broken bridge. Shoot the
box in the hall and get the Medipack, follow S and go left at the
crossing. Save and throw the lever, falling through the trapdoor you’ll end up
in a lot of trouble…
Demigod and
Gladiators, the Obol to Midas.
Drop onto the floor and immediately take a Medipack,
run jump over the yellow pit in front and grab up into the opening W. Run out
of sight and wait till he runs another direction so you can get the Obol to
Midas there. (You can kill them all, it all depends how many medipacks and
ammo you have left) Go find the crawlspace up SW, follow through and in the end
you have 2 options;
1: With secret - You can run down and
shoot all the enemies to get a Medipack on the floor N. Look at the
deadly pit in the middle of the N side and see the colour of the wall is
slightly different, hop in and get Secret #2, Gold Bars. Then pick up the Medipack S
and Harpoons SW. Go back to the crawlspace and use the monkey climb to
leave.
2: Or just pump Medipacks while using the monkey climb
to get over to the opening E. That’s the exit, so get there and pick up an
additional small medipack NW. Climb up the ladder E to get back in the
passage upstairs with a back flip. Follow back N and jump from the bridge to
the terrace with the blue columns.
Climb the block N you raised before and grab the
monkey swing, go to the roof on the structure E and drop/grab, shimmy right
around the corner and pull up on the flat corner in the back, crawl to the small
medipack and crawl back from the edge, hold Ctrl and you’ll land on the
terrace below.
Get the Gold Bars.
Go over the bridge to the portal N take a
running jump over the slanted block, grab into the opening N, follow in to a room with a big Vase.
Vase-push.
There are three skylights; push the vase
under each one of them and the gate S will open up. Get in there and use the
button on the balcony to open the N gate in the Vase room. Go into that passage N and find a hand sticking out of
the wall, put that Obol to Midas in it and the
door will open up, go in and shoot one of those Griffins. As tempting as
it may seem, don’t jump onto that hand, although you might try after saving to
watch what happens. Go through to the room E, shoot more Griffins and
find the ruins of the Colossus. Next to each hand (there are three in total) is
a lower part of floor, stand there and place the Iron bars in the invisible
receptacles, 2 in this room and one in the previous room, every time picking up
the Gold Bar which will appear on the floor behind you, so you will
end up with 3 Gold Bars.
The Hand of Midas.
Go back to the vase and leave W to the
main room and run jump out left to that small balcony SW, take the route over
the yellow ledge W, the grey block and the ledges W to get to the terrace SW,
jump over to the floor W and shoot the Griffins, place the 3 Gold Bars
in the receptacles W and when you walk E a flyby starts, showing you Poseidon
himself coming down from the ceiling and forming ledges in the yellow goo when
he lands, jump back to the terrace and run jump over the fence to that block
down E. Shoot the him as you go jump the yellow, ledges to the S. It will be very hard to jump on the ledge
where he died, best is to jump on that triangle ledge and from there, a running
jump SW to the dark rock for Secret # 3, a Golden Skull. Stand
in the corner and jump back to the ledges and the last jump no grab and pick up
the Hand of Midas, watch the final cut scene of Lara escaping the Midas
Wraiths….
27-05-2008/02-08-2008
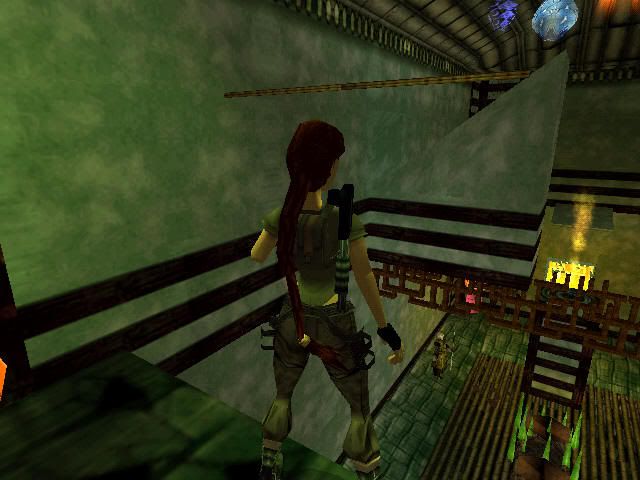
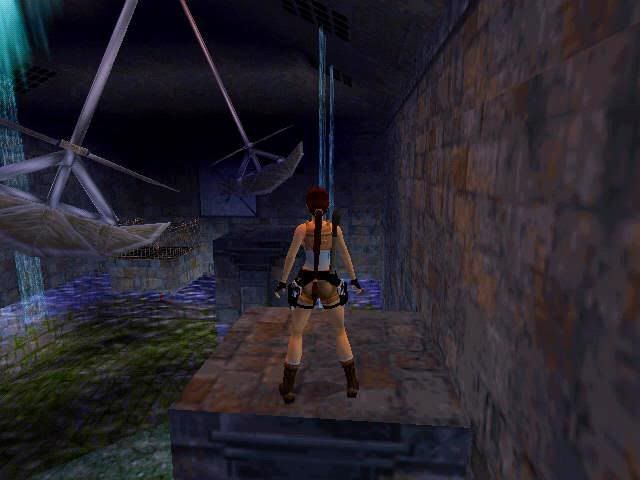
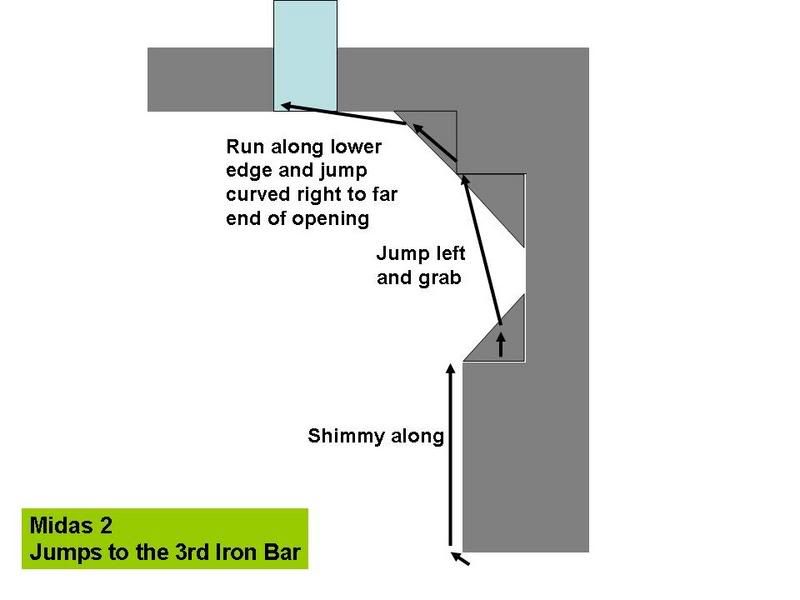