TR3 Custom Level: The Caves,
Temple of Fog
Author: Antoni
Walkthrough: Bex February 5th 2004
“The
Caves, Temple of Fog” by Antoni
Walkthrough
by Bex, February 5th 2004
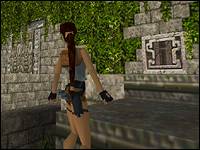
As soon as you boot up this level, a feeling of déjà vu will no doubt
sweep over you. Lara is back in Peru, and if you've played TR1 then you will
already know these caves. Or will you? Hmm. Yes and no...
Follow the paw-prints past the darts and pick up the small medipack on the rock
nearby on the left. Turn right and proceed. Lara will look up to a ledge on her
left as she does in the original "Caves" level, but as with that
level ignore the ledge for now and carry on into the small cave ahead.
Head for the sloped rock at the back of the cave and pull up, sliding
down to grab the ledge in front of you (being careful not to land on the spikes
beneath).
Pick up the large medipack from inside the alcove you're in and jump out back
into the main cave area. Kill the two dogs that attack and then head back to
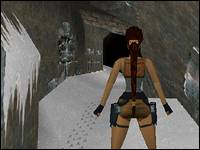
the ledge Lara was looking up at before you entered this bit. Climb up and turn
left when you can. You'll see a small pile of snow in a corner. From there you
can pull up into a small cave and pick up the shotgun.
Drop back down and head for the bamboo gate nearby, killing another three dogs
as you go. Pick up the shotgun shells and notice the red floor tile close by.
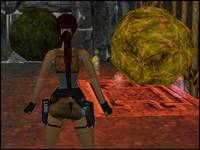
You can stand right on the edge of this to trigger the boulders (if
you're not right on the edge you will catch fire). Backflip twice to avoid
being flattened and proceed on your way.
(Alternatively you can just take your chances and bomb through the boulder bit,
and hope you don't get squished. Note: Right at the back of this cave on the
left is an opening in the cave roof; I never found a way to get up there and so
don't know if I missed anything in that area).
Go through the tunnel on the left and drop into the grassy-covered pit, being
careful to avoid the snake that's waiting for you in there. Pull the switch to
open the door and in the next room pick up the shotgun shells near the bamboo
gate. Turn around and climb up the rock ledge to pull up into the next area.
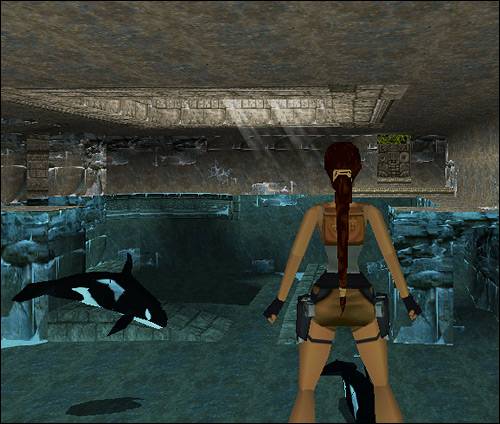
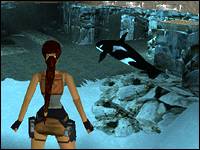
Follow the path until you come to a flooded cave with two killer whales in it
(they don't hurt Lara by the way).
Explore the water and the surrounding ledges for sundry items such as harpoons
and shotgun shells, then look for an underwater lever hidden under a small
overhang.
Pulling this opens the door to the next area. It's timed but it's not
difficult, so pull the lever, swim to the ledge next to the door, climb out and
head through it. If you go across the small water channel and down the steps
you'll notice that the door you need to pass through is closed. What to do,
what to do?
Back at the beginning of this bit, where you came in through the timed door,
there's a floor tile in a dark corner. Standing on this tile opens the door in
the water close by. This is also timed. Through the door is another floor tile
with a green thing on it (looks like part of a save gem; whatever it is my Lara
would not pick it up).
Swim over this floor tile to open the other door back into the whale
cave, picking up shotgun ammo as you go. Repeat the timed underwater lever bit
to get back to the door and back into the area you were just in.
You'll see that fires have illuminated your path. Hop across to the other side
of the water channel and kill a snake. Before going down the stairs, explore
the left hand ledge for desert eagle ammo. Continue down the stairs and find
that your door is now open. Yay!
Use the surrounding ledges to reach the high alcove on the back wall in
front of you. Enter to pick up a large medipack, and draw weapons to shoot the
snake that tries to attack you on your way out.
Head for the switch that is on the same wall as the door, killing
another snake hiding by a plant as you go. This switch opens the door and is
timed. Hurry through the door.
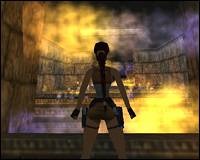
Just when you thought this was going to be a nice, easy remake of the
Caves in TR1, a fiery staircase blocks your way. Yikes! You can use the rocks
on the left to avoid most of the flames, but you will have to time a jump to
the last step to pick up the key that's lying there.
Continue taking well-timed jumps past the flame-emitters on the walls
and the fires on the next set of stairs, and finally time a jump through the
flames into the small pit near the two jade statues.
Use your key in the nearby receptacle and then turn around and head to the
other side of this area. Move the block to the patterned floor tile behind you
to open the door on your left. Before going through, pick up the small medipack
that was lurking beneath the block.
Head through the open door and make your way across to the other side of the
pit. Kill two dogs. Go a little further and you'll see that you need another
key.
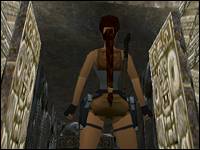
Drop into the area with the sloped walls and the big grey doors and pick
up the second key next to the bamboo gate.
Avoid the darts that start shooting out from the walls and use the rockpile on
the left to climb out of this bit.
Return to the second key receptacle and place your key to open the big
grey doors. Proceed through these to end the level.