TR Forge Advent Calendar 2011 – The Pirate Princess
A Levelset by Luke
Authorized Walkthrough by manarch2
NOTE: The given directions are the directions of the red
needle.
Level 1: Puerto Corona (first visit)
Secrets: 3
Palm Puzzle
You start this level on a coast. Run SE as you cannot open either of the doors
to your right yet. Head to the rocks where you find some vegetation with a
fruit on it. Approach it and grab the Pineapple, which serves as a Large
Medikit. Run towards the fireplace and a cutscene with a talk to the woman
starts. If you want to read the lines look in the download, they’re included
there. Now let’s go searching the rum. Before climbing up to the hut, run E to
the waterfall and jump into the pool. Swim through a longer passage and climb
out at the end. In the next area you have to find a palm with a coconut W, push
the red cross and a Coconut Half comes down. Pick it up. Go NE and push the
palm located here, afterwards you can pick up a little Treasure for Secret 1. Open the W door by using the nearby
switch and exit.
Rum Store
Go under the hut and find a broken ladder W. Jump up to grab it (might be a bit
difficult, try a few times and position Lara differently), climb up and open
the door into the hut. In the far left corner you can open the chest to find a
Peg Leg, which you can combine with the Coconut Half to get an Improvised
Shovel. Climb down to the beach again and head far SE. Climb down a ladder here
in the cellar and use the Shovel in the centre to fall down into the store. To
do it, it’s best to face E and stand exactly in the middle. In the cellar, run
towards the fire and an oil barrel starts rolling down, quickly jump to the
side slopes ahead and let the boulder pass, slide down and run up the ramp. Then,
head left and get into the corridor. Jump over the broken shelve into the left
room and kill two spiders. Go behind the first left barrel and crouch to get an
empty Bottle for Nonalcoholics. Get out of the corridor, jump over the shelve
and head left. Open the door and enter a room with three moving barrels. Time
the runs through them and at the end climb up the ladder and backflip. Head in
the passage and kill two more spiders. In the rear room use the empty Bottle on
the barrel with the fireflies to get Rum. Climb back down the ladder, head
through the now safe barrel room and all the way back to the entrance of the
cellar.
Inner Island
Climb back up and backflip onto the rear slope, then jump over the stones to
prevent Lara from falling down again. Run all the way back to the woman and
place the Rum N of the fire, facing S, and see a little cutscene, afterwards
the Bayou Key is in your Inventory. Head back to the start of the level. You
can search the floor for a red cross here, face W (the sea) and start digging
again for another Treasure, which is Secret 2,
then open the S door – insert the key left of it. Get through the passage and
arrive at a lake. Jump to the rope and swing and jump into the opposite
passage. Time the blades and head right at the junction. Use the lever to open
a trapdoor in the pool, head back there and swim down, then N, left, after
another while left and eventually swim up (if you want a secret, swim right at
the junction and find a Treasure in front of a chest for Secret 3). Climb out and crawl through the
corridor with the arrows, get up at the end and pick up Fireflies (alias
Flares) to your left. Head right afterwards and follow the corridor and the
level changes. You can go back to this level anytime.
Level 2: Bayou
Secrets: 2
Lake Area
Head to the passage and jump into the pool, swim to a bigger and beautiful lake
and pull two underwater levers W and E to open two S doors. Swim in the next
bigger area and head to the right part of the middle E wall to find a hole in
the rocks, swim through to find Secret 1 (4), another Treasure. Swim back to the large lake
and climb out far SE to see a cutscene of a jailed baboon. Also notice a right
passage with a lever you cannot reach yet because it is blocked by spikes. Now
drop back in the lake and swim under the ledge with the baboon to find an
underwater passage.
Free the Baboon
Follow it, at the sole junction head left and eventually climb out. In the next
passage don’t step on the vegetation but jump on the safe blank tiles to
progress. Head through the passage and arrive at another lake. Jump in and swim
SW to pick up the Crabby. Climb back out and head back through the corridor,
jump over the vegetation trap and get in the previous water tunnel that
transports you back to the big lake. Swim up again where the monkey is jailed
and place the Crabby on the marked tile in the corridor to deactivate the
spikes. Run to the end of the now safe corridor and use the lever to free the
baboon, head back and run towards the baboon, then run under the lever on top
of the structure – the monkey follows you and jumps up, then uses the lever. If
the monkey gets stuck in the wall though, kill him and operate the lever again,
a new monkey appears.
Skull Puzzle
A door far N opens. Jump in the water, find Fireflies on a higher W ledge in
the water, then swim N and climb on the far NW ledge, then jump with a midair
turn to the slope NW and jump with a right curve to land on the walkway. Jump W
behind the tree to find Secret 2 (5), the next Treasure, then head back and through
the door in the middle of the northern wall. In the following room you have to
place the four skulls on the marked tiles so that they all look on the middle
of the room, this shouldn’t be so hard. The door opens after the electricity
started, head in the treasure chamber and pick up the Amulet from the large
chest opposite the entrance. You also have a Lair Key in your inventory now.
Get back out through all the tunnels and jump back in the pool. Swim back
through the N tunnel, to the smaller lake, and in the next N passage. Climb out
and head through the passage to get back to the last level.
Level 1: Puerto Corona (second visit)
Secrets: 7 (but you can still get the other three)
Into the Lair
Head on and crawl through the arrow passage, then drop into the pool and swim
all the way back to the pool, swim up and climb out. Head back to the beach and
then run N to place the Lair Key into the receptacle. The door opens, head
through and go around the corner.
Spike Cellar
Drop down the left hand ladder and hang from the ledge, shimmy left around the
corner and when you come across a ladder, backflip with a midair turn and a
grab to reach the next ladder, shimmy right to the third ladder, there backflip
with another midair turn to the next ladder, shimmy right and finally backflip
onto a pillar. Pull the lever to open the door up near the entrance to the
lair. Spot a jumpswitch high up E, jump there and activate it to deactivate
several spikes. Turn and find Secret 1 (6), the next Treasure, in the corner. Climb one
of the ladders and return all the way with the well-known behaviour, then climb
the last ladder and head E to find the open door. Kill two spiders.
On, In and Behind the Tavern
Head through the passage and at the end push the stone into the wall to open
the nearby door. Head into the village to see a long cutscene. Climb up to the
roof of the left hand hut and run to the top to find Secret
2 (7), what a surprise, a Treasure.
Drop down and open the door of exactly this hut to enter the tavern. Have a
little talk to Lucia again, then explore the tavern a bit. Find Secret 3 (8),
the next Treasure, in front of a N window. Open the E door behind the counter
and head in the left room. Pick up Lucia’s Spoon from the left of the two
tables. Now go back into the corridor and go left, open the door and head to an
outside area. Search the N rock wall for a red cross, face E and go to the
middle of the tile. Use your Improvised Shovel to dig for Secret 4 (9), another Treasure (duck if you cannot get it
normally). Head on E.
Swamp
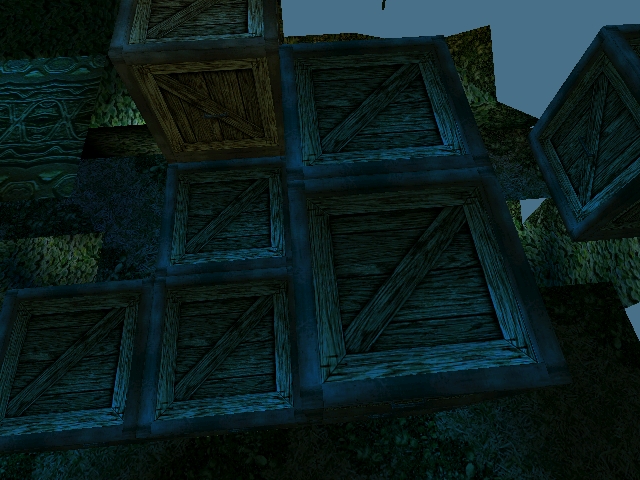
Open the door of the left hut, pick up Fireflies and take a look at the map
lying on the table; it shows which parts of the swamp are safe and which are
deadly. This is a pic from the map, looking from the south:
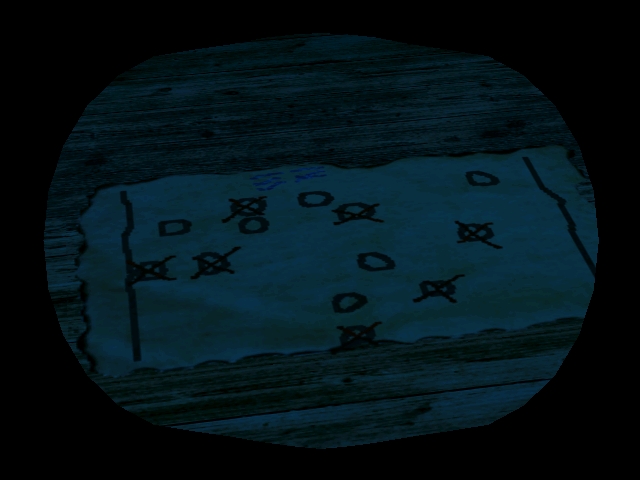
Now go out, then E and climb up the block. Jump over the safe leaves
to the S crawlspace and crawl in the next room, notice a currently too high
jumpswitch. Jump in the right hand passage and avoid three pairs of blades. Get
in the next room and push the floor lever to let a rope appear in the previous
room. Return and jump on the rope, then swing and grab the jumpswitch that
opens the door on the ledge opposite to the entrance of the swamp. Again climb
on the rope, swing W and jump to a crawlspace. Get in the next room and pick up Secret 5 (10),
a Treasure. Crawl back (you can get out of the crawlspace with the new move in
this levelset) and return to the swamp, jump over the save leaves to the opened
door and enter the new area.
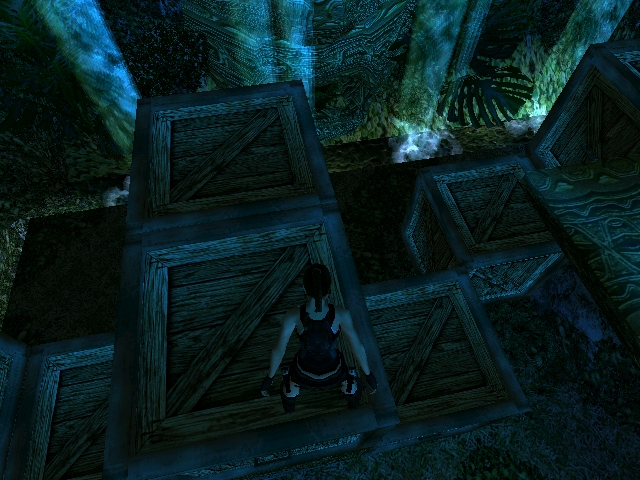
Block Puzzle
Drop down the ledge. Your task is to pull the globe on the other side, but it’s
spiked yet and you first have to create a path for the globe. Jump in the pool
and swim E to find an underwater lever on a W wall. Use it to raise a trapdoor
up at the blocks. Find Secret 6 (11), a Treasure, near the place with many fishes,
then climb out. Push and pull the blocks as follows:
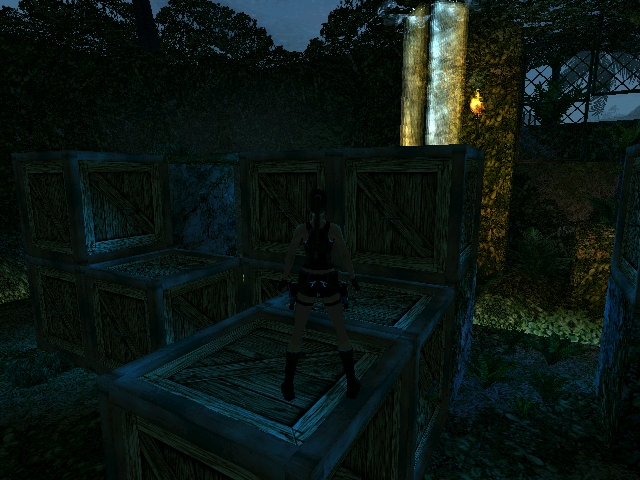
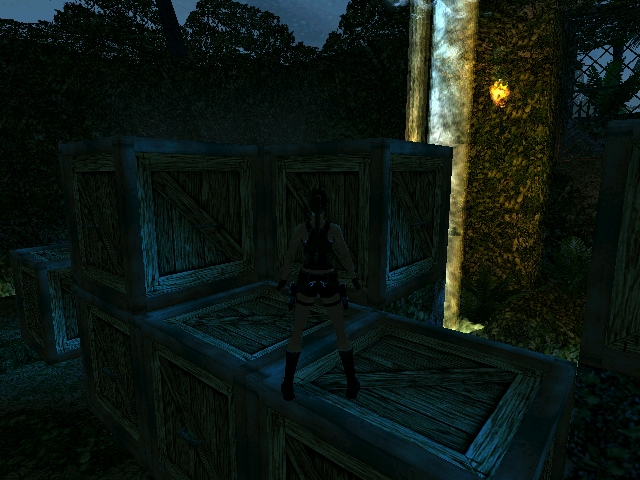
Now all you have to do is to shoot the blue eyes of the E face to
lower the spikes and push the pushblock on the marked tile on the other side of
the bridge. The N door opens – drop down and jump in the alcove. Head to the
next area.
Smaller Village
Open the door of the right hand hut (the SW one) and enter it. Pick up
Fireflies and exit again. NW of the hut you can meet a both harmless and
immortal panther (he seems to be fed already). Go to the middle of the room and
to the SE ledge above the gap, turn S and step back so Lara drops off the
ledge, then press Action until close before Lara would grab the ledge. Release
Action and Lara lands on the safe block below, head in the tunnel and into a
cobra lair. Find Secret 7 (12), the Treasure
that became standard by now, behind a snake in a short left tunnel. You
probably have to duck to get it. Get on and shoot the only movable snake in a
short W tunnel. Follow it, climb up and sprint into a room with a spike wall
approaching you from the right. Quickly run and pull down the E wall lever,
then sprint and jump into the NE alcove and exit this passage. Climb up the
ladder and search the next area for a Torch directly in the middle of the room
under the big tree, or under the small NE tree if you lost the first. Go and
pull the S lever to open the door back to the small village, take the Torch and
light it on one of the two fires in this area. Head out SW again to the block
puzzle area, then climb the W blocks with the Torch and jump back over the
swamp using the safe leaves. Head all the way back W through the tavern and
into the first village.
Bigger Village
Head out again and head N through the street. Run to the end since no door of
the different buildings can be opened yet. After the last pair of buildings
before the pool, run right and jump up the block here. Turn S and jump to the
roof of the building, then to the top where you have to drop the Torch and push
a stone into the wall. That raises a nearby S trapdoor; take the Torch again
and jump onto that trapdoor and from there to the adjacent roof. Go to the S
end and look down to see a ledge, drop on it and enter the building. Throw the Torch
on the wooden floor so that it inflames and breaks eventually. Drop down and
use the NW saber as a lever. A block vanishes S, go there and kick in the
narrow wall.
High above the Village
Crawl in the passage and at the end turn and jump up to use the jumplever.
Climb the ladder now and at the end get off left. Jump up the block and you
find yourself on the very top stage of the village area. Get on the tightrope
to walk to the other side, near the end you can use the Jump button to save
some time. Turn around and jump to the left hand ladder above the street,
shimmy left around the corner and backflip with a midair turn and a grab to the
next ladder. Shimmy around two left corners and climb up to get onto the
monkeyswing automatically. Turn and follow the monkeyswing NW to another safe
ledge, drop and grab the Pineapple from the vegetation. Go right around the
ledge and push the barrel down to the street to get access to another house.
Afterwards get back the way you came or drop down to the lower roof. If you
return through the mansion with the wood floor, you have to activate a lever to
open the nearby door and exit to the street.
Buildings
Get into the newly opened building by entering through the window, and head to
the opposite wall. Pull away the carpet from the key and pick up the Big
Picklock. The chest in the middle of the room is empty so leave this house and
exit to the street. Head N to the pool again and then NW to the house there.
Use the Big Picklock on the keylock in the door to open it. Grab the Picklock
from the SE flower pot. Don’t go upstairs yet but head out again and find a W
stairway leading down. Use the Picklock here to open the door and enter the
cellar, then pick up the Cannonball from the near right corner. Now get back out
again and head W through the caves. Some flies attack, duck and they won’t harm
you much, three bats also appear but they don’t hurt Lara and also weren’t
vulnerable, run to the next coast and onto the pier, at the right end you can
pick up Fireflies and a Match in a broken box.
Cannon
Head all the way back to the village and into the building where you found the
last key, run upstairs now and from the balcony jump NE to the slope, backflip
onto the high pillar and jump again to land on another slope. Grab the edge and
shimmy left until you can stand up, jump over the rocks and place the
Cannonball in the cannon. A door opens nearby and a block lowers behind the
cannon, go there and use the Match to fire the brush of the cannon and let the
ball destroy the window of the S building. Drop down but stay in front of the
building. Use Lucia’s Spoon as a crowbar on the floor lever to open the nearby
door and enter. Kill the next pair of spiders and pull out the box onto the
streets, under the opposite S building with the broken window, jump (don’t
climb) up, drop down the ladder in this room and in the lower stage shoot the
picture on the E wall. Open the chest in the small passage behind to find the
Rusty Key. Go to the W wall, use the lever to open the door and exit to the
streets, head N to the pool and then E. Use the Rusty Key on the wall to open
the nearby door and exit the village.
Caves
Right from the entrance, there is a crawlspace with a block that has to be
pulled into the wall. Get in there and use it to disable a spike trap in the
cave, return there through the crawlspace and get through the safe trap. In the
next room push the stone in the wall right of you to open the opposite door.
Drop down and a cutscene presents you the next enemy: A big crayfish. Killing
it takes its time, when you are finished use the floor lever to open a W door,
enter the tunnel and drop down into the gap. Follow the tunnel through three
timed fire traps, then enter a bigger cave; a cutscene plays in with a lot of
little crayfishes hunting after you. They are immortal, so quickly pick up the
Message in a Bottle from the floor left of you, thereon push the three floor
levers in this room to let the spikes disappear in the centre and also open the
E exit door. Grab the Spiky Ruby (ouch) and sprint through the opened door E.
The crabs don’t follow you here. Jump up the steps and at the end of the
corridor pull the lever to open the trapdoor behind you, climb up to the top.
Two Puzzles
You are back in the area in front of the swamp. Get out of the area through the
W corridor, go through the tavern and exit to the village, go N and all the way
to the smaller coast. When you see a closed grating with a golden skull behind,
look up to the ceiling to find a hole there and a jumpswitch, jump up there and
use it. Enter the passage with the golden skull and do exactly the steps that
were quoted in the Message in a Bottle. A large step means pressing forward
once, without holding it. You land on a dark green tile, place the Spiky Ruby here
to open a door behind the golden skull statue. In the next room, you can dig at
many graves, but at most of them you only will find death. To find the only
correct grave to dig, grab the Note from the pedestal and dig at the only grave
that fits the clues, to get another Amulet (duck to get it). Place the two
Amulets from your inventory in the E receptacles to open the door in the
middle. Slide down the slope to get in the next level.
Level 3: The Pirate Princess
Secrets: 1
Into the Temple
Slide down the slope to the end and in the next room pick up Fireflies in the
middle right alcove. Find a jumpswitch in the opposite (middle left) alcove,
use it to open the N door and enter the next room. Approach the parrot to start
a little cutscene – we have to find something worthy for a pirate through the
double doors!
Suddenly the look doesn’t matter
Use the floor lever behind the parrot to open the E door, enter the next room
and jump on the ledge over the spike pit. A blade trap starts working, jump clockwise
around the ledges to avoid it, but before jumping E stay S and drop down a
ladder to a safe square in the spike pit, find Secret
13, a Treasure, here and climb back up again (time climbing up with the
blade), then jump E and into the next room. Pick up the Pirate Saber from the
skeleton behind the spikes, then make your way back through the spike trap to
the parrot, who seems to be more friendly than in your first visit… I wonder
how comes. The double doors open, head through the passage, avoid a set of
knife traps and enter a larger cave, a flyby shows you the object of your
desire. Run to it and grab it, afterwards backflip and sprint out of the room
to escape the effects of the earthquake. Head back to the parrot, where Lucia
is already awaiting you…
THE END