Journey to the East.
Level by VoodoChild97
Walkthrough Dutchy, pushed by Phil.
“Cambodia”
This is an EXPERT LEVEL, if
you’re not an experienced player, better stop right here.
Turn ON volumetric FX it says…
Don’t!!! It will hinder you hopelessly in the darker places…
My Flares were finished halfway
down Chapter 1b, so I had no other choice than to add some, there was one run I
couldn’t do in time and that was a crucial one to get through Chapter 1c so
that’s where I had to use dozy to finish this walkthrough
Chapter 1a.
Climb the block left of you and grab the Shotgun. Run straight N through the door and through the next after
wading through the pool, hop over the spike traps and shoot a pig. Use the
green mound to jump onto the central balcony and throw the lever to open the
next door. Go up the obvious boulder slope and run back as soon as you hear the
sound, jump over the spikes and to the side.
The
Pit with the Doors.
Go left, up a ladder and back flip onto the
ledge. Look across the pit and spot a ledge with a Secret. On the ceiling near
the tree are roots you can grab. Over to the other side, left and grab Secret #1,
a Gold Skull. Turn around (E) and
hop down onto the tree, jump to the ladder and get down. Look up in the SE
corner and spot a circle tile on the ceiling, run under that one to trigger
gates to open, they are blocking access to the Revolver later. There are more
doors here. Turn around and on the ledge in front (N) is a Medipack, the door opens.
Lasersight.
Get down into the water and in the far
right corner are Flares. In the
opposite corner is an opening down (NE). Follow in and in the next connecting
room in the SE corner is a hidden alcove with the Lasersight. Go into the opening in the wall (E) and go left around
every corner to find more Flares.
Turn back, go straight to that mound of sand and go around it to the opening
ahead (S).
Large
Hall.
In the far SW corner is another Secret, but
taking it will burn you. So face the middle of the room, save and pick up Secret #2,
a Gold Skull and sprint to where a
pool appeared in the middle of the Hall to douse the flames, pump some
medipacks!.
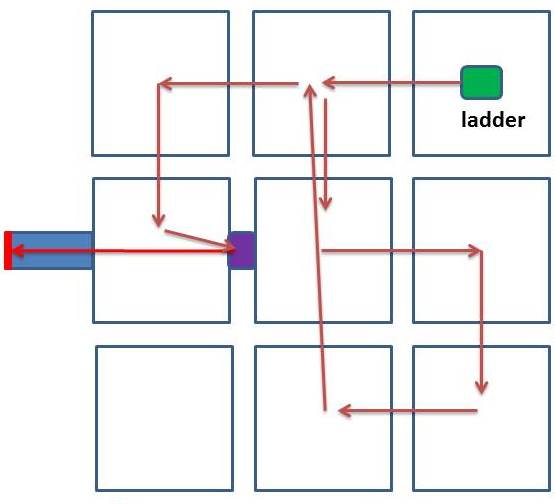
Ladder
Wall.
Go up a climb wall NW and onto the ledge,
run to the other end, hugging the wall and go up again, over the next ledge to
another ladder and up to the top ledge. Go right and jump over to a corner
ledge in the end for Uzi clips. Jump
back and grab the ledge again, follow to the other corner (over the ladder
hole) and to the right is an opening. Slide down and go through the gate.
Hall
with the Monkey Bridge, Revolver.
Take a right and go to a gate in the E
wall, it will open up, shoot the crocs, go down to a cage and grab the Revolver. In
case the gates are closed, look in the paragraph with secret 1 where you can
open them. The side passage around this cage is used later… Go back to
the Hall, a door W will open up and provides a shortcut to the Pit with the
Doors. Now that we have the Revolver and Sight we go get some other weapon.
The
Uzis.
Go into the Pit and through the same door as before, right
hand side (N). Swim left around the corner and down through that deep tunnel
again to the connecting room. Go right around the corner next to a small mound
is a hole in the floor, go down and to a room with a fountain.
Room
with the Fountain, Trigger Tiles and Doors, Uzis.
Here is where you don’t want
the Vol. FX On, because the fog will almost make it impossible to see what you
have to do.
On the central ledge is Revolver ammo indicating you need a
revolver and sight here, there are two Timed Trigger tiles (circle) E and W, to
open doors W of the pool.
It can be done with pistols though, stand
on the tile close to the W door (in the middle), the door inside will be open.
Pull the pistols (or revolver & sight), back flip twice, duck and shoot
that mall vase thing in the distance (revolver & sight, quickly aim and
shoot that small vase thingy, pistols was easier!).
The door behind you will open up and will provide you with the Uzis and 4X Uzi clips. Go to the SE corner and in that corner is a pile of
dirt, face it (SE) a bit left of the top, jump with a twist onto the dirt and
jump again to grab the floor above, get up for Secret #3, a Gold Skull and a door opens below. Drop down and behind the open
door S is a lever to open a door in the Pit with the Doors.
Go back into the passage right (N) and
climb back up the N wall to the room with the water hole. Go into the opening
in the wall (E) and go straight to that mound of sand and go around it to the
opening (S) to the Large Hall.
Up the Ladder Wall and left on top to slide
back down to the Hall with the Monkey Bridge again. Out the door left (W) to
the Pit with the Doors. The door you opened is straight across.
Deep
Shaft.
Go down numerous slides and come to a room
with a strange contraption in the middle. To the right of the entrance in a
hole in the floor is a small medipack.
Go to the open door E, run through the
skeletons and pick up Secret #4, a Gold
Skull, immediately run into the hidden passage behind that circle on the
wall in front of you (E), throw the lever there and just wait out till all the
spikes stopped before heading out. When back in the room with the trigger
Tiles, run jump a bit diagonal over the on the one E and the door W opens up.
Landing on the side of the pool another run jump to the right hand side of that
timed door and if lucky you’ll just get in.
Hall
of Spikes.
Grab the Medipack at your feet, look for the climb wall right of that
central structure, run jump onto the right hand side of the roof and jump off
to grab the wall. Go up as far as you can and one step down. Back flip through
the hole in the roof into the structure and grab the Grenades. Spikes go down E, walk onto that tile and more spikes go
down in front of you. Take two steps back from the edge and jump over with
Ctrl. Climb down and do the same to get into the structure again, left and jump
into the opening in the wall. Proceed carefully as a boulder will drop when you
step on the circle tile. So just run left over the corner of the tile and wait
there.
Use the side ledges to get across the pit
and grab the Grenades, turn around
and go back to the Hall of Spikes. Straight into the opposite passage, you
probably grab the climb wall, just go down as far as possible and drop grab
into the passage. Watch out for more spikes, better use the sloped locks along
the side of the room to jump to and fro steering to the back of the room. There’s
a small medipack near the spikes. Go
down the hole and follow through to a platform in the Hall of Spikes. Here you
have to do a hard jump left out of the opening to grab another platform. Stand in the left corner, face the wall and hop back, now
take two side steps left and turn to the exact corner of platform and wall. Use
Ctrl at the very last moment.
Turn right and run jump with a wide curve
to the open spot in the spikes and grab the edge. Pull up and get the Grenade gun from the indentation in the
floor. Turn right and jump to grab the climb wall above the platform and go up,
turn around and hop into the structure.
Detour: Go right and turn
around at the edge of the floor, crawl and climb down carefully, drop and grab
the crawlspace to get Secret #5, a Gold Skull from it. Crawl forward and
turn around , climb backwards down and hang, shimmy right around the corner
before you drop back inside to where you got the Grenade gun and make your way
back up.
Turn left now and stand jump with Ctrl into
the E side, you may have to turn a bit left before you do to survive… climb up
through the hole in the ceiling, jump to the central structure and turn around
in the middle, jump up and grab the climb wall to climb to the roof. Slide and
jump to the exit. Go straight through the Pit with the Doors into the door to
the Hall with the Monkey Bridge.
Disable
the Spikes and the Timed Door Puzzle.
Run down to that place where you got the
Revolver (E) and go through the right hand gate, just follow the passage
running over trigger tiles to the next gate that opens, now go back up to the
Hall. Don’t touch any of the other trigger tiles and look at the spikes on the
stairs down to the door N, the center row is down.
But there’s a problem, those trigger tiles
for the spikes also closed a set of doors behind the Timed door N, so we have
to open those again before the run.
This
is how you should do it (or scroll down a bit for a partial bypass): These inside
doors are reopened by stepping on the row of
pressure pads on the left of the stairs. The tricky part
is that these pads also reactivate the spikes in the center row. One pad = one door + one adjacent set of
spikes. The crux of the
puzzle is that by reactivating the spikes one by
one, you can time them as a wave going down the
stairs, allowing you to make the timed run. But wait, there's more. Even if you don't
get killed sprinting down the stairs, there is a
pad on the stairs directly in front of the timed door which will close it automatically. To make it through the door
you must stand behind the pressure pad at the top of the stairs,
begin sprinting as soon as you run over it, sprint down the
stairs, do a dive-and-roll at the bottom of the stairs, and then jump over the
trigger pad and through the door (I recommend a
swan dive).
A way around this door business: If you do the timed run while the
spikes are down (directly after going around the
croc cage), the timed door will stay open once
you’ve been inside, provided you don't trigger or anti trigger it again. You can then go back and run across the
row of pads to trigger the
inside doors and bypass the retriggered spikes
altogether. And no second timed run needed.
So after you get inside doing the run with
the inside doors closed, jump out without touching that trigger tile at the
timed door. Go up the stairs and run over those trigger tiles left of the
stairs and hop over the balustrade down to the lower floor. Jump inside without
touching the trigger tile (video- http://www.youtube.com/watch?v=bAPYIYkoi2E
).
Through the passage and up a ladder left,
back flip with twist to grab a platform and throw the lever to open the next
door to get to..
Chapter 1b.
Caves,
a Bridge
Follow through an automatic door to a cave. Going along the left side will get you
to a Bridge, but a gate is closed there.
Block
Labyrinth.
So from where you entered the Cave, keep to
the right and in the dead end cave climb up left to a ladder. You’ll get to the
Timed Block Labyrinth, stepping on the colored trigger tiles will raise and
lower blocks.
The Route Explained: Start in the NE room
where you climb up from below. Entering this room resets the puzzle, so return
here if you don't make it. You have to proceed through each room that is opened
up by standing on colored tile which will lower a raising block doorway. From the NE start room head into the W
room (Red), left through lowered door, then left again to the E room (green).
Turn right to the SE room (Red) then right to the W room (Green). Then right
and straight (back to the N room (red) but no need to retrigger) then left to the
NW room (green). Left again to the Purple tile – Go left and roll ON the tile
where block is lowered in doorway E
(not into the room E) to lower last block W and sprint straight through open the
Black Gate.
A
Secret and an important Gate.
Go down and save just before you enter the
next small room, throw the lever there to open a gate far away from here (see
**).
And it also activated a
trigger triggerer behind you. So hop back into the passage, the well
camouflaged door left of the lever will open, sprint in because it is timed and
will not re-open. Inside and up in the ceiling is a ladder, ignore it for now
because it will get you back to the previous room.
Just go to that pit in the
end and drop down, jump over to the climb wall and go down into the pit. Get Secret #1 (6), a Gem in front of the gate.
Go back up as you came and now climb up in the hole in the ceiling near the
closed door, follow through and drop into the room with the lever.
Leave E to the labyrinth.
In the room with the purple
tile is a closed door to the right. Go straight to the doorway (lowered block)
between the central room and the E room (green) and you’ll hear that door open,
but the timing is very short. So stand back in the E room, hop onto that
trigger and sprint to the door to get in (I couldn’t do it). Inside is Secret #2 (7), a Gem, the Crossbow and 3 kinds of Arrows. A block lowers E so you can get out.
Now go back to the NE room and climb down
the ladder. Go right around corners to get to a bridge. Cross the bridge and go
up the passage ahead, crawl through and come to a Lava Pit.
Secret: turn right and climb
down the wall behind the statue to a lower balcony. Stand on the mound and grab
the familiar roots on the ceiling, go straight over to the other side along an
invisible monkey climb. Drop in the incline and turn right, you have to do a
banana jump N around the pillar to another niche. Crawl in and a bit to the
left (not too far or you’ll be stuck), light a flare (mine were finished) and
find a Shotgun on the ground. Crawl to the right and stand up, go in left and
walk over an invisible bridge to Secret #3 (8), a Gem. Go back as you came here, over the lava and up to the floor
above.
Cross
the Bridge, Shiva Rooms.
The monkey climb is also a bridge, so just
run straight from the white spider web tile to the opposite doorway, the gate
here opened with the (**) lever in the block labyrinth. Go in straight and pick
up a small medipack. Two Shiva’s
come out, shoot them and proceed through the corridor.
Hall
with the Gongs.
When running into the next hall the camera
will focus on that gate with the Gong. Just go into the passage right of the
structure and keep running straight, Lara will emerge left of the structure,
but in the meantime the camera switched to the other end of the room, so run
into the camera and through the opening (you think you came from) and you’ll be
in another section of the Shiva Rooms.
Go to the door S and it opens up, step
through. Run over the walkway triggering two more Shiva’s and go shoot them in
the room you just came from. Back on the walkway look for a transparent ledge
(cloud) S of the walkway and use that to jump to the outer walkway, take a
right to the end and throw the lever to open the door at the end of the first walkway.
Get in there and run jump over a spike pit.
In the next passage just go through the red light to the end.
Around the corner a screen
will show a skeleton waking up, return to the red light and shoot him with a
grenade to get Secret #4 (9), a Gem (even if you do get a chance, don’t shoot him into the spikes
or the Gem might be lost).
Spike
Stairs Challenge.
At the end of the passage you’ll get to the
Spike Stairs. Not one or two ledges, but a whole series of the same. Step on
the trigger tile to open a door on top of this fun room. Jump diagonally up
through them (and the safe ledges) to get to the top (you
have 20 seconds and here’s a video http://www.youtube.com/watch?v=-NWhaecchfE
).
Through the door and at the end of that
passage, grab up to a climb wall right. Go up and back flip into a dark
passage. Go left at the lantern and shoot an incoming Shiva. In the next room
is a burning pedestal on top of a Flower like structure.
Face SE, top up the health
and walk into the fire to
get Secret
#5 (10), a Gem,
hah.. you won’t burn…
Jump to the E branch of the structure and
grab the climb wall right of the ledge. Turn right and go behind that Cog wheel
to turn it about 5-6 times and run into the Gate that opened W and through the
white wall…
Chapter 1c.
You need all 5 Secret Gems from the previous level to play this level, so call it a Bonus
level of sorts. The Secrets in this level are messed up because the numbering
on the Secret triggers is incorrect.
Teleport
Room, a Key.
Turn right and hop into the opening in the
wall, go to the gate in the back (N) and open it with the lever right of it.
If you don’t have the 5 Gems from 1b, just
run down the steps and the level will be over for you.
Activate
the Teleporter.
But with the 5 Gems, go slowly down the steps
and look for the Key on the fore
last step, don’t go any further but go back up the steps and use the 5 Gems on
the wall to the right, jump back through the wall to the Teleport Room and see
the Teleport Beam is now active, step in and you’ll get upstairs (You sure you took the KEY? Because you cannot go back!!!).
Go through an opening in the S wall (SW), you’ll be back in that room with the
Ladder Wall where you got the flamin’ Secret in Chapter 1a.
Hall
with the Star Door.
I renamed it because the “Star Door” (S) was
of no importance before and now it is the main objective…
E
Side Doors, Traps Galore, a Crowbar and Gold Star #2.
Go to the E doors and right of it is a jump
lever, use that to open the doors. Follow through to a room full of traps. There
are numerous doors and gates here, only the gold/blue doors open up. I’ll
describe the “legal” route, you can think up shortcuts yourself.
Hop to the grey ledge and hop to the right
hand ledge (E) to open the door there with the Key you found. Go in, throw the
lever to raise blocks over a spike pit and go onwards to the next door. It will
open and so does the one across when you step out. To the right is the Star,
but we need a Crowbar first.
So jump to the other side via the grey
ledge and enter. Inside are knife blades coming at you, you can use the alcove
left to escape them or just stay close to the left wall. Go down the pole in
the end and drop, immediately back flip into the passage (knife trap!).
At the pit with the spikes AND boulder,
stand in the alcove right and face that slope left of the pit (face NW) and run
jump with a twist onto the slope, while the boulder drops you’ll come sliding
down, jump and grab the climb wall and go left into the passage.
Left of you is a lever opening up a couple
of doors in the Main room (In the back is a crawlspace
you can get in by running to it and hitting “duck”, there’s a ball switch left
at the other side, but once in the crawlspace you can’t get out so this might
be a famous red herring…but it does make you curious doesn’t it).
Now we have to lower the blocks over the
spike pit again: Go back over the boulder pit and up the pole, back flip into
the upper passage. Go out right (door opens) and jump over to the door you
opened with the key (SE). Inside use the lever again to lower those blocks on
the spike trap. Go back out, to the other side and down the pole left. Take a
first right and time spikes and blade to jump to the opening opposite (SE). Climb
the block with the spikes and sprint right through.
Lower
Level.
In the lower part behind the spikes, turn
right (ignore the door opened left for now) and climb backwards into the hole,
down the ladder to land at a closed door. Turn around and head into the passage
(E), Blades start up around the corner, time the best moment to run through
(just after the blades at neck level). Around the next corner is a lever
opening up the door near the ladder. So go back around and out the door to the
Poison pool. Use the block with the burner to hop and a running jump to the
opposite side, left of that door there!
Turn right and stand back to where Lara
disappears behind a column, use the look key to time the burner and jump to the
lever, pull and back flip, a door opened at the other end of this same ledge.
Hop back onto the corner of the block in the goo and turn right, hop back when
the burner is down and run jump with a left curve to land on the next block
(S), far right corner of it. From the burner block, turn facing the open door,
hop back when the burner is down and an immediate run jump to the door.
Want a Secret? Turn left on
the burner block and run through the spikes through the gate (obvious) into the
niche with Secret #1 (11), an Ivory
Skull. Best just stand left facing the burner and run jump straight to the
corner where the opened door is.
Inside is the Crowbar we were looking for…Immediately run onto the ledge and duck
to pick it up, crawl to a corner facing outward and stand up to run off. Go
back out, if you want a Medipack, run jump to the low block and side flip right
to get it (SE). You only need the low burner block to do a running jump with a
right curve back to the NE passage, turn around at the crossing and climb the
ladder back, go straight out the door.
And coming to a bridge, sprint across and
pick up Grenades left, then use the
lever there to see spikes go down at the Gold Star.
Cross the bridge, right through the spike
trap and jump back over the spike/blade ledge, into the passage with the pole
left and up the pole to the upper passage. Run to the end, and best hop to the
grey ledge in the middle of the room and jump straight to the lowered spikes N
to get the Gold Star #1.
Use the grey ledges to do perfectly
straight jumps (or you fall short) back to the other side and head back to the Hall
with the Star Door.
W
Side Doors, Boulder Frenzy, Gold Star #2.
Next to the W doors is also a jump lever,
but it is way up.
Go up that ladder wall (N) again, start
from the pile of rubble NE. Climb to the top walkway and go left. At the end
take two steps back, hop back and run jump over the top of the arch below, down
on a ledge. Look down on the wall next to that arch and spot the jump lever. If
you want another Grenade Gun however, back flip onto the arch, jump and grab
the walkway above (S). Follow around to the roofs, stand right and run jump
with a left curve around the roof, over the next and around the last to get to
the walkway again. Follow all the way to the end and grab a Grenade gun.
Go back to the arch W, just run down from
the walkway and turn left, spot the niche in the wall over the jump lever, grab
that and use it to get to the lever. Enter the door that now opened and follow
left to a gate where you see boulders rolling, just wait it out, they first
have to start all boulders for you… the gates will open. Looks harder than it
is, just run with short stops to get to the other end and jump up to the door
with the stars in the receptacles. Only the one right is save to pry off the
wall, so get Gold Star #1. Make your
way back to the Hall with the Star Door. Oh please.. why didn’t you
anti-trigger those boulders…
Through
the Star Door, .
Place the two Stars and the door will roll
aside, go in and left, throw the lever to open that door behind you closing you
in. Go up the ladder and back flip over the door… In the passage is a hole in
the floor with a Medipack behind it, ignore that for now if you want to go for
a Secret…
Climb down the ladder into
the hole, just drop, there’s some kind of block on the spikes. Turn right and
go into the tunnel, (tsk, still no Flares???) and follow through to a
staircase. Left is a Medipack in
front of a look through. Turn and go back up the stairs and straight, left or
right around makes no difference, a block goes up as you reach a spike pit. Run
jump and grab to the mirror, get Secret #2 (12), an Ivory Skull and a skeleton will wake up, that block in
the spike pit is history. Best just run to that burning lamp E and climb the
wall behind it (you could also shoot the skellie). Off right onto the block and
grab up to the monkey climb you could see in the mirror. Drop down the other
end and back into the staircase. Left through the tunnel and up to the passage
with the Medipack.
The Medipack
which you can now pick up after you saved. The gate opens and a Wraith shows
up. As I saw nothing to get rid of it at the moment I just stood in one spot
turning around my axle shooting pistols till it left me alone…
The
Grand Cave Building.
Well it looks like we are far from done
here… Hang from the right hand side of the walkway at the entrance gate, drop
on a rock. Stand near the wall and grab the underside of the walkway, monkey
climb to the building and drop to land on a ledge below. Look SW and line up
for a run jump with a curve (left in my case) to grab the corner of the ledge
there. Pull up maybe only after a shimmy right and a door opens in the nearby
wall, hop to the next ledge and run jump to grab the opening. Save there!
Going
Up/Going Down and back again..
Pull up and sprint left through the passage
and jump out left to a ledge before the knives deploy. Follow this series of
ledges to where you have to run jump and grab the boulder ramp. After pulling
up, take a step left, side flip left and hop back grabbing the edge. Get back
up and stand jump grab the next boulder ramp, shimmy right or left around the
corner and pull up at the end of the flat part, hop back grabbing the edge.
Now a run jump (no Ctrl) to that ledge
right of the N slope and hop to the ledge with the pole left. Go up and back
flip onto the ladder ledge N. Up the ladder, back flip onto the upper pole
ledge. Jump and grab up to a small balcony up W and jump to the next a gate
will have opened below in the NW corner. Now we have to get back there, there is
a ledge straight ahead on the W wall, but you can’t reach that one…
Instead look for the one just right and
below that, aim for the left side of it and run jump. At the last moment use
Ctrl and you should just be able to reach it. Run off right landing on a lower
ledge and turn around, run off the corner near the wall and you should be in
front of that gate you opened when you reached the balcony above. Go in, crawl
and reach a lever in a green tunnel.
Through
the Pits.
Pull, roll, sprint and hit Alt just before
the circular blades to roll through (need luck) and sprint straight through a
timed door. Crawl through and you’re back at the cave. Hop out left to a flat
part and run jump straight S along the wall landing on a slope, you have to
slide forwards so you can jump again with a left curve and land on a flat
surface. Save before every jump and go up to the highest point, jump left to
the S and go up a bit right, then a hop up SW and go up to the E path. Follow
through with some more jumping and reach an opening with a ladder.
Go up, back flip off onto another ledge, up
the grated window and back flip. Go on till you are overlooking the Cave. Grab
the Medipack and jump to the green ledge ahead. In front of you is a Big Blade.
You could go for preparations
to a Secret here, but I wasn’t able to get legally it because the jump to that
green tunnel you see in the far SW corner was impossible from the nearby green ledges.
You have to make use of the
corner ledge with the burner on the building to get there via the green ledges.
Inside that tunnel is a lever in the left branch and that will open a door in
the wall under the big blade next to the building. The jump out of the green
tunnel was possible… Run jump straight N along the left wall and grab the stone
ledge. Make your way back to the green ledges at the Big Blade.
The
Big Blade.
From the green ledge near the blade, jump
to the left corner of the grated ledge where you are safe, turn right and
remember only the rotating small knives on the big blade will harm you.
Diagonally across the Blade you can see an open door, that’s where you have to
get to. So run jump with a left curve to the NE grate, turn left and hop to the
next grate and then curve hard to the right and a running jump to grab the
opening under the door.
Throw the lever to raise a block over one
of the spike traps on the roof of the building.
You can either jump back through the Big
Blade or run down on the boulder ramp, go left and at the end jump down with
Ctrl to land at the ladder shaft, go up again, bit longer but avoiding the
Blade altogether. Jump to the corner of the building avoiding the burner.
Follow the green ledges to the W and then right. From the last one a run jump
down N to a ledge in front of the gate of the building and grab the Medipack there. Run jump and grab the
gate and climb up to that block you raised (could be Lara grabs below the gate,
just climb up or go to the side of the gate first to climb up).
Jumps
into the Unknown, open the Building.
From the block you have to jump to 5 faint
misty clouds around the building. First I did was a run jump E (1) (no Ctrl), a
blue sphere appears. Then N and a bit left with a simple run jump (2), then W
with a run jump and grab (3). S and a bit right is the next (4) and the last
one I jumped back to the roof and from there straight S without Ctrl (5), blue
rays appear. Indicating you must have done something right.
The
Paragon.
Now you have to get to the walkway on the N
side, I did that by jumping back to the roof, down to the raising block and
slid down (along the right hand side) to the NW corner tile with the burner,
quickly take a step forward to a safe corner. Now hop down to the walkway and
enter the building. Grab the Paragon
and gates open up.
The gate left allows you to
jump to the door you might have opened, Secret #3 (not 13) should be there, but
in my game the alcove was EMPTY.
Go out through the S gate and go around
left or right to where you see a room with a grated floor, sprint straight over
the grate and through the door before it closes again.
Teleport
Hall.
In the hall with the
teleporter is a final Secret to be found, it is in a hidden treasury in the
right hand wall behind the little lamp. Go get Secret #4 (now 13), a Gold Skull. Back to the Hall.
Hop into the teleporter and the level ends…
Oct 22-2014-Dutchy.