alan: Depths of the Arctic Ocean
Walkthrough by Mulf
Colour coding:
Obligatory pickups, usually keys.
Optional pickups. Very nearly all of your human attackers will drop goodies upon their death, and there are additional pickups scattered about the levels. You may occasionally have to look into a corner or take a few extra steps, but they’re easy to spot and acquire, so I won’t usually make particular mention of them in this walkthrough unless they’re new weapons (all to be acquired early in the first level), secrets, or useful as points of reference.
Health hazards, most commonly of the human kind, more rarely fish; also traps such as flames, spikes (glass shards) and rollingballs (oil drums). Collapsing tiles do not necessarily constitute a health hazard and appear in red only if they do so.
Level 1: Hydro-hazards
The game and thus this level begins in one of the most irritating ways possible (but if you look up this section of the walkthrough, you will already be aware of the fact): as the level loads, you’re in a large underwater room, you have no idea what to do, there’s a shark around, and not an airpocket in sight. From your initial position you may glimpse the glimmer of a pickup in an alcove in the wall ahead, to your left and just below the ceiling. It’s a big medipack, but more importantly, there’s an underwater lever in that alcove. It opens a trapdoor which is located in another alcove at the other end of the same wall, and at the same height.
As you enter this second alcove, a frogman attacks. Ignore him as hard as you can, go through the trapdoor, down a shaft and through a short tunnel until you reach a room where you can climb out of the water. This may be a good opportunity to save, as you will be immediately under attack by two wrench-wielding goons; avoid leaving the rust-covered area until you’ve killed them, or you’ll have to deal with two shotgun goons as well. One of your attackers drops the M16 and another the Harpoon Gun. Meanwhile, the frogman and the shark have been following you; with the goons dead, you can take them out at your leisure (along with another shark and a barracuda keen to join the fray) and then go back to retrieve any pickups you may have left behind.
Secret (1/3): There is a second lever in the initial underwater room, mounted on the back of one of the pillars. It opens a door which you can’t see. To get there, find a crevice at the bottom of the far end of the wall to your left (left, that is, as you operate the lever). There’s an airpocket at the top of the shaft ahead and, just below it, the door you opened with the lever. Behind that door is the Silver Dragon. (If you want to pull a prank on the shark, go for the secret before you do anything else. The shark will try to follow you and become stuck in the crevice. This will have it so fazed that it won’t even snap at you when you squeeze past it on your way out.)
When you return to the scene of the recent massacre, stand at the edge of the rusty area and face the blue room ahead. Note the slanted blocks facing each another, and the row of three closed trapdoors in the ceiling; this will be your way out of the level. At the back of the room are two doors, one in each corner. Your first task is to get past the row of burners on the right, so climb the block next to them and follow the shimmy crack until you can pull up into an alcove. The lever in there opens one of the doors. Hop over to the block ahead and pick up the Automatic Pistols, then drop down and go through the open door with weapons ready. (Use your newly acquired weapons liberally; there will be no shortage of ammo).
Kill the two goons in the next room, then the two barracudas in the pool of water. Hop into the water, note the closed door and use the underwater lever. A camera shows you that you’ve activated a trapdoor somewhere higher up. Climb out of the water and use the stairway to get on top of the high block next to it, then jump from block to block all around the room until you reach the top. The next wrench-wielding goon chose a poor spot to stage his ambush and can be taken out from a safe distance. Jump across the gap and collect the Grenade Gun from his dead body. (You can spot the Jade Dragon from here, but you can’t reach it yet.)
Turn to face the central pillar and spot the trapdoor you’ve raised with the underwater lever. Take a running jump towards any of the two ladders, position Lara above the trapdoor and make her climb down until she won’t go any further, then release CTRL and immediately press it again to make her grab the edge of the trapdoor. Shimmy over to the pillar, pull up, grab the Uzis, and use the lever to open the door in the pool below.
Drop down into the water, take a deep breath and swim through the door, which ominously closes behind you (creating an invisible block in the process). This next area may appear a little confusing, but it’s far too small to amount to a maze. You’ll spot the trapdoor that blocks the exit soon enough, and you’ll hear a frogman even sooner. The lever that opens the trapdoor can be reached by passing through a crevice at the bottom of one of the nearby blocks (there is a pile of pickups immediately behind that crevice to guide you). Once you’ve used the lever and climbed out of the water, immediately draw your guns to face two wrench-wielding goons and another one with a shotgun who pop into existence.
Apart from these goons, the room is empty, so when you’ve dealt with them, hop up to the large opening in one of the walls. The doors ahead open as you approach, and you’ll hear another wrench-wielder coming your way, soon to be followed by another shotgun goon. This latter drops the shotgun, thus completing your arsenal at an unexpectedly early stage.
Behind the doors is a corridor with two ways to go. Turning left, you’ll find your path blocked, with a seemingly unreachable big medipack sitting at the top of a sliding slope and laughing in your face. (If you jump towards it and press CTRL, Lara will pick it up before sliding down. It’s a TR2 thing.) Turning the other way, you end up in a small room with a pushable crate. Move it two tiles so you can reach the lever high up in the corner.
Judging by the sound you hear when you use this lever, it merely seems to open a nearby trapdoor; but if you now go back to the previously empty room you’ve just left behind, you’ll find it did more than just that: the room is now filled with a large pile of sludge. If you clamber about on its far side, you may become stuck in an illegal slope; but there’s no need to do so. Just use the leftmost (as you’re facing the room) of the newly raised blocks for a standing jump towards the high block beneath the trapdoor, grab its edge and climb up into the room above.
This next room features a door, a lever up on a tall block, a row of burners, and a block that looks like it might be a pushable but isn’t (it’s merely there for your convenience if you’re not the ladder-climbing type). Your goal is to get into the opening high up in the wall near the tall block, which is as yet out of reach. First, do the obvious thing and get on top of the tall block to use the lever and thus open the door, get down, go through and kill the wrench-wielder who’s coming at you.
The room you’re in appears to be made of crates. Surely some of them will turn out to be pushable? Of course they will. The second crate from the right (when facing the door you just passed through) is the first pushable. Pull it once, then push it along the wall as far as it will go. Jump up onto the crates that are not part of the walls, pull a second pushable out of an alcove and move it on top of the first, then climb up and push a third pushable once. Go back into the previous room to find that you’ve moved the last pushable on op of the tall block with the lever. (The lever was apparently mounted on the crate you just pushed into this room. What became of the lever? We’ll never know.) From the top of the pushable you can jump into the opening that was previously out of reach.
Secret (2a/3): Before you continue, grab the crack above the burners and shimmy all the way across the room, then pull up, turn around, jump the gap and follow a rusty tunnel until you reach a lever (mind the gap immediately in front of it). There will be no camera clue, but pulling this lever grants you access to the Gold Dragon, which you will be able to retrieve shortly. (You might notice something that looks like a pickup inside the shimmy crack. It’s that thingy with the Natla logo on it, and of course you won’t be able to pick it up.)
Continue to a slope, slide down and kill another wrench-wielder / shotgun goon couple. An opening on your right (as you enter this area) leads to a double slide with a row of burners inbetween.
Secret (2b/3): Just to the right of that opening is an alcove that’s accessible if you used the lever mentioned above. Pick up the Gold Dragon.
Secret (3/3): Continue to the far end of the room and through a short corridor until you reach a ladder. Climb up to retrieve the Jade Dragon you’ve spotted earlier. If you collected all three dragons, you are rewarded with a bunch of harpoons.
At the double slide, you won’t lose any health if you run off the edge at an angle and jump off the first slide the moment you touch it; you’ll land on the second, and from there will slide safely to the floor. As you do so, a door in this room opens. Go through, and at the end of a short corridor, drop down in front of a lever which opens the next door. When you pull it, you’ll get an interesting camera view that may not tell you very much at first glance, but as you continue on your merry way, you’ll quickly find yourself back in the place where you killed your first goons near the start of the level. The last lever you pulled also opened the row of trapdoors in the middle of this room.
You’ll have to go up there now. To get going, position Lara so that she faces the middle (this is important) of the lower row of slanted blocks below the trapdoors. Pull up onto the block and backflip onto the higher block in your back, then jump off of it to grab a ledge. Do this two more times until you grab a ladder.
Climb that ladder, and at the top do another backflip, but now with a twist, to grab the next ledge. Then move one tile to the left or right, pull up and backflip, immediately jump off the next ledge and grab the last one. From there, another backflip-with-twist will land you on safe ground again.
You’ll immediately hear the rattling noises of a wrench-wielding goon, yet he’s nowhere to be seen. I’m not sure where he’s hiding, but at some point during the next operation he’ll come floating down from that place and attack you, so be prepared. This next task consists in moving the crate which is currently located in the middle of the burner machine (let’s call it that) under the lever at its back. The lever opens the door at the other end of the room. (I don’t think the burners can be switched off, so you’d better ignore the big medipack and the shotgun shells placed on one of them.)
Behind that door is a slope that Lara doesn’t seem very eager to go down (it may be necessary to jump onto it). This slope will land you in a very, very large water room with a whole host of sharks and barracudas. Immediately start swimming forwards. (I find that moving up and down while doing so helps with evading the hostile fauna, but at any rate don’t stop moving.) The finish trigger zone is not marked in any way, but it’s located straight ahead in the left corner of the other end of the room. However, there’s a large pile of pickups about half way down and to your right, so if you don’t want to deprive yourself of it, veer in that direction, and when you’ve collected it, cross over to the left-hand corner of the room to end the level.
Level 2: Shipwrecked
For some reason, you begin this level not underwater, but at the top of a series of slopes.
Secret (1/3): Acquiring the Silver Dragon is a little tricky, though you may have been training for it in the preceding level when you picked up that big medipack at the top of a sliding slope. Here, you will have to jump from somewhere near the middle of the second slope so that you land more or less right on top of the dragon, which sits at the top of the third. You’ll probably lose some health in the process.
The last slope ends in a deep shaft. At the bottom, two frogmen are waiting for you; deal with them. In one corner of this room is a trapdoor, and the underwater lever that opens it is in an alcove diagonally across the room. There’s also a non-underwater lever, so this room will be drained shortly.
The room above the trapdoor is full of crates and also contains three goons. The wrench-wielder up on one of the stacks of crates poses no threat, but the two others carry a shotgun and an automatic rifle, respectively; they’re hiding at the back of the room and will take potshots at you if you don’t take them out first. That done, find the two differently-textured crates and move the one on the floor so that you can push the other one on top of it, allowing you to reach the switch up above.
Clicking the switch drains the room you just came from. Return there and find the ladder on its opposite side (the block with the non-underwater lever on top looks like it might be climbable, but isn’t). Climb the ladder, then jump towards the lever via several pillars and a ledge sticking out of the wall. The lever opens one of the two doors located high up in the walls of the crates room, so go back there, use the crates to reach the open door and pick up the Rest Room Key. The keyhole is mounted on a crate (don’t ask) in the middle of the room. Turning the key opens the other door. Save at the top of the slope behind it.
The drop at the end of the slope will cost you some health even if you safety-drop to the floor. Either way, draw your guns and kill a goon with an automatic rifle, as well as a barracuda in the shallow water. Mind the glass shards while doing so. Up on the higher level is another goon with a shotgun; it may take a little patience, but you can take him out safely from below. There’s a third goon up there as well, but he’s the wrench-wielding kind, so you may ignore him for now. In one of the piles of glass shards is some M16 ammo (walk up to it to pick it up, then walk away again).
Climb the raised blocks in the middle of the room (you may have to navigate around an invisible block created by the off-kilter collision of the overturned bench in the corner). It’s possible to take out the wrench-wielder from a safe distance, but he’s partially protected by another invisible block (this one created by one of the closed doors in the wall ahead) into which he will be running, so you’ll have to find a good position to shoot from; either that, or you tackle him at close quarters. The ledge he’s on also sports a pushable block; it’s for reaching the keyhole in the opening at the top of the pillar with the upside-down lamps, but you’ve yet to acquire the key that goes there.
Hop over to the next ledge and face a ramp with a couple of oil drums perched precariously at its far end. They won’t move until you get to the fourth row of tiles. I found the best way of dodging them is to backflip onto that row, slide forward (don’t jump at this point, or you will overshoot the ledge ahead and fall to your death), and then immediately get out of harm’s way with a curved jump away from the ramp (it’s quite tight, but you’ll make it).
When you go back up, note the door up on the wall to your left. As you approach the end of the ramp, two wrench-wielding goons attack. It turns out they were guarding what may once have been a swimming-pool. Before you climb any blocks, drop into the water. Dive through a crevice at the bottom, ignore the frogman (it’s less painful this way) and move a few tiles towards an underwater lever, which opens a trapdoor someplace high up. Get out of the water, climb the block in one corner of the room and make your way over to the central pillar. Jump to a ledge (trapdoor), and from there back in the opposite direction towards a ladder. Climb that ladder, then onto a ledge and up a number of blocks until you reach the top, where there’s a switch which opens a door elsewhere (it’s the one you may have noticed when going up the oil drum ramp). Step onto the collapsing tile next to the switch in order to open up a shortcut for you to quickly get back down into the pool of water. Get out of the water, kill a goon with an automatic rifle who managed to paint himself into a corner (or leave him to his misery), and go back to the ramp.
Take a running jump from the ramp towards the now accessible opening in the wall and push the switch at the end of the corridor. It opens the two doors near the ledge with the dead wrench-wielder and a pushable crate. Go there, look up and choose wisely. (It’s another ramp two tiles wide, but there’s only one oil drum.) At the end of the ramp, jump up into the next room and kill two goons with automatic rifles (one immediately on your left, the other will approach from the other side). A big medipack sits among the containers in the middle of the room.
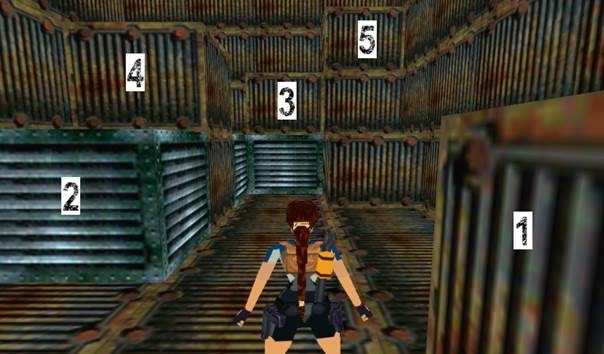
This room may be made of containers rather than crates, but yes, some of them will turn out to be pushable; quite a few actually, and not merely the obvious blue ones. Your goal is clear: you will have to rearrange the pushables in such a way that you can reach the switch high up on the wall. The good news is that not all of the pushables need to be moved. Those that do are marked with numbers in the screenshot below. The switch is on the wall to Lara’s right (off-screen).
First, move #1 (the green one that’s sitting by itself in a corner) and #2 (the blue one closest to it) onto the second row of tiles, counting from the wall with the switch. This is the row that Lara is standing on in the screenshot. (The roles of #1 and #2 in this puzzle are interchangeable, it doesn’t matter which goes first.) Then move both in front of the blue container ahead, so that you can pull #3 one tile and then push it towards the wall with the switch.
Next, push and pull #1 and #2 in such a way that you can move #4 across them towards the wall with the switch; and that is, essentially, it. You can now move #5 across #3 and on top of #4, and thus reach the switch.
Secret (2/3): You will have to move some more pushables around for this one. Spot a non-obvious pushable in the middle of the wall opposite the entrance (the one in Lara’s back in the screenshot above), second row from the bottom. You will need three pushables to pull it out of the wall and off to the side before you can pick up the Gold Dragon.
When using the switch, you get a camera view of another door opening. Leave the container room, and at the end of the ramp, use the ladder to get up into the corridor you just made accessible. Pick up a Rusty Key and drop down onto the ledge to your right. Another goon with an automatic rifle appears on the far ledge. Kill him, and, if you haven’t done so before, move the pushable crate under the opening in the pillar with the upside-down lamps. Climb up to the keyhole and use your Rusty Key.
Secret (3/3): The Jade Dragon sits on a collapsing tile which is now within reach. Just past the keyhole, there’s a gap in the banisters you can use to jump there. This will take a bit of trial and error, but don’t mind the collapsing tile. The main thing is to get Lara on top of the dragon as quickly as possible. She will pick up the dragon long after the tile has collapsed and only then realise, Wile E. Coyote style, that it’s gone. You will land in the pit where the water is slightly deeper than elsewhere in this room. If you collected all three secrets, you get additional grenades. Climb back up to the keyhole.
The walkway ahead has a couple of collapsing tiles in it, but you can run right across to the other side. There follows a rather lengthy sequence of block-climbing, briefly interrupted by a wrench-wielding goon, before you arrive at the top of a sliding slope. Save before you go down.
During the slide you will lose a little health, and near its end, you have to react quickly to avoid a pit full of glass shards. When you jump this pit, do it with a twist so you can grab the edge of the slope when you reach its end. If you safety-drop to the floor, you will lose a little health; if you don’t, about half of it (assuming your health bar is at 100 %).
You end up in dark blue room with a door that requires a key, and a deep pool of water in in which two frogmen will be waiting. Enter an opening at the bottom of the pool and continue past a moray eel until you come across a narrow crevice on your left. Go in, pick up a Circuit Breaker, get out, and follow the rest of the tunnel until you can come up for air.
Kill a goon with an automatic rifle and a wrench-wielder in the next room, then climb the blocks, minding flames and glass shards, and insert the Circuit Breaker at the top to open the door above it. Take a standing jump from an adjacent safe tile towards the opening (or, if you don’t mind losing a little health, simply pull up into it). When you’ve picked up the Cabin Key, run off the tile at an angle to avoid the glass shards below.
Return the way you came (jump straight up to get Lara in swimming mode in front of the opening) and insert the Cabin Key in its keyhole. Behind the door is a very large room with a series of three sliding slopes high above a deadly floor. You don’t actually have to perform any particular moves to get down safely, just press CTRL when Lara slides off the second slope to make her grab the edge of the last one. Pull up, and slide towards the finish trigger.
Level 3: Underwater Research Facility
You start once again in a large underwater room with no airpocket in sight. A frogman is shooting at you from out of the dark depths below. Ignore him (no time to dawdle), dive straight down and find an opening at the very bottom of one of the walls. When you enter, stick close to the right-hand wall to avoid the giant moray eel (you can’t kill it) and pull the underwater lever hidden in the far corner, next to a bench. The trapdoor above you opens. Get out of the water and kill a wrench-wielding goon in the next room, then take out the frogman who has been following you.
Secret (1/3): Go back down into the water (sticking close to wall again), then up to the door in the initial room which you may have spotted previously on your way down. It opened along with the trapdoor when you pulled the underwater lever. Grab the Silver Dragon and a small medipack, then quickly make your way out of the water again.
Now that there’s some peace and quiet, take in your surroundings. The metal construction looks like the goons have been amusing themselves by building their favourite anime character from the material available, but mainly it is, of course, climbable. Climb up on either side until you reach a ramp with oil drums at the top. Jump at an angle onto one of the corners of the ramp and immediately backflip to the tile from which you came.
If you go up the ramp, the doors ahead will close in your face, and you’re left with a missing key. Go back to the ramp and jump from its lower end towards the opening in the other wall. To your left is a row of burners, and if you climb the block at one end of it, you’ll see a key at the other; but in order to get past the burners, you obviously need yet another key. The door in this room locked, but another room with an alluring lever is accessible. When you reach the sloped part of the floor in this room, a baton-wielding goon materialises in your back. Get rid of him and use the lever to open the door in the other room.
When you enter the room behind the door, keep to right to avoid the oil drums and pull up into an opening at the other end of the room. Shimmy past a floor littered with.glass shards and pull up into another opening. There’s a hole in the floor ahead which contains more glass shards, but another hole is safe and contains a big medipack. Spot the moveable crate in the wall and pull, then push it out of the way.
Go through a short passage and enter a very large room which is also very empty; this will change in a bit. Enter the passage on the other side of the room. The door ahead opens automatically, and it closes behind you automatically. At the top of the ladder you find another array of oildrums. This time you don’t have to do anything to dodge them; simply let Lara to slide and drop into the water below. Keep your harpoon gun ready though, as a barracuda will be waiting for you, and another barracuda is triggered when you enter the underwater passage. When these two are dealt with, swim above the burners towards the wall ahead. In its middle, at the top of a steep slope, is a closed trapdoor. The underwater lever that opens it is in an alcove in the ceiling on your right.
As you emerge from the water, two shotgun goons will be firing at you. Take cover and take them out; then save your game, for the next bit is fairly tricky. Ignore the Jade Dragon among the glass shards for the moment and jump towards one of the slopes facing each other, grab its edge and shimmy as far as you can towards the pillars on which the goons were standing; then pull up, backflip onto the opposite slope and jump off it immediately, without sliding. During the jump, veer further in the direction you were going, and press CTRL at the end of it. Hopefully you land in the safe spot past the glass shards. (Note that if you prefer the continuous back-and-forth jumping technique over a shimmy, you should still hang from the edge at the end in order to get the optimal starting point for your backflip and thus make your life less miserable.)
Secret (2/3): You can then simply walk up to Jade Dragon and pocket it.
Pull up onto the row of blocks and take a running jump-grab towards the collapsing tiles. Pull up and immediately take another running jump towards the ledge on the wall ahead. Turn around and jump to grab the edge of a sloped ledge, pull up and backflip onto the slope in your back, then immediately do a jump-grab from that one to grab the edge of a collapsing tile. Pull up, backflip to land on another collapsing tile, and immediately jump ahead towards a safe ledge.
When you enter the blue tunnel ahead, another shotgun gun goon comes round the corner. Follow the tunnel to its end and safety-drop to a crack in the wall below. Repeat this three more times, shimmying to the right or left when necessary; then drop onto the slope below. After a brief slide, Lara will land just in front of a field of glass shards.
The door beyond the glass shards is opened by the switch in your back, but it is timed. Press the switch, roll, take one step ahead, then take a standing jump towards the first safe tile, and without stopping, run-jump to next. You should be able to just squeeze past the closing door.
In the next room there’s a row of blocks which form a kind of stairway, and a dead-end corridor filled with more glass shards. Climb the blocks, and before you go up the last step, look ahead to spot the oil drums at the end of two parallel ledges which are separated by a gap, at the bottom of which is the row of glass shards you’ve just passed. The oil drums start rolling as you climb the last step. Run towards them, but veering to the right, and jump at an angle between the two sets of oil drums and towards the pickup (a big medipack and grenades) on the other ledge.
Jump to the block between the slopes at the end of the ledges, then across a pit with glass shards at the bottom, and use the switch mounted on the wall of the room ahead. A camera notifies you that you’ve raised a large number of tall pillars in the very large and (previously) very empty room you’ve passed through before. Safety-drop down the pit near the switch (this will cost you a good deal of your health). You’re back in an area you’ve visited before.
Re-enter the very large room and climb the lowest block (near the cormer on your left as you enter), then make your round across the various pillars towards the top of the room. When you reach the tallest pillar at its centre, jump and pull up into a rusty corridor. At its end, drop down a shaft and into a water room. In the middle of the metal structure in this room is a short tunnel in which you find the Rusty Key you’ve been coveting all this time.
Leave the water room through one of the two openings in its ceiling and climb down the ladder. It leads back into the room where the keyhole is. Use the key to raise the trapdoors and retrieve the Theatre Key, which you’ve also been coveting all this time. Return via the metal structure in the adjoining room to the double doors that previously closed in your face and use the key there. Follow the corridor until you reach a ladder, climb up and continue (minding a pit full of glass shards along the way) until you reach an opening in the ceiling.
It’s all gold up there. Kill two goons with melée weapons who come at you at floor level, and two shotgun goons up on the large stepped structure (the auditorium). Climb up to its top and pull up through an opening in the ceiling into a room full of containers. Spot the pushable in the middle of the room, three tiles past the sloped part of the floor and to your right. Pull, then push it to clear the way to lever behind it. It opens the double doors on the stage.
Secret (3/3): Find a second pushable at the back of the room and push it twice, then push and pull a third one to clear the way to the Gold Dragon. If you found all three secrets, you’ll get a load of M16 ammo.
Return to the stage and go through the double doors you just opened. At the end of the corridor behind them, drop into a hole to end the level.
Level 4: Sunken Kingdom
You land on a collapsing tile. Quickly press roll to gain stable ground and avoid considerable health loss.
Secret (1/3): Follow the short tunnel to pick up the Silver Dragon.
Safety-drop down to the floor (some health loss is inevitable) to find yourself in the middle of an ice cave. At one end, there’s a keyhole just in front of an abyss. Approaching the brink, you’ll get a camera view of the object of your quest, a Seraph. This is where you’ll finish this level and the game.
At the other end of the cave, there are two trapdoors, one on the floor in one corner, the other on the ceiling in the opposite corner, hidden behind some blocks. Climb into the opening in the wall and use the switch. It opens the trapdoor in the ceiling. Go there, climb up into another cave and pull up onto the tall block on your left. Take a running jump to the next block, then turn around, grab a ledge and pull up to a higher level.
Climb another tall block and take a standing jump to the row of blocks ahead, then a jump-grab across a pit filled with glass shards. Jump to the top of the slope on which you landed and face another pit filled with glass shards, this one partially covered by collapsing tiles. Jump across it to the block in the middle (the slopes left and right get you nowhere) and enter a wide tunnel. Proceed past a locked door with another keyhole and towards the opening ahead.
You’re facing a large ice cave. As you’re assessing the situation, a shotgun goon will try to take potshots at you, but you probably won’t be able to take him out from up here. Step onto the raised trapdoor on your left and take a running jump (swan dive if you like) in the general direction of the dead wrench-wielding goon down below. You’ll likely land in water next to a ledge. Quickly get up onto this ledge (if you try this with the tile closest to the wall you’ll glitch back down into the water, so take another one), then deal with the assorted foes: in addition to the shotgun goon, a flamethrower guy, a frogman, and three barracudas.
Use the underwater lever beneath the ledge (near the goon that was already dead when you entered) to open the trapdoor in the water. This trapdoor covers a shaft which leads to a large underwater cave inhabited by two sharks. It’s best you deal with them first before you make any further inquiries. (If you go back up the shaft after you’ve triggered the sharks and stay on the tile where the trapdoor is, the sharks will follow but otherwise ignore you and pass you by. You can then take them out at your leisure.)
Take a breather, then go back down into the shark cave. Swim straight across until you reach its far end, then turn left into a cleft in the wall to retrieve the Stern Key. Quickly return the way you came.
Secret (2/3): Re-enter the shark cave and turn immediately right (when facing into the cave) and swim towards a short pillar. At its back is a well-camouflaged underwater lever. It opens a trapdoor at the top of a shaft in the opposite corner, diagonally across the room. At the top of this shaft is a small airpocket in which you can pick up the Jade Dragon. Return to the ice cave.
Move the pushable crate underneath the keyhole and use the key you just found. It opens a set of double doors at the top of a ladder on the other side of the room. (The structure suspended in the middle of the cave appears to be another part of the wrecked ship.) Once past the doors, jump the gap and backflip onto the sloped block so you can reach the ladder. Climb all the way to the top, then run a few steps towards an opening in the ceiling. In the tiled room above, pull up onto a tall block and jump twice to reach the block with the Storage Key. Leave the tiled room.
One side of the level below ends in a long row of tall slanted blocks. This is your way back into the tunnel from which you entered the ice cave. Take a standing jump to grab the edge of the row of slanted blocks and identify the place where you can slide down to the raised trapdoor next to the tunnel’s mouth without falling to your death. Shimmy if necessary, then pull up. If you chose the right place, Lara will land on the raised trapdoor by herself.
Enter the tunnel and go back to the door you passed on your way in. Use the Storage Key there, enter and save at the hole in floor. You’re facing a series of slopes with pits full of glass shards inbetween. Position Lara so that she will slide in the middle of the slope. Jump as you approach the first pit, and let Lara clear the second one by herself. On the third slope, jump with a curve to the left just before you reach the collapsing tile at its end, so that Lara lands in an alcove. (If you end up on the collapsing tile, it’s still possible to make it, but do it quick.) Run and jump up the slope in that alcove and pull the lever at the top, then go back down and find the door across the pit open.
Take a running jump-grab to land in the opening. You find yourself in a large room with a metal structure in the middle. On the opposite ledge are two flamethrower guys and a shotgun goon. Another shotgun goon is skulking about on the floor below. When these are dealt with, move the pushable container on the ledge surrounding the metal structure so that you can reach the switch mounted on its far side. It opens the double doors in your back.
Head over there and enter a tiled room with a click switch. It opens a camouflaged door in your back, behind which is another tiled room with another click switch. This will repeat several times. You’ll have click seven of these switches all in all, each time crossing over through the initial room. When you’ve reached the last one, a cutaway camera shows you the door at the bottom of the large room opening.
Go through this door and pick up the Cabin Key. As you do so, the trapdoor ahead opens. Pull up and find yourself back in the cave where you began this level. Use the Cabin Key on the keyhole near the deep pit to flood it.
Secret (3/3): Before you go for the Seraph, find a spot where you can pull out of the water and climb onto the structure at the far end. The Gold Dragon sits at its back, near the middle of the structure.
Dive to the bottom, and in the middle of the structure at the far end, pick up the Seraph to end the level.